Achieving the perfect ride on your motorcycle depends heavily on your suspension setup. Compression and rebound are two essential aspects that directly affect how your bike handles bumps, corners, and overall road performance. Whether you're riding on smooth asphalt, rough off-road trails, or winding mountain roads, dialing in your suspension settings can significantly improve your control, comfort, and safety. In this guide, we’ll walk you through how to properly set your compression and rebound to optimize your motorcycle’s suspension for any riding condition.
Explanation of Compression and Rebound in Motorcycle Suspension
Compression and rebound are two critical components of a motorcycle’s suspension system. They directly affect how your bike handles road imperfections, corners, and overall ride comfort. Understanding these concepts will allow you to adjust your suspension to suit different riding styles, conditions, and preferences.
Learn in detail about compression and rebound in motorcycle suspension. Understand how these adjustments affect ride quality, handling, and comfort for better performance.
What is Compression Damping?
Compression damping controls how quickly or slowly the suspension compresses when you hit a bump or dip in the road. In other words, it manages how fast the springs compress and absorb the energy from road impacts.
Key Function:
Compression damping prevents your suspension from compressing too quickly when you encounter bumps, potholes, or dips. Without it, the suspension could collapse too easily, causing you to lose control or experience a harsh ride.
Types of Compression:
Low-Speed Compression: This refers to the suspension’s response to slower, smaller movements like cornering or braking. It's not about bike speed but rather the speed of suspension compression. Example: During hard braking, the bike’s front suspension compresses as weight shifts forward. Low-speed compression damping will control how much and how quickly the front end dives under braking.
High-Speed Compression: This manages the suspension’s response to sudden, sharp impacts like hitting a pothole, a speed bump, or off-road obstacles at higher speeds. Example: When you hit a big bump at high speed, high-speed compression damping controls how the suspension absorbs the impact. Without proper damping, the suspension could bottom out, causing a jarring impact.
Compression Damping Adjustments:
Too Much Compression Damping (Stiff Suspension): If your compression damping is set too high (too stiff), the suspension won’t compress enough to absorb bumps. This results in a harsh ride where every imperfection on the road is felt. In extreme cases, the tires may lose contact with the road on rough surfaces.
Too Little Compression Damping (Soft Suspension): If it’s set too low (too soft), the suspension will compress too easily, causing the bike to feel mushy or unstable. The suspension may bottom out on larger bumps, leading to a loss of control.
What is Rebound Damping?
Rebound damping controls how quickly the suspension returns to its original position after being compressed. In other words, it regulates how the suspension extends back after absorbing a bump.
Key Function:
Rebound damping ensures that the bike’s suspension doesn't bounce back too fast after compression, which can cause instability. Without proper rebound damping, the suspension may recover too quickly or too slowly, both of which can negatively affect handling and comfort.
Rebound Scenarios:
Too Fast Rebound: If the rebound is too fast (not enough damping), the suspension will extend quickly after compressing, causing the bike to "bounce" excessively. This can make the ride feel unstable, especially on rough roads or during high-speed cornering. Example: After hitting a bump, if the bike rebounds too fast, the suspension may overshoot and bounce back, leading to reduced traction and making it difficult to control the bike.
Too Slow Rebound: If the rebound is too slow (too much damping), the suspension won’t extend fast enough after a bump. This can cause the suspension to stay compressed longer than necessary, making the bike feel sluggish and unresponsive. Example: After hitting multiple bumps in quick succession, if the rebound is too slow, the suspension won't return to its full travel before encountering the next bump. This can lead to a loss of suspension travel (packing), making the bike harder to control.
Rebound Damping Adjustments:
Excessive Rebound (Too Slow): This can make the bike feel heavy and unresponsive. If the suspension takes too long to return to its original position, it will "pack down" over successive bumps. This means that the suspension doesn’t recover fully between impacts, reducing its ability to absorb the next bump.
Insufficient Rebound (Too Fast): If the rebound is too fast, the bike will feel bouncy and unstable. The suspension will recover too quickly after a bump, making the bike feel like it's floating or hopping over the road rather than staying firmly planted.
How Compression and Rebound Work Together
Compression and rebound damping are two halves of a balanced suspension system. They must work together to provide smooth, controlled responses to road conditions. Improper settings on either side can drastically impact ride quality, handling, and safety.
Compression-Rebound Relationship:
Under-Damped Compression + Fast Rebound: If compression is too soft and rebound is too fast, the bike may dive too quickly into its suspension on a bump and then snap back too fast, creating an uncontrolled bouncing effect.
Over-Damped Compression + Slow Rebound: Conversely, if compression is too stiff and rebound is too slow, the bike will feel harsh and unresponsive, compressing too little on bumps and then taking too long to return to its normal position.
Tuning Both Together:
When tuning your suspension, it’s crucial to adjust both compression and rebound in tandem. For example, if you stiffen the compression damping, you may also need to increase rebound damping to balance the suspension's return after compression.
Testing Compression and Rebound Settings
After making adjustments, it’s important to test the settings by riding your motorcycle in different conditions to feel how the suspension responds.
How to Test Compression:
Find a Bumpy Road or Rough Terrain: Ride over rough patches or speed bumps and note how the suspension reacts.
Look for Harshness or Bottoming Out: If you feel every bump harshly or bottom out too often, adjust compression settings accordingly.
How to Test Rebound:
Ride Through a Series of Bumps: Find a road with multiple bumps or a winding road to see how the suspension recovers between impacts.
Look for Bouncing or Sluggishness: If the bike feels bouncy or unstable after hitting bumps, reduce rebound damping. If it feels sluggish or unresponsive, increase rebound damping.
Signs of Imbalanced Damping:
Bouncing after bumps: This indicates too fast rebound or too soft compression.
Harshness and poor comfort: This suggests too stiff compression or too slow rebound.
Consider Your Riding Style and Terrain
The ideal compression and rebound settings depend heavily on your riding style, terrain, and preferences.
Sport Riding or Racing: Stiffer compression and faster rebound settings will provide sharper, more responsive handling for aggressive cornering and high speeds.
Touring or Commuting: Softer compression and slower rebound settings prioritize comfort, allowing the suspension to absorb more of the road’s imperfections for a smoother ride.
Off-Road Riding: Softer compression and slower rebound settings work best for off-road terrain, as they allow the suspension to absorb large bumps and rocks while preventing excessive bouncing.
Compression and rebound damping are fundamental aspects of suspension tuning that greatly affect how your motorcycle handles, reacts to road imperfections, and performs overall. Mastering these settings allows you to tailor your bike’s suspension to suit your weight, riding style, and terrain, leading to a safer, more enjoyable ride. Start with small adjustments, test thoroughly, and fine-tune until you find the perfect balance for your riding needs.
How to Set Compression and Rebound for Good Motorcycle Suspension
Dialing in your motorcycle's suspension can greatly improve both your ride quality and performance. Compression and rebound adjustments allow you to fine-tune how your bike responds to bumps and how quickly it returns to its normal position after a compression. Here’s a step-by-step guide to help you set these suspension settings properly.
Learn how to set compression and rebound adjustments on your motorcycle suspension for optimal ride quality and handling. Master these key settings for a smoother and more controlled ride.
Understand the Basics of Suspension
Your motorcycle's suspension system primarily serves two key functions: to absorb the impact of road imperfections and to maintain tire contact with the road for better control. Adjusting compression and rebound settings is all about customizing how your bike behaves in different conditions.
Compression: Controls how fast your suspension compresses when you hit a bump.
Rebound: Manages how quickly the suspension returns to its normal position after being compressed.
Prepare for Suspension Adjustments
Before you start making adjustments, ensure the bike’s sag (how much the suspension compresses under the rider's weight) is set correctly. Sag directly affects how your bike handles and should be set first.
Tools Needed: Screwdrivers, spanners, and a tape measure (for measuring sag).
Get the Right Environment: Adjust your suspension in a safe, controlled environment, preferably on smooth, level ground.
Setting Compression
Compression damping affects how your suspension reacts to bumps or dips in the road. If it's too stiff, you'll feel every bump harshly; it’s too soft, and your bike will bottom out on rough roads.
Step 1: Identify the compression adjuster. Typically, it's located on the fork or rear shock.
Step 2: Start by turning the adjuster fully clockwise (the stiffest setting).
Step 3: From this position, turn the adjuster counterclockwise, one click at a time, until the suspension feels responsive yet not overly stiff. A good starting point is usually 10-15 clicks out from the stiffest setting.
Test ride after every adjustment to feel how the bike handles small and large bumps.
Setting Rebound
Rebound controls how quickly the suspension returns to its neutral position. Too fast, and the bike feels bouncy; too slow, and it might feel sluggish or unresponsive.
Step 1: Locate the rebound adjuster. Like compression, it's usually found on your fork or shock.
Step 2: Turn it fully clockwise (slowest rebound).
Step 3: Turn the adjuster counterclockwise a few clicks at a time (a good starting point is 10-15 clicks) to find a balance between responsiveness and stability.
When testing, ensure the bike doesn't "bounce" excessively after hitting bumps and that it returns smoothly to its position.
Testing and Fine-Tuning
After adjusting both compression and rebound, take your bike for a test ride. Here’s what to look for:
Under-Damping Symptoms:
Too much bouncing or oscillation after hitting a bump.
Rear-end "kicks" or "pogo" effect.
Over-Damping Symptoms:
Harsh ride, feeling every road imperfection.
Suspension feels slow to react or too rigid.
Make small adjustments, typically one or two clicks at a time, and re-test until you achieve the balance between comfort and control.
Consider Riding Conditions
Your ideal suspension setup may vary depending on where and how you ride. Off-road trails, city streets, and racetracks all demand different suspension behavior.
Off-Road Riding: Softer compression for absorbing bigger bumps, slower rebound to avoid bouncing.
Street or Racing: Stiffer compression for sharp handling, faster rebound for quicker cornering response.
Setting your motorcycle’s suspension isn’t a one-size-fits-all process. It takes time, testing, and small tweaks to find the perfect balance between compression and rebound. Once dialed in, your ride will be smoother, safer, and more enjoyable.
How to Set Compression and Rebound for Different Types of Motorcycles
Adjusting your motorcycle's suspension is key to enhancing ride quality, safety, and handling. While the basic principles of compression and rebound settings apply universally, different types of motorcycles have unique suspension needs. Here’s a breakdown of how to set suspension for various bikes—whether you ride a sportbike, cruiser, dirt bike, or touring bike.
Learn how to set compression and rebound for different types of motorcycles, including sportbikes, cruisers, dirt bikes, and touring bikes. Get tailored suspension settings for better performance and comfort.
Sportbikes: Precision Handling and Performance
Sportbikes are built for high speeds and tight cornering. Their suspension systems are designed for aggressive riding, requiring precise adjustments to handle the demands of the track or twisty roads.
Compression: Sportbikes often have stiffer suspensions to maintain stability and reduce fork dives under hard braking. Start by setting your compression towards the stiffer end of the spectrum—around 10 clicks out from the firmest setting. Adjust softer if the ride feels too harsh on regular roads.
Rebound: Quick recovery from bumps is crucial for maintaining control at high speeds. Set rebound so that the bike returns to its normal position quickly but without "bouncing." Typically, 8-12 clicks out from full slow is a good starting point.
Consider Track vs. Street: If you're on track, stiffer settings for both compression and rebound will offer the responsiveness you need for hard cornering and quick maneuvers. For street riding, soften both settings slightly for better comfort over rougher surfaces.
Cruisers: Comfort and Stability
Cruisers prioritize a smooth, comfortable ride over sharp handling. The suspension settings here should absorb bumps and provide long-distance comfort rather than track-like responsiveness.
Compression: Softer settings are key for a smooth ride. Start by turning your compression clicker 15-20 clicks out from the firmest setting. This allows the suspension to absorb more road imperfections, providing a plush ride.
Rebound: A slower rebound setting ensures the bike doesn’t feel bouncy, but you don’t want it too slow, or the suspension won’t recover quickly enough, causing a “dead” feeling. Start around 15-18 clicks out from full slow and adjust based on how smooth the bike feels over bumps.
Comfort Tuning: Since cruisers are heavier and often ride on city streets or highways, the goal is to minimize the jarring effect of bumps. If the ride is too stiff, soften both compression and rebound further.
Dirt Bikes: Off-Road Absorption and Control
Dirt bikes are built to handle rough, uneven terrain, so their suspension needs to absorb larger impacts while keeping the rider in control on loose surfaces.
Compression: Dirt bikes need softer compression settings to soak up large bumps, rocks, and jumps. Start by turning your compression adjuster about 18-20 clicks out from full stiff. This will provide the travel you need for rough terrain without bottoming out.
Rebound: A slower rebound is often best to prevent the bike from bouncing or kicking after a jump. However, it shouldn’t be so slow that the suspension can’t reset before the next obstacle. Start around 12-16 clicks out from full slow and fine-tune depending on how the bike reacts over multiple bumps or jumps.
Adjust for Terrain: If you're riding in sand or loose dirt, slightly softer compression and rebound can help the bike float over obstacles. For rocky or harder surfaces, slightly firmer settings may be needed for better control.
Touring Bikes: Smooth, Long-Distance Comfort
Touring bikes are designed for long-distance travel, and their suspension needs to balance comfort with stability, especially when carrying luggage or a passenger.
Compression: Touring bikes often have a heavier load, so you’ll want a softer compression setting to absorb road imperfections and keep the ride comfortable. Start at 15-20 clicks out from full stiff. If you’re carrying a passenger or extra gear, you may need to firm up the compression slightly.
Rebound: Rebound should be slower than on sport bikes but quicker than on dirt bikes. A smooth recovery after bumps is key to maintaining comfort over long distances. Start around 15 clicks out from full slow and adjust to make sure the suspension recovers gently without feeling sluggish.
Load Considerations: When riding fully loaded, increase both compression and rebound to handle the added weight. Make sure the bike remains stable, especially when cornering or riding on highways.
Adventure Bikes: Versatility and Adaptability
Adventure bikes are hybrid machines that often switch between on-road and off-road riding. Their suspension needs to be versatile to handle everything from highways to dirt trails.
Compression: Because you’ll face varied terrain, compression settings should be balanced. For on-road riding, stiffer settings around 12-15 clicks out from full stiff will offer better control. For off-road, soften the compression (18-20 clicks out) to absorb bumps and maintain comfort.
Rebound: You’ll want a moderate rebound setting that allows quick recovery on paved roads while preventing bouncing on rough trails. Start with 10-14 clicks out from full slow and adjust based on terrain. On-road riding may require quicker rebound, while off-road may need slightly slower recovery.
Terrain Flexibility: For adventure riders, adjust suspension depending on the type of riding you do most. A softer setup is best for off-road, while stiffer settings will offer more control on highways and twisty roads.
Adjusting compression and rebound for different types of motorcycles requires a tailored approach. Understanding the unique needs of your bike—whether it’s a sportbike, cruiser, dirt bike, or touring machine—ensures you get the most out of your suspension. Start with the recommended settings, test, and fine-tune to your riding style and environment for the best performance and comfort.
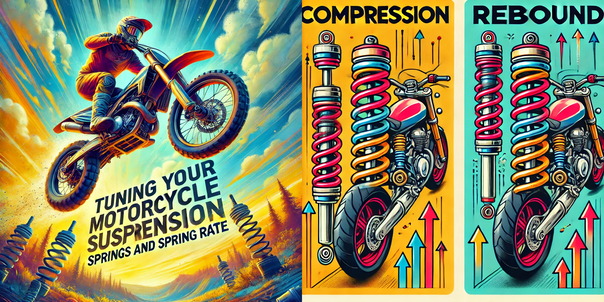
The Role of Springs and Spring Rate in Tuning Your Motorcycle Suspension
When tuning your motorcycle’s suspension, one of the most fundamental aspects is the role of springs and the spring rate. These elements are crucial for maintaining proper suspension balance, absorbing road impacts, and ensuring optimal handling. Understanding how springs and spring rates affect your bike’s performance will allow you to fine-tune your setup for your riding style and conditions.
Learn about the role of springs and spring rate in motorcycle suspension tuning. Understand how adjusting these components improves handling, comfort, and ride stability.
What Are Suspension Springs?
Springs are the core component of your motorcycle's suspension system, supporting the weight of the bike and rider. The springs compress and expand to absorb bumps, keeping the tires in contact with the road for better control and comfort.
Key Functions of Suspension Springs:
• Support the weight of the rider and the bike.
• Absorb energy from road impacts.
• Maintain tire contact for better traction and control.
Springs work in conjunction with dampers (which control the rate of compression and rebound), but without the right spring rate, even the best damper settings won’t deliver optimal performance.
What is Spring Rate?
Spring rate refers to the stiffness of the spring—how much force is required to compress the spring by a certain amount. It’s typically measured in kilograms per millimeter (kg/mm) or pounds per inch (lb/in). A higher spring rate means the spring is stiffer and resists compression more, while a lower spring rate means the spring is softer and compresses more easily.
Why Spring Rate Matters:
Too Soft of a Spring Rate: The bike will sag too much under the rider’s weight, bottom out on bumps, and feel unstable during aggressive maneuvers.
Too Stiff of a Spring Rate: The bike will feel harsh over bumps, and the suspension won’t absorb road imperfections effectively, leading to a rough and uncomfortable ride.
Finding the correct spring rate ensures that your suspension responds properly to the road surface and rider input, keeping the bike balanced and performing well in various conditions.
How to Choose the Right Spring Rate
Choosing the right spring rate depends on factors like the rider's weight, riding style, and the type of terrain or conditions you’ll encounter.
Factors to Consider:
Rider Weight: Heavier riders will require a stiffer spring rate to prevent excessive sag, while lighter riders need softer springs to ensure the suspension isn't too rigid.
Riding Style: Aggressive riders, such as those on sportbikes or dirt bikes, may prefer stiffer springs for sharper handling, while touring or cruiser riders might prioritize comfort with softer springs.
Terrain and Conditions: Off-road riders benefit from softer springs that absorb bigger impacts, while on-road riders typically prefer stiffer springs for better cornering and stability.
How to Check if Your Spring Rate is Correct:
Sag Measurement: Setting the sag (how much the suspension compresses under the bike and rider’s weight) is key to determining if your spring rate is appropriate. Ideally, the sag should be about 25-30% of your total suspension travel.
Bottoming Out: If your suspension bottoms out (compresses fully and hits its limit) frequently during normal riding, your springs are too soft. If it never bottoms out, even in hard riding, they may be too stiff.
Handling Feel: If your bike feels sluggish and unresponsive during cornering, a stiffer spring rate may help. On the other hand, if it feels too harsh and unsettled over bumps, a softer spring rate could improve comfort and control.
How Springs Affect Compression and Rebound Settings
Your spring rate directly influences how you should set your compression and rebound damping. A stiffer spring will require more damping to control the energy stored in the spring, while a softer spring needs less damping.
Compression Damping: With stiffer springs, you’ll need more compression damping to prevent the suspension from compressing too quickly on bumps. Softer springs require less compression damping because the spring itself absorbs more of the impact.
Rebound Damping: Stiffer springs also need more rebound damping to control how quickly the suspension returns to its normal position after a bump. Softer springs will need less rebound damping as they store less energy.
Progressive vs. Linear Springs
When choosing or upgrading your springs, you may come across two types: progressive and linear springs.
Linear Springs: These have a consistent spring rate throughout their compression. This means the force required to compress the spring is the same throughout its travel. Linear springs provide predictable handling, making them ideal for racing and performance-oriented riding.
Progressive Springs: These have a variable spring rate, meaning they become stiffer as they compress. Progressive springs are softer initially, providing a more comfortable ride over small bumps, but stiffen up to handle bigger impacts. They’re ideal for riders who need versatility—such as adventure or touring riders.
Tuning Your Suspension with Springs
Once you’ve determined the correct spring rate, fine-tuning your suspension involves adjusting sag, compression, and rebound to match your riding style and terrain.
Steps for Tuning:
Set Your Sag: Ensure that your bike’s sag is within the proper range for your weight. This is typically about 25-30% of your suspension’s total travel.
Adjust Compression and Rebound: After setting sag, adjust your compression and rebound damping based on your spring rate. Stiffer springs will need more damping, while softer springs need less.
Test Ride and Fine-Tune: Take your bike for a test ride. Evaluate how it handles bumps, corners, and overall comfort. Make small adjustments as needed.
Springs and spring rates play a crucial role in determining how your motorcycle handles, absorbs bumps, and responds to your input. Tuning your suspension with the right spring rate tailored to your weight, riding style, and terrain can make all the difference in your bike’s performance and comfort. With proper tuning, you’ll enjoy better control, smoother rides, and enhanced stability.
Fine-tuning your motorcycle’s compression and rebound settings can make all the difference between a rough, bouncy ride and a smooth, responsive one. By understanding how these adjustments affect your bike's handling and performance, you'll be able to customize your suspension for any road or trail. Take the time to experiment, test different settings, and listen to how your bike reacts to different terrains. With the right setup, you’ll enjoy improved stability, better traction, and a more enjoyable ride overall. Now, it’s time to hit the road and experience the benefits of a well-tuned suspension!