
Welcome to the high-octane world of motorcycles, where the open road beckons and adrenaline surges through your veins. In this blog, we'll delve into the captivating realm of motorcycles, exploring their allure, types, and the freedom they offer riders. Whether you're a seasoned rider or a curious newcomer, join us to discover the thrilling joys of two-wheeled adventures!
Comfort, Distance, and the Motorcycle That Stays with You.

Good Old Bandit
A rider's reflection on touring motorcycles, comfort, range, and the journeys that shape a lifetime of riding.
A touring motorcycle is never just a machine. It becomes a companion through changing weather, long horizons, and quiet moments between destinations. After more than forty years on two wheels, I have learned that comfort and range are not numbers on a specification sheet. They are feelings that reveal themselves mile after mile.
The Seat Beyond the Saddle
Comfort Lives in the Hours, Not the Minutes
My first long-distance motorcycle had a seat that felt acceptable in the showroom. Three hundred kilometers later, it felt like a wooden plank. That ride taught me something every touring rider eventually learns. Real comfort appears long after the excitement of a new machine fades.
Modern touring motorcycles have transformed the riding experience. Better ergonomics, wind protection, and suspension allow riders to stay fresh longer. Yet comfort remains deeply personal. I have watched riders cross entire states on simple motorcycles while others struggled on premium machines.
One evening on a fading highway, I met an older rider resting beside his well-worn touring bike. He smiled and said the motorcycle fit him "like an old pair of boots." That sentence stayed with me. Comfort is not luxury. Comfort is harmony between rider and machine.
The Long Reach of a Fuel Tank
Range Creates Freedom Between Destinations
Range changes the rhythm of a journey. A motorcycle with a strong fuel range lets the road dictate the day rather than the next fuel stop.
Years ago, while crossing a remote stretch of road where fuel stations seemed forgotten by time, I learned to appreciate a motorcycle that could travel farther on a single tank. The confidence it provided was impossible to measure.
Today's touring motorcycles combine efficient engines with larger fuel tanks. The result is more freedom and fewer interruptions. Long-distance riding becomes less about planning every stop and more about experiencing the landscape.
That freedom remains one of motorcycling's greatest gifts. Every extra kilometer expands the possibility.
Machines That Leave Their Mark
Character Matters as Much as Capability
Some motorcycles impress with technology. Others stay with you because of how they make you feel.
I remember riding an older touring motorcycle through mountain roads at sunrise. It was not the fastest machine. It was not the most advanced. Yet the steady engine note and relaxed riding position created a sense of calm I still remember decades later.
Modern touring motorcycles offer heated grips, electronic suspension, and advanced rider aids. I appreciate every one of those improvements. Still, the best touring motorcycle is the one that encourages you to keep riding when the day grows long.
That is the real measure of comfort and range.
The Road Ahead
A New Generation of Riders Awaits
Every generation finds its own motorcycles and its own roads. The spirit remains unchanged.
When young riders ask whether motorcycling is worth pursuing, my answer is simple. Ride responsibly, ride often, and let the road teach its lessons. A touring motorcycle offers more than transportation. It offers perspective.
The hashtags #TouringMotorcycles and #LongDistanceRiding appear everywhere today. What matters is the experience behind them. The sunrise after a cold night. The conversation at a roadside café. The quiet confidence that comes from traveling under your own power.
Those moments stay with you far longer than any motorcycle specification.
After four decades of riding, I still believe comfort and range are about more than seats and fuel tanks. They are about confidence, endurance, and the freedom to keep moving when curiosity calls.
Motorcycling rewards patience and attention. It introduces strangers who become friends and roads that become memories. Whether you ride a classic machine or a modern touring motorcycle, the greatest journey begins with a simple decision to keep going.
The road is waiting, and it always has another story to tell.
#TouringMotorcycles #LongDistanceRiding #MotorcycleTravel #TouringBike #MotorcycleAdventure #RideMore #OpenRoad #MotorcycleLife #TwoWheels #GoodOldBandit
The Roads Between Us.

Good Old Bandit
Must-Visit Motorcycle Shows and Events That Keep the Spirit Alive.
Experience the stories, machines, and connections that make motorcycle shows and events unforgettable.
Introduction
Long before motorcycles became packed with electronics and riding modes, they carried something simpler. They carried people toward new places and new versions of themselves. After more than forty years in the saddle, I still believe some of the most meaningful riding moments happen when riders gather, share stories, and celebrate the machines that connect us.
More Than Machines
The heartbeat behind every motorcycle event
The best motorcycle shows and events are never about chrome, horsepower, or specifications alone. They are about people.
I remember attending a motorcycle exhibition decades ago after riding three hours through steady rain. My gloves were soaked, my boots felt heavy, and my old machine looked tired beside the polished bikes on display. Yet that day remains one of my favorites. Riders from different backgrounds stood together, talking about roads, repairs, and unforgettable rides.
That spirit still lives at major motorcycle events today. Whether it is a vintage motorcycle show, a custom bike gathering, or a large motorcycle expo, every machine tells a story. Every rider adds another chapter. The hashtags #MotorcycleLife and #RideTogether often appear online, but their meaning becomes real when you stand among fellow enthusiasts.
Machines That Mark Time
Every generation leaves its signature
One reason I never miss motorcycle events is the chance to see motorcycling's timeline in one place.
I still remember my first motorcycle. It was simple, stubborn, and far from perfect. It taught patience on rough roads and confidence on open highways. Years later, I rode a modern touring motorcycle packed with technology that would have seemed impossible back then.
At motorcycle shows, those generations sit side by side. Vintage motorcycles stand proudly beside electric models and performance machines. The contrast reminds us that riding continues to evolve while keeping its soul intact.
Young riders often arrive looking at the newest bikes. They leave appreciating the older ones too. That connection across generations keeps motorcycle culture strong.
Stories Found Between Destinations
The moments riders carry home
Some of my strongest memories started at motorcycle rallies and riding events.
One gathering led to a ride through winding backroads I had never seen before. Another introduced me to a rider who had crossed several countries alone. We shared coffee beside our motorcycles and spoke for hours. I cannot remember every detail of his bike, but I remember his stories.
That is the gift of these events. They create conversations that would never happen otherwise.
For younger riders, these gatherings offer something valuable. They show that motorcycling is not about appearing fearless. It is about curiosity, respect, and the willingness to keep moving forward.
The Road Ahead
Keeping the tradition alive
Every motorcycle event carries a quiet message. The story is not finished.
When I walk through a motorcycle exhibition today, I see experienced riders sharing wisdom and young riders imagining future adventures. I see old machines preserved with care and new machines waiting to create memories.
Motorcycling has given me freedom, perspective, and friendships that lasted decades. The shows and events that celebrate this culture remind us that riding is bigger than any single motorcycle.
The motorcycles may change, and the roads may look different than they once did. Yet the feeling remains familiar. Motorcycle shows and events bring riders together to celebrate movement, craftsmanship, and shared experiences.
If you are already a rider, keep showing up. If you have never ridden before, spend a day among these machines and the people who love them. You may find that the road has been waiting for you all along.
#MotorcycleLife #RideTogether #MotorcycleEvents #MotorcycleShow #VintageMotorcycles #RidingCommunity #MotorcycleCulture #OpenRoad #MotorcycleExpo #GoodOldBandit
Top 10 Scenic Motorcycle Routes Around the World.
Good Old Bandit
Roads that ride back with you
Some roads feel alive. They breathe with the land, shift with light, and reward riders who listen. These ten motorcycle routes span oceans, mountains, deserts, and cliffs. Each ride carries a mood, a rhythm, and a story worth sharing. This is not a checklist. It is an invitation.
1. Pacific Coast Highway, USA
Ocean air, endless light, and curves that calm the mind
The Pacific Coast Highway flows beside the ocean like a long-held breath. One side opens to cliffs and surf. The other rises into green hills and redwood shadows. The road feels relaxed yet alert. Sweepers arrive with perfect spacing. The light changes every mile.
This ride suits early mornings and late afternoons. Fog lifts slowly. Sun breaks through without warning. You ride between moods. The bike hums. Salt air sticks to your jacket. Pullouts tempt you to stop, but the road keeps calling.
The magic lies in balance. Speed feels unnecessary. The road rewards smooth throttle and clean lines. Every turn frames the sea in a new way. Riders often speak less here. The coast does the talking. #PacificCoastHighway #CoastalRiding
2. Stelvio Pass, Italy
Tight hairpins, thin air, and pure riding focus
Stelvio Pass does not ease you in. It demands attention from the first turn. The climb stacks hairpins like a staircase to the sky. Each corner arrives sharp and close. The road feels narrow. The drop feels real.
Riding Stelvio sharpens instincts. Clutch control matters. Vision matters. Calm matters. You feel small among peaks and clouds. The bike becomes an extension of your body. Mist rolls in without notice. Sun follows soon after.
At the top, engines tick as they cool. Riders smile without speaking. The descent offers a different lesson. Control replaces attack. Precision replaces power. Stelvio stays with you long after the ride ends. #StelvioPass #MountainRiding
3. Great Ocean Road, Australia
Cliffs, wind, and the sound of waves below
The Great Ocean Road carries drama in every mile. The Southern Ocean crashes far below. Wind sweeps across open sections. The road hugs cliffs with confidence. It feels bold and exposed.
This ride tests awareness. Gusts push the bike. Light shifts fast. Corners hide behind rises. Yet the flow feels natural. The road invites a steady pace. Smooth inputs keep things settled.
Stops along the way offer silence and scale. Rock stacks rise from the sea. The horizon feels endless. Riders leave with windburn and wide smiles. The road feels wild but welcoming. #GreatOceanRoad #OceanCliffs
4. Transfăgărășan Highway, Romania
A ribbon through clouds and forest shadows
The Transfăgărășan Highway twists across the Carpathians with quiet confidence. Forests close in at first. The air smells of pine and earth. Then the road climbs. Trees thin. The world opens.
Curves here feel playful. Elevation adds drama without aggression. Lakes mirror the sky. Clouds drift across the road. You ride through layers of weather in one afternoon.
This road surprises many riders. It lacks hype yet delivers deeply. The rhythm feels honest. The scenery feels earned. You finish the ride grounded and grateful. #Transfagarasan #HiddenGems
5. Leh–Ladakh, India
High altitude, raw land, and inner stillness
Leh–Ladakh rides test more than skill. They test patience and respect. The terrain feels ancient. Mountains stand bare and massive. Roads appear carved by will alone.
Altitude slows everything. Engines lose power. Bodies feel the strain. The ride teaches restraint. Momentum matters more than speed. Smoothness keeps one moving.
Villages appear like quiet miracles. Prayer flags flutter in thin air. Silence feels loud. Many riders speak of clarity here. The road strips away noise. What remains feels true. #LehLadakh #HighAltitudeRiding
6. Route 66, USA
Asphalt history and open horizons
Route 66 carries memory in its cracks. It crosses towns shaped by travel and time. Neon signs glow at dusk. Diners hum with stories. The road stretches straight and patient.
Riding Route 66 feels reflective. Speed matters less than presence. You ride through layers of culture. Each stop adds texture. Each mile adds context.
The landscape shifts slowly. Deserts open wide. Skies feel taller. The road invites thought. Many riders find perspective here. The past rides alongside you. #Route66 #ClassicRides
7. Amalfi Coast Road, Italy
Color, cliffs, and controlled chaos
The Amalfi Coast Road pulses with life. Scooters dart. Buses squeeze past. Villages cling to cliffs in bright colors. The sea glimmers far below.
This ride demands alert calm. Traffic flows with rhythm, not rules. Locals ride with confidence. You learn by watching. Smooth inputs and patience unlock the flow.
Moments of stillness appear between villages. A bend reveals open sea. A café stop resets the senses. The road feels alive and social. Riding here feels like dancing with the land. #AmalfiCoast #MediterraneanRiding
8. Atlantic Road, Norway
Bridges, sea spray, and northern light
The Atlantic Road feels sculpted by weather. Bridges rise and fall like waves. The sea presses close. Wind carries salt and cold.
This ride feels short yet intense. Conditions shift fast. Sun breaks through clouds without warning. Rain follows just as quickly. The road rewards steady control.
The setting feels cinematic. The horizon blends sea and sky. Riders often stop just to breathe. The road feels bold and clean. It leaves a strong imprint. #AtlanticRoad #NordicRiding
9. Grossglockner High Alpine Road, Austria
Order, precision, and alpine grace
Grossglockner feels refined. The road surface feels perfect. Signage feels clear. The mountains rise with calm authority.
Riding here feels composed. Corners flow with intent. Elevation adds presence without threat. The bike settles into rhythm easily.
Stops offer sweeping views and quiet moments. Snow lingers even in warmer months. The ride feels balanced and complete. Many riders call it elegant. #Grossglockner #AlpineRoads
10. Carretera Austral, Chile
Isolation, gravel, and quiet resolve
Carretera Austral stretches through Patagonia with raw honesty. Pavement comes and goes. Gravel tests balance and trust. Weather shapes each day.
This ride feels earned. Distances feel long. Services feel rare. The landscape feels untouched. Rivers cut through valleys. Forests feel endless.
Riders speak of resilience here. The road asks commitment. It gives depth in return. The silence stays with you long after the ride. #CarreteraAustral #AdventureRiding
Roads as teachers, mirrors, and companions
What these rides leave behind
These roads share one truth. They give back what you bring. Rush them and they resist. Respect them, and they open. Each route teaches something different. Calm. Focus. Patience. Joy.
Riders often debate favorites. That debate matters less than the ride itself. The best road often matches your moment. Mood shapes memory. Experience shapes meaning.
These routes remind us why we ride. Not to arrive. Not to collect miles. But to feel present and alive. The road meets us halfway.
Which road shaped you most? Which one still calls? The conversation starts there.
#MotorcycleTravel #ScenicMotorcycleRoutes #RideTheWorld #AdventureMotorcycling #OpenRoad #TwoWheels #MotorcycleLife #GoodOldBandit
Between the Lines of Asphalt: What Riding Really Does to a Man.
Good Old Bandit
A seasoned rider reflects on the deep psychology behind motorcycling and the pull of the open road.
There’s something about a motorcycle that gets under your skin. It’s not speed. Not the machine. It’s something quieter. Something that stays long after the engine cools.
The First Spark
Where it begins, and never quite ends
I still remember my first motorcycle. A worn-out 1250cc machine that coughed more than it ran. It wasn’t pretty, and it certainly wasn’t fast. But the day I kicked it alive and rolled onto an empty road, something shifted inside me.
It wasn’t about getting somewhere. It was about feeling alive in a way nothing else had managed before.
Back then, I didn’t have the words for it. Today, I understand it better. Riding taps into something primitive. It strips away noise. You are left with motion, balance, and instinct.
That first ride wasn’t perfect. I stalled twice. Nearly dropped it at a turn. But when I got home, I knew I’d crossed a line. Life would never feel the same again.
That’s where it begins for most of us. Not with perfection, but with a moment that feels bigger than logic.
The Quiet Pull of the Open Road
Freedom that doesn’t need permission
Years later, I found myself on a long stretch of highway just outside Rajasthan. The sun was low, the road was empty, and the wind carried that dry, endless silence.
No music. No calls. Just the steady hum of the engine and the rhythm of the road.
That ride taught me something no book ever could. Freedom isn’t loud. It doesn’t announce itself. It shows up quietly when you’re moving with nothing holding you back.
Motorcycles give you that in a way cars never can. You are exposed. Vulnerable. Present.
You feel the temperature change as the day fades. You smell the fields. You sense the road beneath your tyres.
This is what keeps riders coming back. Not speed. Not adrenaline. It’s presence.
In a world that constantly pulls your attention away, riding pulls it back.
Machines That Stay with You
More than metal, less than memory
Over four decades, I’ve ridden machines that came and went. Some were powerful. Some were forgettable. But a few stayed with me.
There was one in particular. A mid-weight bike that handled like it understood me. It wasn’t the fastest on the road, but it felt right. Every gear shift, every lean into a corner felt natural.
I rode that machine through rain, heat, and long nights that blurred into early mornings.
One evening, riding through a forest stretch, the headlight cut through fog so thick it felt alive. I slowed down, heart steady, trusting the machine beneath me.
That’s the thing about motorcycles. They build trust. Not instantly. Not easily. But once it’s there, it runs deep.
You don’t forget machines like that. They become part of your story.
Fear, Respect, and the Edge
Where riding sharpens the mind
Let me be honest. Riding is not always romantic. Some moments shake you.
I’ve had my share.
A sudden skid on wet gravel. A truck appearing too close for comfort. A moment where your reflexes decide everything.
One such moment came on a narrow hill road. Loose sand, a blind corner, and a mistake in judgment. The rear tyre slipped. For a split second, everything slowed down.
I didn’t panic. Years of riding kicked in. Gentle correction. Controlled throttle. Balance.
I came out of it fine. But I stopped soon after and just sat there for a while.
Riding teaches you respect. Not fear that freezes you, but awareness that sharpens you.
It reminds you that control is never absolute. That humility matters.
This is part of the psychology people miss. Motorcycling demands presence because the cost of distraction is real.
That’s what makes it powerful. It forces you to be better.
Riders You Meet, and the Ones You Don’t
A brotherhood that speaks without words
Over the years, I’ve met riders from all walks of life. Young, old, seasoned, reckless, thoughtful.
I remember a roadside tea stall somewhere in Himachal. Cold evening, tired body, warm chai.
A group of riders pulled in. No introductions. No questions.
Just a nod. A shared understanding.
We spoke about roads, machines, breakdowns, and near misses. Stories flowed easily. No one tried to impress. No one needed to.
That’s the thing about motorcycle culture. It cuts through layers. Titles don’t matter. Background doesn’t matter.
What matters is the road you’ve ridden and the respect you carry.
Even today, when I see a rider on a lonely stretch, there’s a silent connection. A small wave. A nod.
It’s a language built on shared experience.
Solitude That Heals
Time alone that feels complete
Some of my best rides were alone.
No group. No destination. Just a direction.
There was a morning ride I still think about. Early start, mist hanging low, roads barely awake.
I rode for hours without stopping. No urgency. No plan.
Somewhere along the way, things that had been weighing on me began to settle. Not because I solved them, but because they stopped feeling overwhelming.
Motorcycling has a way of doing that. It creates space in your mind.
It doesn’t fix your life. But it gives you clarity.
In a world that rarely slows down, that kind of solitude is rare.
And valuable.
The New Generation and the Same Feeling
Different machines, same heartbeat
I see young riders today on powerful machines, advanced electronics, and riding gear that we never had.
It’s impressive. It’s exciting.
But what I notice most is something familiar in their eyes. That same spark I felt years ago.
The machines have evolved. The roads have changed. But the core feeling remains untouched.
Motorcycling is still about connection. Between rider and machine. Between mind and road.
I often tell younger riders this. Respect the machine. Respect the road. But never lose that feeling.
Because that feeling is what will keep you riding long after the novelty fades.
What Riding Does to You Over Time
A slow, quiet transformation
After decades of riding, I can say this with certainty.
Motorcycling changes you.
It makes you patient. You learn to read situations before they unfold.
It makes you aware. You notice things others miss.
It makes you humble. Because the road always has the final say.
And most importantly, it makes you present.
That’s rare in today’s world.
We are constantly distracted. Constantly pulled in different directions.
But on a motorcycle, you are here. Fully.
And that’s where the magic lies.
Motorcycles are not just machines. They are experiences waiting to unfold.
They don’t promise comfort. They don’t guarantee safety. But they offer something far more valuable.
They offer connection. To the road. To yourself.
If you’ve never ridden, there’s a world waiting for you. Not perfect, not easy, but real.
And once you feel it, truly feel it, you’ll understand.
Some things in life don’t need explanation. They just need to be experienced.
#MotorcycleLife #RideToLive #BikerMindset #OpenRoad #MotorcycleCulture #SoloRide #RiderStories #TwoWheelsOneSoul #FreedomRide #GoodOldBandit
Silent Roads, Electric Souls: Motorcycle Clubs in a Changing Era.

Good Old Bandit
A veteran rider reflects on electric motorcycles, evolving clubs, and the timeless spirit of the road.
The sound of a motorcycle used to arrive before the rider. Now, sometimes, it slips in like a quiet thought. And yet, the feeling remains the same. Wind on your chest, road beneath your wheels, and something inside you coming alive.
The First Roar Still Echoes
Where it all began, and what never changes
I still remember the first machine I kicked to life. It was an old, stubborn thing that coughed more than it roared. Back then, starting a bike meant effort. You leaned into it, trusted it, and hoped it trusted you back. That first ride was not smooth. I stalled twice, nearly dropped it once, and rode home grinning like I had conquered something bigger than the road.
Motorcycling has always been more than machines. It is a feeling that stays long after the engine cools. Over four decades, I have ridden across highways that cut through deserts, narrow hill roads that tested my nerves, and forgotten trails where silence felt like a companion. Every generation brings new machines, but the essence remains untouched.
Now I see young riders stepping into this world through electric motorcycles. No clutch to fight. No engine vibrations to tame. Some of us old-timers raised an eyebrow at first. I did too. But the truth is simple. The road does not care what powers your wheels. It responds to your intent, your focus, your respect.
The first roar I heard decades ago still echoes in my memory. Today, that roar might be replaced by a soft hum. The emotion behind it has not changed.
The Sound of Silence on Open Roads
Electric motorcycles and a different kind of connection
A few months ago, I rode an electric motorcycle for the first time. It felt strange at first. I twisted the throttle and expected the usual growl. Instead, there was silence. Just the rush of wind and the hum of tyres on asphalt.
I took it out on an early morning stretch, the kind where the city is still half asleep. No horns. No traffic. Just me and a machine that moved like a thought. And somewhere along that ride, I stopped missing the sound.
There was a stretch near a lake where I slowed down. In the old days, I would have heard the engine bouncing off the water. That morning, I heard birds instead. I heard my own breathing. It felt like riding stripped down to its purest form.
Electric motorcycles are not replacing the old experience. They are adding a new layer to it. A quieter one. A more introspective one.
For young riders, this changes the entry point. You do not need to wrestle with gears on day one. You can focus on balance, awareness, and the rhythm of the road. And that matters more than anything.
I have spent years believing that sound was part of identity. Now I see that silence has its own character.
Clubs, Brotherhood, and New Riders
The evolving culture of motorcycle communities
Motorcycle clubs used to gather around shared machines and shared habits. You could tell what a rider stood for by the sound of his engine or the way his bike idled. We rode together, argued over oil and carburettors, and spent nights fixing things that did not need fixing.
I remember a ride through Rajasthan with a small group. We had three breakdowns before sunset. One of the bikes refused to start near a dusty roadside dhaba. We pushed it for nearly a kilometre, sweating and laughing in equal measure. That night, sitting under a dim bulb, sharing food and stories, felt like the real destination.
Today, clubs are changing. You see electric motorcycles parked next to classic machines. You see riders who have never opened an engine casing but understand battery management and software updates. The conversations have shifted, but the bond remains.
What matters is not what you ride. It is that you ride.
I have seen young riders form communities around electric mobility, sustainability, and urban commuting. They ride in silence, yet their presence is strong. They organize clean rides, night runs, and long-distance trips that would have seemed unlikely a decade ago.
Something is refreshing about this shift. It removes barriers. It welcomes more people into the fold.
The brotherhood is still there. It just speaks in a different tone now.
Machines That Shape Generations
From petrol legends to electric beginnings
Every rider carries a list of machines that shaped them. Mine includes heavy cruisers that taught patience, lightweight bikes that demanded precision, and one particular machine that broke down so often it forced me to understand every bolt.
I remember riding through the Western Ghats during the monsoon. The road was slick, visibility was poor, and the bike felt heavier with every kilometre. At one point, I had to stop under a tree, drenched, tired, and unsure if I should continue. But something inside pushed me forward. That ride stayed with me. Not because of the machine, but because of what it demanded from me.
Electric motorcycles bring a different demand. They ask for planning. Range awareness. Charging stops. It is a different discipline, but a discipline nonetheless.
Young riders today are forming their first memories on these machines. Their stories will sound different from mine, but the core will be the same. A moment of doubt. A stretch of road that felt endless. A ride that changed something inside them.
Machines evolve. The rider’s journey does not.
The Road Ahead Feels Different, Not Distant
Adapting without losing the soul of riding
There was a time when long rides meant carrying spare parts, tools, and a fair bit of courage. You never knew what would fail next. That uncertainty was part of the thrill.
Today, the uncertainty has changed. With electric motorcycles, you think about charging points, battery health, and route planning. It is less mechanical, more strategic.
I rode a long stretch recently with a group that included both petrol and electric bikes. We had to stop more often for the electric ones. At first, it felt like a disruption. Then it became part of the rhythm. We talked more. Rested more. Observed more.
One of the younger riders told me he started riding because electric motorcycles felt accessible. No intimidation. No noise. Just a clean start. That stayed with me.
If this is what brings more people to the road, then it is worth embracing.
The soul of riding does not sit in the engine. It sits in the rider.
A New Generation Finds Its Own Freedom
Encouraging the next wave of riders
I meet young riders who hesitate. They think they need the perfect machine, the perfect skills, or the perfect moment. They wait.
I tell them what I wish someone had told me. You start where you are. You ride what you have. The road will take care of the rest.
Electric motorcycles are lowering that barrier. They are making riding feel approachable. And that matters.
I remember a solo ride I took years ago through a quiet stretch in Madhya Pradesh: no traffic, no noise, just a long road disappearing into the horizon. I stopped midway, took off my helmet, and realized I had never felt more present.
That feeling is still waiting for anyone willing to ride.
It does not matter if your bike hums or roars. What matters is that you show up.
Motorcycling has never been about resisting change. It has always been about embracing the road, no matter how it evolves. Electric motorcycles are not the end of something. They are the beginning of a new chapter.
The machines may change. The silence may grow. But the feeling remains untouched.
If you have been thinking about riding, take that step. The road is still open. It always will be.
#MotorcycleClubs #ElectricMotorcycles #RideTheFuture #MotorcycleLife #RiderStories #ElectricBikeIndia #SustainableRiding #TwoWheelFreedom #NewAgeRiders #GoodOldBandit
Smart Helmets: Are They Worth It?

Good Old Bandit
When Safety Meets Silence, and Technology Joins the Ride
Helmets have always meant trust. A quiet agreement between rider and road. Smart helmets arrive with new promises, new questions, and a future that feels close enough to touch. They do not replace riding instinct. They sit beside it. And that makes the conversation worth having.
The Helmet as a Sacred Object
Protection First, Everything Else Follows
For riders, helmets are not accessories. They are guardians. Long before screens and sensors, helmets carried the weight of survival. A strong shell, a reliable liner, and a secure fit have always mattered more than anything else. That truth stands firm today.
Smart helmets step into this sacred space with confidence. They do not rewrite the rules of protection. At their best, they respect them. Any helmet that adds technology without honoring safety fails its purpose. Riders know this instinctively. Trust is earned through impact ratings, real-world crashes, and years of lived experience on the road.
What “Smart” Really Means on Two Wheels
Technology That Stays Out of the Way
A smart helmet blends electronics into something deeply physical. Cameras, speakers, sensors, and displays sit quietly within a structure built to save lives. When done well, these features disappear while riding. They support without demanding attention.
Rear cameras widen awareness. Voice prompts guide without pulling eyes away. Subtle alerts nudge rather than shout. The goal remains simple and unchanged. Keep the rider present. Keep your hands on the bars. Keep the mind calm. Technology earns its place only when it respects that balance.
Safety Before the Impact
Awareness as the New Frontier
Traditional helmets protect during the moment of impact. Smart helmets aim to protect before that moment arrives. They extend awareness beyond mirrors and instincts alone. Blind-spot warnings, brake alerts, and crash detection systems offer seconds of notice. Those seconds often matter more than we admit.
Traffic has grown denser. Distraction has grown louder. Riders face risks from every direction. Active awareness feels less like luxury now and more like quiet support. Still, the delivery matters. Alerts must feel intuitive. Visual cues must remain soft. Sound must never startle. The best systems feel like instinct, not interruption.
Focus, Comfort, and the Long Road Ahead
Reducing Fatigue Without Stealing the Ride
Long rides test more than endurance. They test attention. Wind noise wears down focus. Navigation checks break rhythm. Stops for devices interrupt the flow. Smart helmets promise a smoother experience by keeping essential information inside the ride.
Noise reduction eases fatigue. Navigation guidance stays steady. Communication becomes simpler. Yet riders ride for sensation. The engine speaks. The wind carries feedback. Tires hum stories of grip and danger. Any technology that silences these voices betrays the ride. Smart helmets must enhance presence, not replace it.
Weight, Balance, and the Neck Test
Comfort Lives in Small Details
Every gram matters on the head. Electronics add mass. Mass adds strain. Riders feel this within minutes, not hours. Smart helmet makers chase lighter materials and tighter integration for good reason.
Carbon shells, compact batteries, and better design reduce the burden. Still, weight remains personal. City riders may accept more. Tourers notice it by midday. Off-road riders feel it at every jolt. Track riders feel it through every lean. Fit and balance decide comfort more than numbers on paper.
Battery Life and the Question of Trust
Technology Only Works When It Endures
A dead battery ends the promise. Charging becomes part of the ritual. For some riders, this feels natural. For others, it feels like friction. Trust grows when technology works quietly, consistently, and without anxiety.
Manufacturers now focus on longer endurance and clearer indicators. Quick charging helps. Honest feedback builds confidence. Still, smart helmets demand a small shift in habit. Riders must decide whether that shift feels reasonable or restrictive.
Cost, Value, and Personal Judgment
Price Is Simple, Worth Is Not
Smart helmets cost more. Sometimes much more. That reality stops many riders before the conversation begins. And that hesitation makes sense. Value depends on how and where one rides.
Daily commuters may find constant benefit. Tourers may value reduced fatigue and emergency support. Weekend riders may feel little need. Purists may reject the idea entirely. No choice here is wrong. Worth remains personal, shaped by roads, routines, and values.
Privacy on the Open Road
Freedom Includes Control
Smart helmets collect data. Cameras record journeys. Sensors track motion. This raises questions that riders deserve to be answered. Who owns the footage? Where does it live? Who can see it?
Riders value freedom deeply. Privacy sits close to that value. Clear controls, local storage, and rider choice build trust. Surveillance without consent has no place in riding culture. Respect for boundaries defines responsible technology.
Design, Identity, and Pride
Style Still Speaks
Helmets express identity. They signal intent, tribe, and taste. Early smart helmets struggled with appearance. That has changed. Designs now feel sharper and more purposeful.
Clean lines, thoughtful lighting, and restrained displays make technology feel intentional. A helmet should look right on the bike and feel right in reflection. Pride matters. Riders wear their gear publicly and personally.
Riders, Roads, and Real Experience
Truth Lives Beyond Marketing
Some riders credit smart helmets with avoiding close calls. Others value automatic crash alerts for peace of mind. Many appreciate calm guidance on unfamiliar roads.
Others remember glitches, weight, and distraction. These stories matter just as much. Riding culture grows through shared honesty. Borrow gear when possible. Talk to riders, not ads. Experience shapes belief more than specifications ever will.
A Future Riding Beside Us
Technology as Companion, Not Commander
Smart helmets hint at where riding is heading. Cities grow louder. Traffic grows tighter. Attention grows thinner. Thoughtful technology can protect space for focus and reduce stress without stealing freedom.
The future that feels right keeps protection at the center. Technology stays subtle. Riders stay in control. Joy remains untouched. That balance feels within reach.
So, Are Smart Helmets Worth It?
An Open Question for Every Rider
Smart helmets are not mandatory. They are an option. A powerful one for some. An unnecessary one for others. Worth depends on roads ridden, habits formed, and values held.
The best helmet disappears once worn. It protects without shouting. It supports without steering. Smart or simple, that remains the goal. The road invites conversation. This question stays open, and that feels exactly right.
Riding Together, Riding Right.
Good Old Bandit
The Quiet Truth About Motorcycle Clubs
A seasoned rider reflects on motorcycle clubs, brotherhood, and finding where you truly belong on two wheels.
Some riders chase speed. Some chase silence. And some, without knowing it, are searching for people who understand both. Motorcycle clubs promise that feeling. But the road has a way of revealing what truly fits.
The First Time You Ride with Others
The moment solitude meets shared rhythm
I still remember the first time I rode in a group. It was the late 80s, somewhere between dusty state highways and half-built bypass roads. My machine was a stubborn old 350, the kind that vibrated like it had something to prove. I had spent years riding alone before that day.
There were five of us. No matching jackets, no rules written down. Just a loose understanding of pace and presence. I remember feeling uneasy at first. Riding solo teaches you to listen only to your machine and your instinct. Riding with others asks you to trust something beyond that.
We moved as one, slowly at first. Then something changed. You begin to sense each rider without looking. A slight roll of the throttle, a lane shift, a shared pause at a tea stall. It felt unfamiliar, yet right.
That was my first lesson about motorcycle clubs. Not every group is about identity. Some are simply about rhythm.
Today, when young riders talk about joining clubs, I see that same curiosity. The desire to belong, to ride with purpose. It is a powerful pull. And it deserves to be understood, not rushed.
The Weight of the Patch
Identity, pride, and what comes with it
Over the years, I have seen all kinds of motorcycle clubs. Some wear their identity on their backs. Leather jackets, patches, logos that mean something only to those inside the circle. Others are quieter, almost invisible from the outside.
I once rode with a group in Rajasthan, men who had been riding together for over two decades. No branding. No social media. Just a tradition of meeting every full moon and riding into the desert. They spoke little, but when they did, it carried weight.
Then there were the bigger clubs. Organized rides, strict formations, and hierarchies that resembled small institutions. There is pride in that structure. A sense of belonging that runs deep. But there is also responsibility.
A patch is not just a design. It is a statement. It tells the world who you ride with, and sometimes, what you stand for. I have seen riders wear it with honor. I have also seen some wear it without understanding its weight.
Motorcycle clubs are not just about riding together. They are about identity. And identity, once worn, shapes the ride in ways you may not expect.
Machines Change, People Stay
Generations of riders, one shared feeling
When I started riding, machines were simple. No electronics. No rider modes. Just throttle, clutch, and instinct. Today’s motorcycles are smarter, faster, and far more forgiving.
But the rider’s heart has not changed.
I have ridden everything from old carbureted machines that refused to start on cold mornings to modern bikes that adjust themselves mid-corner. Each machine taught me something. Each left a mark.
I remember a long ride through the Western Ghats in the early 2000s. Heavy rain, poor visibility, and a road that seemed to vanish into the clouds. I was with a mixed group. Some on older machines, some on new imports. The bikes were different, but the struggle was the same.
We stopped under a broken shed. No one spoke for a while. Then someone laughed. It spread through the group like relief. In that moment, the machines didn’t matter. The experience did.
Motorcycle clubs often bring together riders from different generations. Different machines, different mindsets. But the road levels everything. It reminds you that the core of riding is not the machine. It is the feeling.
Freedom and Structure
The balance every rider must find
There is a quiet tension in motorcycling. The need for freedom, and the pull of structure. Riding alone gives you complete control. You decide the route, the pace, the stops.
Clubs introduce a different dynamic. There are ride plans, group decisions, and sometimes even rules. For some riders, this feels restrictive. For others, it brings clarity.
I have walked away from rides that felt too rigid. I have also stayed longer than expected in groups that understood balance. The best clubs I have known never tried to control the rider. They respected the individual, while protecting the group.
Once, on a long highway stretch near Nagpur, I broke away from a group ride. Not out of frustration, but instinct. The road ahead looked too inviting to follow a set pace. I rode alone for hours, then rejoined them at dusk.
No questions were asked. No judgments made. That is the kind of club that stays with you.
A motorcycle club should never take away your sense of self. It should sharpen it.
The Quiet Brotherhood
Connections that go beyond the ride
Not all bonds are loud. Some are built in silence.
I have shared rides with people whose names I barely remember, yet their presence still feels familiar. A nod at a fuel stop. A hand raised in acknowledgment on an empty stretch of road. These small gestures carry meaning.
There was a rider I met in Himachal years ago. We rode together for two days without exchanging more than a few words. Different languages, different lives. But on the road, none of that mattered.
We parted ways at a fork in the road. No contact was exchanged. Just a handshake and a smile. I still think about that ride.
Motorcycle clubs can create that kind of connection. But they can also dilute it if the focus shifts too much towards appearance over experience.
Brotherhood is not in the number of riders. It is in the quality of connection.
Young Riders, New Roads
The search for belonging in a changing world
Today’s riders have access to more than we ever did. Better machines, better roads, endless information. Social media has made motorcycle clubs more visible than ever.
That visibility brings opportunity. It also brings noise.
I see many young riders joining clubs quickly, chasing the image before understanding the experience. There is nothing wrong with wanting to be part of something. But the road teaches patience.
Your first club may not be your last. And that is fine.
Ride with different groups. Feel the difference. Notice how each ride makes you feel. Does it energize you, or drain you? Does it push you to ride better, or pressure you to ride faster?
These questions matter more than any badge or logo.
Motorcycling is not about fitting in. It is about finding where you feel most alive.
The Road Decides
Time reveals what truly fits
After four decades on two wheels, I have learned one simple truth. The road has a way of revealing what belongs in your life, and what does not.
I have been part of clubs that felt like family. I have also stepped away from ones that no longer aligned with who I had become. There is no shame in that.
Riders grow. Priorities shift. What felt right in your twenties may not feel the same in your forties. The key is to stay honest with yourself.
I still ride alone often. Early mornings, empty roads, the sound of the engine settling into a steady rhythm. Those rides remind me of where it all began.
And yet, now and then, I join a group ride. Not for the club, but for the shared experience. For the laughter at roadside stops. For the stories that unfold without effort.
Motorcycle clubs are part of the journey. Not the destination.
Motorcycle clubs can offer something rare. A sense of belonging that feels earned, not given. But they are not the only path. The road itself is the greatest teacher.
Ride enough, and you will find your place. It may be in a club. It may be on a quiet stretch of road with no one in sight. Both are valid. Both are real.
What matters is that you keep riding. That you stay curious. That you respect the machine, the road, and yourself.
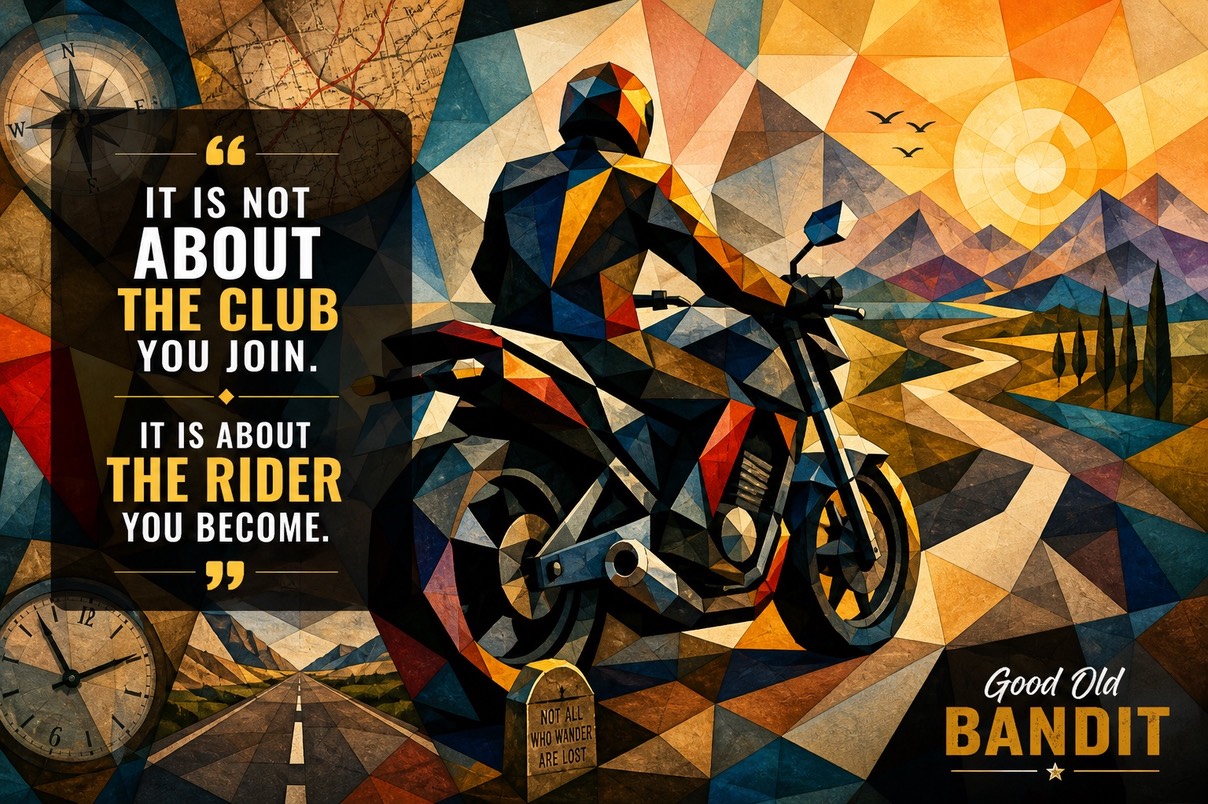
Because in the end, it is not about the club you join. It is about the rider you become.
Find your rhythm, not just your group. The right ride always feels honest.
#MotorcycleClubs #BikerLife #RideYourOwnRide #Motorcycling #BikerCommunity #LongRideStories #TwoWheelsLife #RidingCulture #BrotherhoodOnWheels #GoodOldBandit
Machines That Teach You to Ride, Roads That Teach You to Live.
Good Old Bandit
A seasoned rider reflects on the best beginner motorcycles in 2026 and the deeper meaning of starting the ride.
The First Turn of the Throttle
Where every rider begins, and something shifts inside
I still remember the first time I twisted a throttle and felt the machine answer back. It wasn’t fast. It wasn’t pretty. But it was alive in a way nothing else had been.
You don’t start riding because you need to. You start because something inside you refuses to stay still.
In 2026, beginner motorcycles are better than they’ve ever been. Safer, smoother, more forgiving. But beneath all the tech and design, the feeling remains unchanged. That quiet pull toward the open road.
The Old Machines, The First Lessons
Before electronics, when mistakes taught you everything
My first proper motorcycle was a tired old Yezdi Roadking. It rattled at idle and coughed on cold mornings. There were no rider aids, no smooth clutch feel, no forgiving throttle mapping.
If you made a mistake, the bike reminded you instantly.
I stalled it at signals, dropped it on gravel, and once rode ten kilometers with the choke still on. No one told me what I did wrong. The machine did.
That’s what beginner motorcycles are meant to do. Not to punish you, but talk to you.
Today’s bikes speak in a softer tone. And that’s a good thing.
Machines like the Royal Enfield Hunter 350 or the TVS Ronin don’t intimidate you. They invite you in. They let you make mistakes without making you pay heavily for them.
But the lesson stays the same. Respect the machine, and it will carry you far.
Lightweight Machines, Heavy Memories
The beauty of small bikes that stay with you forever
People chase power too early. I’ve seen it for decades.
A young rider once met me at a fuel station on a KTM Duke 390. Fast bike, sharp edges, aggressive stance. He looked proud, but tense, as if he were holding on to something that wanted to escape.
We rode together for a while. He struggled through traffic. Over-braked corners. Kept looking at the speedometer more than the road.
That evening, I thought about my days on a humble Bajaj Boxer. No power to brag about. But I rode it everywhere. Highways, broken village roads, and even a muddy trail that I should never have attempted.
That bike never scared me. So I rode it more. And in riding more, I became better.
In 2026, machines like the Bajaj Pulsar N250 or the Honda CB300F carry that same spirit. Enough power to keep things exciting, but not so much that it overwhelms you.
A beginner motorcycle should build your confidence, not test your courage every minute.
The Roads That Shape You
Where machines fade, and the rider takes over
There was a stretch of road outside Gwalior where I used to ride at dawn. No traffic. Just long, empty tarmac and the sound of the engine settling into rhythm.
I didn’t need a powerful machine there. I needed a predictable one.
That’s where bikes like the Yamaha FZ-X shine. They don’t demand attention. They let you focus on the ride itself.
In those quiet moments, you stop thinking about gears and braking points. You start noticing the wind direction, the texture of the road, the way the engine hums differently at each speed.
That’s when you begin to understand riding.
The best beginner motorcycles don’t distract you. They disappear beneath you, letting you feel everything else.
Modern Machines, Old Soul
Technology has changed, but the essence remains untouched
Today’s motorcycles come with fuel injection, ABS, ride modes, and refined engines. Machines like the Hero Xtreme 160R and the Suzuki Gixxer 250 are far more capable than anything we had decades ago.
But here’s the truth.
Technology doesn’t make you a rider.
It helps. It protects. It smooths out your errors. But the connection between you and the machine still depends on how you ride.
I once rode a modern bike after years of old machines. It felt effortless. Almost too easy. But after a few hundred kilometers, I realized something.
The joy wasn’t in the ease. It was in the awareness.
A beginner bike today gives you the comfort to focus on awareness. That’s its biggest gift.
Moments That Stay, Long After the Ride Ends
The quiet memories that define your journey
There was a night ride I’ll never forget. A group of us riding under a clear sky, somewhere between Jaipur and nowhere in particular.
One rider had just bought his first bike. A simple machine. He was quiet the whole ride.
We stopped for tea at a roadside stall. He looked at his bike, then at the road ahead, and said, “I feel like I’ve started something.”
That’s exactly what beginner motorcycles do. They don’t complete your story. They start it.
Machines like the Royal Enfield Classic 350 or the KTM Duke 250 don’t just serve as transport. They become part of your early memories.
And those memories stay long after you move on to bigger machines.
The Mistake Most Riders Make
Chasing speed before understanding control
I’ve seen too many riders rush the process.
They skip the basics. Go straight for speed. And then struggle with control.
A beginner motorcycle is not about limitations. It’s about the foundation.
Bikes like the TVS Apache RTR 200 4V or the Yamaha MT-15 offer a perfect balance. They respond well, stay stable, and don’t punish you harshly.
When you ride a machine that matches your skill level, you ride more often. And when you ride more, everything improves naturally.
There’s no shortcut to becoming a good rider. But there is a right starting point.
Machines That Grow with You
The rare bikes that stay relevant beyond the beginner phase
Some motorcycles don’t leave your life easily.
I’ve known riders who kept their first bikes even after upgrading. Not because they had to, but because they wanted to.
That’s the mark of a good beginner motorcycle.
The Honda CB350, for example, offers enough depth to keep you engaged even as your skills improve. The same goes for the Bajaj Dominar 400, though it sits on the higher end for beginners.
These machines don’t just teach you. They stay with you as you evolve.
And sometimes, years later, you take them out for a ride just to remember where it all began.
The Ride Begins Before the Engine Starts
Motorcycling is not about the bike you choose. It’s about the rider you become.
The best beginner motorcycles in 2026 are not defined by specs or features. They are defined by how they make you feel when you ride them.
They build your confidence. They teach you patience. They give you moments that stay with you for life.
I’ve ridden across decades, across machines that came and went. But the feeling of that first ride has never changed.
If you’re thinking about starting, don’t overthink it.
Pick a machine that feels right. Start small. Ride often.
The road will take care of the rest.
#BeginnerMotorcycles #FirstBike #MotorcyclingIndia #RideToLive #TwoWheelJourney #NewRiders #MotorcycleLife #OpenRoad #RideSafe #GoodOldBandit
The Middleweight Cornering Trap.
Good Old Bandit
Confidence Is Built in the Bend, not on the Straight
Master middleweight cornering with smooth brake control, sharp vision, and true front-end feel.
The Moment the Bike Starts Talking Back
Every rider remembers that corner. You tipped in. The line looked right. Then the bike drifted wide. Your heart spiked. You pushed harder on the bar. The bike resisted. For a split second, you felt like a passenger. That moment is not about courage. It is about control. And if you ride a 400cc to 750cc machine, that lesson arrives fast. #CorneringConfidence #RideSmart
The Honest Class of Motorcycles
Why Your 400–750cc Bike Is Exposing Your Technique — And How to Fix It
If you ride a middleweight motorcycle, you’re in the most honest category on the road.
No massive cruiser inertia to hide clumsy inputs.
No beginner-bike forgiveness to soften mistakes.
No liter-bike horsepower to blast out of a bad line.
Just you, physics, and a motorcycle that reacts exactly to what you tell it to do.
And here’s the uncomfortable truth:
Most riders in the 400cc–750cc range are making the same mistake every time they tip into a corner.
Let’s fix it.
Middleweights Don’t Hide Your Mistakes
The Dangerous Middle Ground
Heavy cruisers feel planted because they have the inertia of a small planet. They don’t react quickly — which means they also don’t punish quickly.
Tiny beginner bikes? They’re often not moving fast enough to make small errors terrifying.
But middleweights?
They’re light enough to be skittish.
Fast enough to get you into real trouble.
And often built with softer suspension.
They amplify bad technique.
If you’ve ever felt your bike drift wide mid-corner and thought, “Did I just run out of talent?” — you probably didn’t.
You ran into physics.
Middleweight bikes live in a rare space. They are quick, light, and responsive. They do not have the heavy calm of a cruiser. They do not have the raw surge of a liter bike. They sit right in the middle. That makes them honest. When your inputs are smooth, they feel sharp and alive. When your inputs are abrupt, they react just as quickly.
A heavy cruiser absorbs clumsy control. Its weight smooths over poor timing. A small commuter rarely builds enough speed to punish errors. A middleweight does neither. It amplifies. It reflects your skill to you. That is not a flaw. That is a gift. If you choose to see it that way. #MiddleweightMindset #RideAware
The Old Advice That Holds Riders Back
The Old Lie: “Never Brake in a Corner”
You’ve heard it.
“Don’t brake in a turn.”
“If you’re running wide, just counter steer more.”
That advice sounds simple. It’s also incomplete.
If your front tire is lightly loaded — meaning your forks are extended, and there’s less weight on the contact patch — pushing harder on the inside bar doesn’t magically create grip.
It can actually make things worse.
When the front tire is underloaded, you’re asking it to change direction without giving it the traction to do so.
That’s how bikes stand up mid-corner and drift toward the outside of the lane.
And that’s usually where the guardrails live.
“Just Lean More” Is Not a Strategy
Many riders still believe you must finish braking before the corner. They hear that braking in a turn is taboo. They are told that if they run wide, they should push harder on the inside bar. It sounds bold. It sounds brave. It is also incomplete.
When the front tire lacks load, it lacks grip. When the forks extend, the front contact patch shrinks. At that point, pushing harder does not fix the line. It reduces the margin. The bike wants to stand up. The tire feels vague. The road feels closer than it should.
The problem is not lean angle. The problem is front-end management. When you stop treating the brake as an on-off switch and start treating it as a tool for balance, the entire corner changes. #BrakeControl #RideWithSkill
Geometry in Motion
The Front End Sets the Tone
Every time you touch the front brake, you change the shape of the bike. The forks compress. Trail reduces. The wheelbase shortens. The front tire digs into the road. That compression does more than slow you down. It sharpens the bike’s willingness to turn.
Release the brake too fast, and the forks rebound. Trail increases. The front unloads. The bike tries to stand up. That shift happens in a heartbeat. On a middleweight, it feels dramatic. The bike moves from sharp to stubborn in a blink.
This is not magic. It is geometry. It is physics. And once you see it, you cannot unsee it. The brake is not just a speed control. It is a steering tool. #MotorcyclePhysics #RideInControl
Speed and the Shape of the Corner
What’s Really Happening at Corner Entry
Here’s the mechanical reality.
When you abruptly release the front brake at turn-in:
- The forks rebound.
- Trail increases.
- The wheelbase lengthens.
- The front tire unloads.
Trail is the key player here.
The trail creates that self-centering effect that makes the bike want to stand up and go straight.
So when you release the brake too quickly, you’ve just changed the bike’s geometry in a way that encourages it to stop turning.
At the exact moment you want it to turn more.
That’s not rider error.
That’s unmanaged geometry.
Lean and Pace Draw the Circle
There is a simple truth every rider must accept. Speed and lean create a circle. If that circle is wider than your lane, you will drift wide. No amount of hope changes that path.
Reduce speed, and the circle tightens. Maintain too much speed and the circle opens. The bike does not negotiate with emotion. It responds to numbers. When you adjust speed with calm brake pressure, you change the path without panic. You gain space. You gain time.
That is where confidence lives. Not in aggression. In adjustment. #SpeedEqualsRadius #RideSmooth
The Subtle Power of the First Touch
The Suspension Neutral Zone
Most middleweight bikes have around 120–140mm of fork travel.
The sweet spot? Roughly mid-travel.
Too extended:
- Front feels vague.
- Tire underloaded.
- The bike resists turning.
Too compressed:
- Suspension bottoms out.
- You lose compliance.
- The bike feels harsh and unstable.
You want the forks working — not topping out, not slamming into the bottoming cones.
This is where the real reset happens.
The Opening 5 Percent Sets the Corner
Most riders grab the brake. Skilled riders apply the brake. The first small squeeze is quiet. It takes slack out of the system. It settles the fork. It tells the front tire to get ready.
That gentle input moves the suspension toward its sweet spot. Not fully compressed. Not extended. Balanced. In that space, the bike feels planted. The tire feels present. The steering feels clear.
You are not chasing speed. You are building stability. That early touch shapes the entire corner. #TrailBraking #FrontEndFeel
The Discipline of Release
The 5% Rule — The Game Changer
This is the discipline most riders lack.
The First 5%
The initial 5% of brake lever travel isn’t about stopping power.
It’s about:
- Taking slack out of the system.
- Loading the front tire.
- Beginning fork compression smoothly.
- Reducing the trail gradually.
You’re settling the chassis.
The Last 5%
This is where most riders get into trouble.
If you suddenly let go of the brake:
- Forks rebound fast.
- Trail increases abruptly.
- Front unloads.
- Bike stands up.
- You run wide.
Instead, you trade inputs smoothly:
Brake pressure → Lean angle → Throttle.
It’s a controlled handoff.
On a light, reactive middleweight, any sudden pitch change is amplified.
Smooth inputs aren’t optional. They’re survival.
The Last 5 Percent Protects Your Line
The exit of brake pressure matters as much as the entry. Snap off the lever, and the forks rebound. The front lights. The bike rises. Your line opens. You feel it. The road edge moves closer.
Instead, trade brake for lean. Then trade lean for throttle. Make the change smooth. Let the fork extend with grace, not shock. This calm exchange keeps the tire loaded and the chassis steady.
Middleweight bikes react fast. That is their charm. That is their warning. Smooth release keeps them loyal. #BrakeRelease #CornerFlow
The Decision Point Changes Everything
Stop Obsessing Over the Apex
The apex isn’t the goal.
It’s the result.
What actually matters is the decision point.
The decision point is when:
- You’ve slowed to a speed you’re happy with.
- You’re on a wide outside line.
- You can finally see the exit clearly.
- You’ve confirmed it’s clear.
Only then do you commit.
Only then do you begin reducing lean and adding throttle.
If you find yourself accelerating before you can see the exit, you’re gambling.
Patience wins corners.
Impatience visits ditches.
Patience Builds Exit Speed
Riders fixate on the apex. They chase that painted point like it holds the secret. The real power lies elsewhere. It lies at the decision point. That is the moment you see the exit. That is when you confirm the road is clear.
Until then, stay patient. You stay ready on the brake. You hold a wide line. You gather data. You slow down until the speed feels right. Only then do you commit. Only then do you begin to unwind the lean and add throttle.
This shift in focus changes the tone of your ride. You stop rushing the corner. You start shaping it. The apex becomes a result, not a target. #DecisionPoint #RideWithVision
Electronics Are Allies, Not Crutches
Cornering ABS Is Not a Magic Shield
Modern bikes increasingly come with cornering ABS.
It’s a brilliant safety net.
But it cannot:
- Create a grip where there isn’t any.
- Prevent fork bottoming.
- Stop geometry changes.
- Fix an unloaded front tire.
ABS prevents lockup.
It does not override physics.
True skill means riding smoothly enough that the electronics rarely have to intervene.
Skill Stays in the Rider’s Hands
Modern bikes offer cornering ABS. It is a strong safety net. It can save a lockup. It can reduce panic. It cannot create grip from thin air. It cannot hold the front tire down if you unload it.
The best use of technology is quiet. When the system rarely activates, you know your inputs are smooth. You know your front tire is working. You know your geometry is stable.
Trust the tech. Respect it. But never hand over responsibility. Mastery stays in your right hand and left fingers. #CorneringABS #RiderSkill
Precision Over Power
Middleweights Make You Better
Here’s the upside.
You don’t have brutal horsepower to fix mistakes on exit.
You don’t have massive weight masking your inputs.
You must be precise.
That precision builds skill.
Middleweights demand that you manage:
- Speed.
- Geometry.
- Suspension.
- Transitions.
And when you learn to do that well?
You stop being a passenger, making suggestions to the machine.
You start managing it.
Middleweights Reward Intent
You cannot fix a bad line with brute force on a middleweight. There is no giant wave of torque waiting to erase mistakes. That forces you to be exact. It pushes you to read the road early. It demands calm inputs.
This demand builds real skill. It builds feel. It builds timing. Riders who master middleweights often carry that finesse to every other bike they ride.
That is the beauty of this class. It shapes riders. It sharpens awareness. It turns mistakes into lessons rather than disasters. #RideToImprove #MotorcycleGrowth
The Three Core Shifts
If you take nothing else from this, take these:
1. Manage the trail with the front brake.
2. Use the 5% rule to control suspension pitch.
3. Ride to the decision point, not the apex.
Braking in a corner isn’t taboo.
Abrupt braking is.
Leaning harder isn’t the fix.
Managing geometry is.
A Conversation Worth Having
Corners Reveal Character
Think about your last spirited ride. Did you rush the entry? Did you release the brake too fast? Did you feel the front go light? Or did you stay calm, breathe, and shape the line with intention?
Every corner tells you something. It speaks through the bars and the pegs. The question is simple. Are you listening?
This is not about riding slower. It is about riding smarter. It is about control over the ego. It is about pride in smooth inputs. That mindset shifts the ride from reaction to intention. #RideReflect #TwoWheelWisdom
If your middleweight feels nervous in corners, it’s not because the bike is flawed.
It’s because it’s honest.
And honest machines make skilled riders.
Master the reset.
Respect the physics.
Trade inputs smoothly.
Then watch your confidence grow — not because you’re pushing harder, but because you’re managing smarter.
Ride sharp. Ride patient. Ride in control.
Confidence Is Earned in Quiet Control
The middleweight cornering trap is not a curse. It is a mirror. It shows you where your inputs lack patience. It shows you where your timing slips. It also shows you where growth waits.
Manage the brake. Respect geometry. Stay patient until the decision point. Trade inputs with care. When you do, the bike stops fighting you. It flows. It feels planted. It feels right.
That feeling is not luck. It is a skill.
Ride with intention. Ride with respect. Ride like the corner is a craft, not a contest. The road will reward you for it. #GoodOldBandit #RideWell #CornerMastery
#CorneringConfidence #RideSmart #MiddleweightMindset #BrakeControl #MotorcyclePhysics #TrailBraking #DecisionPoint #CornerMastery #GoodOldBandit
Motorcycling Builds Confidence and Character.
Good Old Bandit
Motorcycling forges calm confidence and strong character through focus, courage, and respect for the road.
Steel Calm, Open Roads
Confidence and character are shaped through motion
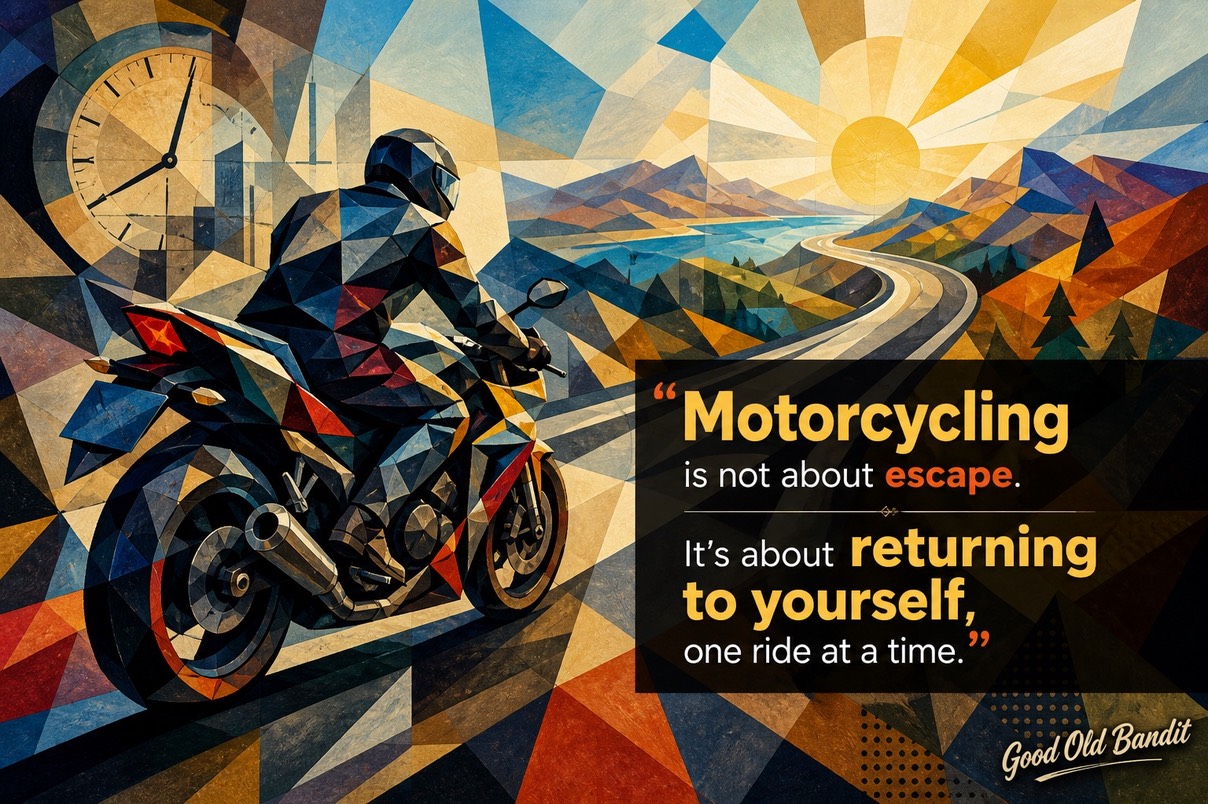
Motorcycling is not about escape. It is about engagement. Every ride strips noise, sharpens focus, and demands honesty. On two wheels, confidence is earned through action, and character forms through choices made at speed. Riders feel this shift long before they explain it.
The Quiet Shift
Focus replaces noise
The moment the helmet locks, the world changes. Sound dulls. Vision sharpens. Attention narrows to what matters. Throttle, brake, road surface, and line take priority. There is no space for wandering thoughts. Motorcycling trains focus through necessity, not effort.
This focus does not stay on the road. Riders carry it into work, conversations, and decisions. Meetings feel calmer. Problems feel smaller. Confidence begins here, rooted in attention held steady while moving. #Focus #Presence #RidingLife
The Weight of Responsibility
Ownership without escape
On a motorcycle, responsibility is absolute. Every input matters. A rushed corner exposes impatience. A smooth exit rewards restraint. Riders accept outcomes without drama because denial has no value at speed.
This mindset reshapes character. Riders learn to own results without excuses. That ownership shows up everywhere. At work. In relationships. In leadership. People trust those who take responsibility without noise. #Accountability #Character #RideResponsibly
Fear as a Teacher
Courage built on respect
Fear never disappears on a motorcycle. It arrives early and often. Lean angles test nerve. Gravel demands humility. The weather reminds riders of limits. The difference is how riders respond.
Motorcycling teaches fear as information, not weakness. Breathing slows. Vision widens. Hands relax. Courage grows from respect for risk, not bravado. Confidence follows when fear becomes guidance instead of resistance. #Courage #CalmUnderPressure #Mindset
Patience at Speed
Timing over force
Speed tempts impatience. Riding punishes it. Smoothness wins races and survives roads. Riders learn to wait for the right moment, read the surface, and act with intent.
This patience reshapes decision making. Riders stop forcing outcomes. They choose timing over pressure. Character deepens through restraint, and confidence grows quieter but stronger. #Patience #SmoothIsFast #RiderWisdom
The Body Learns First
Skills that settle the mind
Motorcycling teaches through the body. Eyes lead. Hands respond. Feet support. Over time, movement becomes instinct. Skill builds trust between thought and action.
As competence grows, anxiety fades. Confidence feels earned, not imagined. Riders carry this calm into stress, deadlines, and uncertainty. The body remembers balance even when the world feels unstable. #Skill #EmbodiedConfidence #TwoWheels
Risk With Respect
Boldness grounded in care
Riding accepts risk without romance. Gear matters. Checks matter. Training matters. Preparation is confidence expressed through action.
This balance defines the rider’s character. Riders stay bold without recklessness. They push without forgetting consequences. Respect for risk becomes a lifelong discipline. #RespectTheRide #PreparedMind #SafetyCulture
Solitude That Strengthens
Clarity through distance
Long rides quiet everything else. Thoughts fall into line. Values surface. Priorities sharpen. The road offers solitude without isolation.
This time alone builds self-trust. Riders return lighter, clearer, and more aligned. Confidence grows when values feel settled rather than questioned. #Solitude #Clarity #OpenRoads
Community Without Pretense
Belonging through respect
Rider communities form without performance. A nod at a signal. Help on the roadside. Stories shared without hierarchy. Skill and kindness matter more than titles.
This shared respect strengthens character. Confidence grows when belonging feels earned and mutual. #RiderCommunity #Brotherhood #Sisterhood
Failure That Teaches
Mistakes as mentors
Missed lines happen. Bad days happen. Riders reflect instead of sulking. They adjust their technique and return stronger.
This response to failure spreads beyond riding. Goals reset honestly. Growth feels steady. Character forms through reflection rather than denial. #Resilience #GrowthMindset #RideOn
The Long View
Progress measured in years
Motorcycling rewards patience over time. Small gains stack quietly. Skill matures. Ego softens. Confidence loses its need to announce itself.
Character settles into consistency. Riders show up grounded, prepared, and calm. The road teaches those willing to stay. #LongGame #Consistency #MatureConfidence
Presence in Motion
Joy through engagement
Joy on a motorcycle is not accidental. It appears when effort meets awareness. A perfect corner. A clear horizon. A steady rhythm.
This joy fuels confidence without excess. Character brightens when joy stays honest and grounded. #JoyInMotion #Gratitude #RideHappy
What Riders Carry Forward
Lessons beyond the ride
Riders carry calm into chaos. They choose care over noise. They act with intent rather than impulse. Confidence feels lived, not claimed.
Character shows through consistency, not words. The road leaves its mark long after the ride ends. #LifeOnTwoWheels #InnerStrength #RideMindful
The Road Keeps Teaching
Lessons that never end
Motorcycling continues shaping those who listen. It demands presence and returns clarity. It builds confidence through action and character through respect.
The road stays open. The lessons continue.
#GoodOldBandit #MotorcycleCulture #RideWithPurpose