
Unleashing the Thrills of Motorcycles
Brake Fluids Decoded: Navigating the Hydraulic Landscape for Optimal Vehicle Safety
In the intricate world of automotive engineering, few components carry the weight of responsibility quite like brake fluids. As the unsung hero behind every smooth stop, brake fluids play a pivotal role in ensuring the safety and performance of your vehicle's braking system. Join us on a journey to unravel the nuances of brake fluids, exploring their types, applications, and the critical considerations that go into choosing the right fluid for your drive.
Explore the world of brake fluids – the silent guardians of your vehicle's braking system. From DOT 3 to DOT 5.1, discover their types, applications, and key factors to consider for optimal performance and safety. Uncover the hydraulic secrets that keep your every stop smooth and reliable.
Unveiling the Essence of Brake Fluids: Safeguarding Your Drive
In the intricate world of automotive engineering, where every component plays a vital role, brake fluid stands out as a silent yet crucial performer. As the hydraulic lifeline of your vehicle's braking system, brake fluid ensures that your car responds with precision and reliability when you apply the brakes. In this blog post, we embark on a journey to uncover the significance of brake fluids, exploring their types, applications, and the critical role they play in ensuring road safety.
Brake fluid is a critical component in the hydraulic braking system of vehicles, playing a pivotal role in ensuring efficient and safe brake operation. It is a type of hydraulic fluid specifically formulated to withstand the demands and high temperatures associated with braking mechanisms. This essential fluid transmits the force applied to the brake pedal by the driver to the brake components at each wheel, facilitating the conversion of kinetic energy into heat and ultimately stopping the vehicle.
The composition of brake fluid typically involves glycol-ether or silicone-based compounds, chosen for their high boiling points and stability under extreme conditions. The selection of an appropriate brake fluid is crucial, as it directly influences the system's performance and longevity. Brake fluids are classified into different types, such as DOT 3, DOT 4, and DOT 5, each with varying boiling points and viscosity levels to suit diverse automotive applications.
One of the primary characteristics of brake fluid is its hygroscopic nature, meaning it has an affinity for absorbing moisture from the surrounding environment. This trait is particularly important as it helps prevent water accumulation within the brake system, which could lead to a decrease in the fluid's boiling point and compromise braking effectiveness.
Regular inspection and maintenance of the brake fluid are essential to ensure optimal performance and safety. Over time, brake fluid may degrade due to exposure to heat, moisture, and contaminants. Periodic replacement, as recommended by the vehicle manufacturer, helps maintain the fluid's integrity and preserves the overall efficiency of the braking system.
Brake fluid is a specialized hydraulic fluid vital for the proper functioning of a vehicle's braking system. Its carefully formulated composition and hygroscopic properties contribute to reliable and consistent braking performance, underscoring its significance in automotive safety.
Understanding Brake Fluid: The Hydraulic Sentinel
At the heart of every braking system lies brake fluid, a specialized hydraulic fluid designed to transmit the force applied to the brake pedal to the braking components. This transmission of force is vital for converting kinetic energy into heat, ultimately bringing your vehicle to a safe stop. Brake fluids come in various formulations, and their choice profoundly influences the performance and longevity of your braking system.
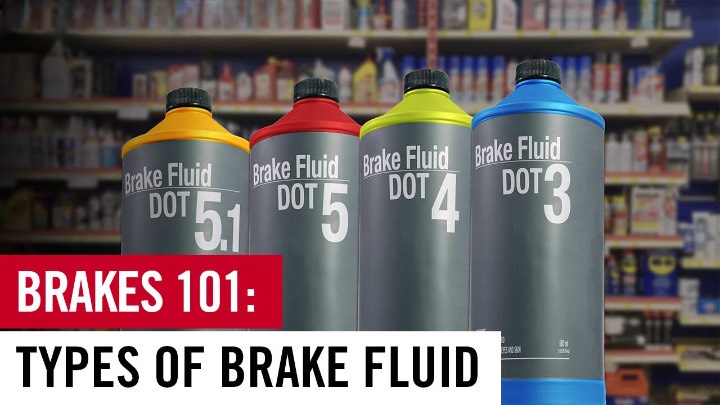
The Quartet of Brake Fluid Types: DOT 3, DOT 4, DOT 5, and DOT 5.1
1. DOT 3 Brake Fluid: The Everyday Workhorse
· Suited For: Standard driving conditions.
· Advantages: Cost-effective, widely available, and compatible with various braking systems.
· Considerations: Moderate boiling point, regular maintenance required.
2. DOT 4 Brake Fluid: Versatility Redefined
· Suited For: Versatile applications, including high-performance and heavy-duty conditions.
· Advantages: Higher boiling point than DOT 3, compatibility with DOT 3 and DOT 5.1.
· Considerations: Moderate cost, hygroscopic properties.
3. DOT 5 Brake Fluid: The High-Performance Maverick
· Suited For Specialized and high-performance applications.
· Advantages: Silicone-based, non-hygroscopic, stable under extreme conditions.
· Considerations: Incompatible with glycol-ether-based fluids, requires a complete system flush when transitioning.
4. DOT 5.1 Brake Fluid: Performance Refined
· Suited For High-performance and heavy-duty applications.
· Advantages: High boiling point, compatible with DOT 3 and DOT 4.
· Considerations: Moderate cost, hygroscopic properties.
The automotive industry recognizes several types of brake fluids, each classified according to its composition and intended application. The most common types are DOT 3, DOT 4, DOT 5, and DOT 5.1 brake fluids:
1. DOT 3 Brake Fluid:
· Composition: Typically glycol-ether based.
· Boiling Point: Moderate.
· Application: Suitable for everyday driving conditions.
· Compatibility: Mixes well with DOT 4, but not with silicone-based fluids.
2. DOT 4 Brake Fluid:
· Composition: Glycol-ether or borate-ester based.
· Boiling Point: Higher than DOT 3, suitable for higher performance and heavy-duty applications.
· Application: Commonly used in both disc and drum brake systems.
· Compatibility: Mixes well with DOT 3 but not with silicone-based fluids.
3. DOT 5 Brake Fluid:
· Composition: Silicone-based.
· Boiling Point: Typically higher than DOT 3 and DOT 4.
· Application: Often used in high-performance or custom vehicles.
· Compatibility: Does not mix well with glycol-ether-based fluids. It's crucial to completely flush the system before switching.
4. DOT 5.1 Brake Fluid:
· Composition: Glycol-ether based.
· Boiling Point: Similar to DOT 5 but compatible with DOT 3 and DOT 4.
· Application: Suitable for high-performance and heavy-duty braking systems.
· Compatibility: Mixes well with DOT 3 and DOT 4 fluids.
Vehicle owners and technicians need to adhere to the manufacturer's specifications regarding brake fluid type. Mixing different types of brake fluids can lead to unpredictable results and compromise the performance of the braking system. Regular inspection and replacement, following the recommended maintenance schedule, contribute to the overall safety and efficiency of the braking system.
Let's delve into a detailed comparison of the different types of brake fluids—DOT 3, DOT 4, DOT 5, and DOT 5.1—highlighting their key characteristics, applications, and considerations:
1. Boiling Points:
· DOT 3: Moderate boiling point, suitable for standard driving conditions.
· DOT 4: Higher boiling point compared to DOT 3, making it suitable for heavier use and performance applications.
· DOT 5: Typically has a higher boiling point than DOT 3 and DOT 4.
· DOT 5.1: Similar boiling point to DOT 5, providing enhanced performance under high-stress conditions.
2. Composition:
· DOT 3: Primarily glycol-ether based.
· DOT 4: Can be glycol-ether or borate-ester based.
· DOT 5: Silicone-based.
· DOT 5.1: Glycol-ether based.
3. Hygroscopic Properties:
· DOT 3: Hygroscopic (absorbs moisture) to a certain extent.
· DOT 4: Hygroscopic; absorbs moisture to maintain boiling point stability.
· DOT 5: Not as hygroscopic as glycol-ether-based fluids.
· DOT 5.1: Hygroscopic, similar to DOT 4.
4. Compatibility:
· DOT 3: Mixes well with DOT 4 but not with silicone-based fluids.
· DOT 4: Compatible with DOT 3 and DOT 5.1 but not with silicone-based fluids.
· DOT 5: Does not mix with glycol-ether-based fluids; a complete system flush is necessary when switching.
· DOT 5.1: Mixes well with DOT 3 and DOT 4.
5. Applications:
· DOT 3: Suitable for everyday driving conditions.
· DOT 4: Commonly used in both disc and drum brake systems, ideal for higher performance and heavy-duty applications.
· DOT 5: Often used in high-performance or custom vehicles.
· DOT 5.1: Suitable for high-performance and heavy-duty braking systems.
6. Considerations:
· DOT 3: Entry-level fluid, adequate for standard driving but may not meet the demands of high-performance applications.
· DOT 4: Versatile and widely used, providing a balance between performance and everyday driving needs.
· DOT 5: Requires a complete system flush when transitioning due to its silicone base.
· DOT 5.1: Offers high-performance capabilities and is compatible with DOT 3 and DOT 4.
The choice of brake fluid depends on the specific requirements of the vehicle and its usage. While DOT 3 and DOT 4 are more common for general applications, DOT 5 and DOT 5.1 cater to specialized needs, with DOT 5 being silicone-based and requiring special attention during a system transition. It is essential to follow the vehicle manufacturer's recommendations to ensure optimal braking system performance and safety.
Let's explore the advantages and disadvantages of each type of brake fluid—DOT 3, DOT 4, DOT 5, and DOT 5.1:
DOT 3 Brake Fluid:
Advantages:
1. Cost-Effective: DOT 3 brake fluid is generally more affordable than higher-grade options.
2. Widespread Availability: Widely available and compatible with many vehicle braking systems.
3. Standard Driving Conditions: Well-suited for everyday driving conditions.
Disadvantages:
1. Lower Boiling Point: Has a moderate boiling point, making it less suitable for high-performance or heavy-duty applications.
2. Hygroscopic: Can absorb moisture, leading to a reduction in boiling point over time.
DOT 4 Brake Fluid:
Advantages:
1. Higher Boiling Point: Offers a higher boiling point than DOT 3, suitable for more demanding driving conditions.
2. Versatility: Compatible with DOT 3 and DOT 5.1, providing flexibility in various applications.
3. Performance: Well-suited for both disc and drum brake systems, making it a versatile choice.
Disadvantages:
1. Cost: Typically more expensive than DOT 3.
2. Hygroscopic: Like DOT 3, it can absorb moisture over time.
DOT 5 Brake Fluid:
Advantages:
1. High Boiling Point: Generally has a higher boiling point compared to DOT 3 and DOT 4.
2. Non-Hygroscopic: Less prone to moisture absorption compared to glycol-ether-based fluids.
3. Stability: Less prone to corrosion and oxidation.
Disadvantages:
1. Compatibility Issues: Does not mix with glycol-ether-based fluids; a complete system flush is required when transitioning.
2. Cost: Tends to be more expensive than DOT 3 and DOT 4.
DOT 5.1 Brake Fluid:
Advantages:
1. High Performance: Offers high boiling points, suitable for heavy-duty and high-performance applications.
2. Compatibility: Mixes well with DOT 3 and DOT 4 fluids.
3. Versatility: Suitable for a range of braking systems.
Disadvantages:
1. Cost: Generally more expensive than DOT 3 but comparable to or slightly more affordable than DOT 5.
2. Hygroscopic: Can absorb moisture, similar to DOT 3 and DOT 4.
The choice of brake fluid depends on factors such as the vehicle's application, driving conditions, and performance requirements. While DOT 3 and DOT 4 are more common and cost-effective, DOT 5 and DOT 5.1 cater to specific needs but may come with higher costs and considerations for compatibility and system transition. Regular maintenance and adherence to manufacturer recommendations are crucial for ensuring optimal braking system performance and safety.
The choice of brake fluid depends on the specific requirements of the vehicle, its braking system, and the intended application. Here's a general guideline for the suitability of each type of brake fluid:
1. DOT 3 Brake Fluid:
· Suited For Everyday driving conditions, standard vehicles with conventional braking systems.
· Applications: Commonly found in commuter cars, light trucks, and vehicles with standard braking demands.
· Considerations: May not be suitable for high-performance or heavy-duty applications due to its moderate boiling point.
2. DOT 4 Brake Fluid:
· Suited For: Versatile applications, including higher performance and heavy-duty conditions.
· Applications: Suitable for a wide range of vehicles, including those with disc and drum brake systems.
· Considerations: Well-balanced for various driving conditions; offers a higher boiling point than DOT 3.
3. DOT 5 Brake Fluid:
· Suited For Specialized and high-performance applications.
· Applications: Often used in custom or high-performance vehicles where the silicone-based nature of DOT 5 provides advantages.
· Considerations: Requires a complete system flush when transitioning due to its incompatibility with glycol-ether-based fluids.
4. DOT 5.1 Brake Fluid:
· Suited For High-performance and heavy-duty applications.
· Applications: Suitable for vehicles with advanced braking systems, performance cars, and those subjected to demanding conditions.
· Considerations: Mixes well with DOT 3 and DOT 4, offering high boiling points for enhanced performance.
Additional Considerations:
· Climate: In areas with extreme temperatures, a brake fluid with a higher boiling point may be preferable.
· Vehicle Manufacturer Recommendations: Always follow the vehicle manufacturer's specifications and recommendations for the appropriate brake fluid type.
· Performance Requirements: For high-performance or racing applications, where braking systems undergo significant stress, a fluid with a higher boiling point, such as DOT 4 or DOT 5.1, may be necessary.
It's crucial to note that while these general guidelines provide a starting point, individual vehicle requirements may vary. Therefore, consulting the vehicle's owner's manual and seeking advice from automotive professionals can help ensure the most suitable brake fluid is selected for a specific application. Regular monitoring and adherence to recommended maintenance intervals are essential for optimal braking system performance and safety.
The selection of brake fluid for a particular vehicle depends on various factors, each influencing the fluid's suitability for use. Here are the key factors that determine the type of brake fluid suited for a specific application:
1. Vehicle Manufacturer Recommendations:
· Guideline: Always follow the recommendations provided by the vehicle manufacturer in the owner's manual or service documentation.
· Reason: Manufacturers specify the type of brake fluid that best suits the design and materials of the braking system.
2. Brake System Design:
· Guideline: Consider the type of braking system (disc, drum, or a combination) installed in the vehicle.
· Reason: Different brake systems may have varying temperature and pressure requirements, influencing the choice of brake fluid.
3. Performance Requirements:
· Guideline: Evaluate the vehicle's performance demands, such as high-speed driving, towing, or frequent heavy braking.
· Reason: Performance requirements impact the boiling point and overall stability of the brake fluid under strenuous conditions.
4. Climate and Driving Conditions:
· Guideline: Consider the climate in which the vehicle operates (extreme heat or cold) and the driving conditions it encounters.
· Reason: Brake fluids with higher boiling points may be needed in hot climates or for high-performance driving.
5. Boiling Point:
· Guideline: Assess the boiling point of the brake fluid, as it indicates the fluid's resistance to vaporization under heat.
· Reason: Higher boiling points are desirable for heavy-duty and high-performance applications to prevent brake fade.
6. Hygroscopic Properties:
· Guideline: Understand the hygroscopic nature of brake fluids, indicating their ability to absorb moisture.
· Reason: Moisture absorption can impact the boiling point and lead to corrosion, making it important to choose a fluid suitable for the vehicle's environment.
7. Compatibility:
· Guideline: Consider the compatibility of different brake fluid types when topping off or replacing fluid.
· Reason: Mixing incompatible fluids can lead to system damage and reduced braking performance.
8. System Flush Requirements:
· Guideline: Note whether a complete system flush is required when changing brake fluid types.
· Reason: Some brake fluids, like DOT 5, may require a thorough system flush due to their incompatibility with other types.
9. Cost Considerations:
· Guideline: Evaluate the cost of different brake fluids.
· Reason: While cost is a factor, it should be balanced with meeting the performance and compatibility requirements of the vehicle.
10. Regulatory Compliance (DOT Standards):
Guideline: Ensure that the selected brake fluid complies with relevant Department of Transportation (DOT) standards (e.g., DOT 3, DOT 4, DOT 5, DOT 5.1).
Reason: Compliance ensures that the brake fluid meets specific safety and performance standards.
By carefully considering these factors and consulting the vehicle's documentation, mechanics, or manufacturers, one can make an informed decision on the most suitable brake fluid for a specific vehicle and its intended use. Regular maintenance, including monitoring the fluid condition and adhering to recommended replacement intervals, further contributes to the overall safety and performance of the braking system.
Design considerations for brake fluid selection depend on the type of braking system and the specific characteristics of each brake fluid. Here are design considerations for each type of brake fluid—DOT 3, DOT 4, DOT 5, and DOT 5.1:
DOT 3 Brake Fluid:
1. Boiling Point:
· Design Consideration: Moderate boiling point suitable for standard driving conditions.
· Application: Everyday driving in vehicles with standard braking demands.
2. Hygroscopic Nature:
· Design Consideration: Has hygroscopic properties.
· Application: Regular maintenance to prevent moisture absorption and boiling point reduction.
DOT 4 Brake Fluid:
1. Higher Boiling Point:
· Design Consideration: Higher boiling point compared to DOT 3.
· Application: Versatile use in various vehicles, including those with disc and drum brake systems.
2. Compatibility:
· Design Consideration: Compatible with DOT 3 and DOT 5.1.
· Application: Suitable for a broad range of vehicles, providing flexibility in brake system design.
DOT 5 Brake Fluid:
1. Silicone-Based Composition:
· Design Consideration: Silicone-based, non-hygroscopic.
· Application: Commonly used in custom or high-performance vehicles.
2. Incompatibility:
· Design Consideration: Does not mix with glycol-ether-based fluids.
· Application: Requires a complete system flush when transitioning to DOT 5.
DOT 5.1 Brake Fluid:
1. Glycol-Ether Based:
· Design Consideration: Similar to DOT 5 but glycol-ether-based.
· Application: Suitable for high-performance and heavy-duty braking systems.
2. Compatibility:
· Design Consideration: Mixes well with DOT 3 and DOT 4.
· Application: Provides enhanced performance in a variety of braking systems.
General Considerations for All Types:
1. Temperature Stability:
· Design Consideration: Brake fluid must maintain stability at high temperatures.
· Application: Critical for preventing brake fade under heavy braking.
2. Corrosion Resistance:
· Design Consideration: Resistance to corrosion for longevity of brake components.
· Application: Protects brake system parts from damage.
3. Seal and Gasket Compatibility:
· Design Consideration: Compatible with materials used in brake system seals and gaskets.
· Application: Ensures the integrity of the braking system over time.
4. Regulatory Compliance:
· Design Consideration: Complies with DOT standards.
· Application: Meets safety and performance regulations.
5. Moisture Absorption:
· Design Consideration: Hygroscopic nature and moisture resistance.
· Application: Prevents water absorption to maintain boiling point stability.
6. System Flush Requirements:
· Design Consideration: Consideration of system flush requirements when changing fluid types.
· Application: Important for maintaining the integrity of the brake system during fluid transitions.
The design considerations for brake fluid selection involve a careful balance between the specific characteristics of each type and the requirements of the vehicle's braking system. Understanding the unique properties of DOT 3, DOT 4, DOT 5, and DOT 5.1 helps ensure optimal performance, safety, and longevity of the braking system.
Choosing the Right Fluid: Factors to Consider
1. Vehicle Manufacturer Recommendations: The North Star
· Guideline: Always follow the recommendations provided by the vehicle manufacturer.
2. Brake System Design: Tailoring to Specifics
· Guideline: Consider the type of braking system (disc, drum) installed in the vehicle.
3. Performance Requirements: Matching the Intensity
· Guideline: Evaluate the vehicle's performance demands, such as high-speed driving or heavy braking.
4. Climate and Driving Conditions: Taming the Elements
· Guideline: Consider the climate and driving conditions the vehicle regularly encounters.
5. Boiling Point: Defying Heat Stress
· Guideline: Assess the boiling point of the brake fluid concerning the vehicle's requirements.
6. Hygroscopic Properties: Battling Moisture Intrusion
· Guideline: Understand the fluid's hygroscopic nature and its impact on moisture absorption.
7. Compatibility: Harmonizing Fluids
· Guideline: Ensure compatibility with the existing brake fluid or during transitions.
8. System Flush Requirements: Seamless Transitions
· Guideline: Be mindful of system flush requirements when changing brake fluid types.
The Fluid Link Between Safety and Performance
As we navigate the intricate landscape of brake fluids, it becomes evident that their role extends beyond mere fluid dynamics. Brake fluids are the unsung heroes that ensure our journeys are not only smooth but, more importantly, safe. Choosing the right brake fluid involves a meticulous understanding of your vehicle's needs and adhering to manufacturer recommendations. So, the next time you press that brake pedal, remember the hydraulic sentinel working diligently to keep you in control, bringing you to a halt with precision and grace.
Brake fluids are not just hydraulic solutions; they are the fluid link between safety and performance on the road. Understanding the types, applications, and considerations of brake fluids empowers every driver to make informed choices, ensuring their vehicle responds with precision and reliability when it matters most. So, the next time you press the brake pedal, appreciate the hydraulic sentinel working diligently to keep you in control and bring you to a halt with grace.
#BrakeFluids
#VehicleSafety #HydraulicEngineering #BrakeSystem #AutomotiveSafety
#PerformanceDriving #CarMaintenance #FluidDynamics #RoadSafety #AutoTech
#SmoothStops #EngineeringExplained #goodOldBandit #GudOlBandit #SanjayMohindroo
Mastering the Art of Middleweight Sports Adventure Touring Bike Setup: A Comprehensive Guide

Embarking on an adventure touring journey requires more than just a bike; it demands a thoughtful and meticulous setup. In this comprehensive guide, we delve into the essential and optional components, providing a step-by-step process to transform your middleweight sports adventure touring bike into the ultimate riding companion.
Discover the secrets to crafting the perfect middleweight sports adventure touring bike setup. From essential gear to optional enhancements, follow our step-by-step guide to optimize performance, comfort, and versatility for your next epic adventure.
Crafting the Ultimate Middleweight Sports Adventure Touring Bike Setup: A Comprehensive Guide
Setting up a middleweight sports adventure touring bike is an art that requires a meticulous approach to ensure an optimal blend of performance, comfort, and versatility across diverse terrains. In this comprehensive guide, we will walk you through the essential and optional equipment, as well as the step-by-step process to transform your bike into the ultimate adventure companion.
Essential Equipment for Your Adventure:
1. Choosing the Right Bike: The foundation of your adventure lies in selecting a middleweight sports touring bike that aligns with your riding style. Popular options like the Yamaha Tracer 900, Kawasaki Versys 650, and Honda NC750X offer a perfect balance of power, handling, and comfort.
2. Safety First - Helmet and Protective Gear: Invest in a high-quality helmet that meets safety standards and protective gear made from abrasion-resistant materials. Your safety is paramount, and the right gear can make a significant difference in case of unexpected situations.
3. Luggage System: Consider your luggage capacity needs and choose a secure and accessible system. Whether it's hard panniers, soft saddlebags, or a combination of both, a well-thought-out luggage setup is essential for long-distance touring.
4. Tools and First Aid: Equip yourself with a basic toolkit for roadside repairs and a first aid kit for minor injuries. Being prepared ensures you can handle unexpected challenges during your adventures.
Optional Enhancements for Ultimate Versatility:
1. Navigation and Communication: Invest in a reliable GPS device or smartphone app for navigation. A communication system, such as a Bluetooth headset, adds convenience and safety, allowing hands-free communication with riding companions.
2. Performance and Comfort Upgrades: Enhance your bike's handling and performance with optional upgrades like exhaust modifications, suspension enhancements, and performance tires. Comfort accessories, such as heated grips and seats, can make long rides more enjoyable.
3. Camping Gear: For those planning to camp during their adventure, pack lightweight and compact camping gear, including a tent, sleeping bag, sleeping pad, and cooking equipment.
Step-by-Step Guide to Setting Up Your Bike:
1. Choose the Right Bike: Consider factors like ergonomics, engine power, and handling characteristics. Your bike's suitability to your preferences and intended adventures is crucial.
2. Frame and Suspension: Invest in a sturdy touring frame that accommodates luggage racks. Customize your suspension settings for a comfortable ride on various terrains, including both on and off-road.
3. Tires and Luggage Solutions: Select dual-sport or adventure touring tires for optimal grip. Install durable pannier racks and a top case, ensuring they are securely attached and waterproof.
4. Comfort and Protection: Upgrade your bike's seat for comfort during long rides. Install an adjustable windscreen to combat wind fatigue and engine guards for off-road protection.
5. Auxiliary Lighting and Navigation: Enhance visibility with auxiliary lighting, and equip your bike with a motorcycle-specific GPS navigation system for confident exploration.
6. Communication System and Tool Kit: Install a helmet communication system for convenience and safety. Carry a compact tool kit and spare parts for on-the-road repairs.
7. Regular Maintenance: Establish a routine maintenance schedule to keep your bike in peak condition, ensuring a reliable performance during your adventures.
By carefully selecting essential and optional equipment and following a systematic approach to setting up your middleweight sports adventure touring bike, you can create a versatile and reliable machine capable of handling a wide range of riding conditions. Safe travels on your epic adventures!
Curating your bike's equipment and following a systematic approach to setup, you can ensure a seamless and enjoyable adventure touring experience. Whether it's enhancing safety, upgrading performance, or preparing for unexpected challenges, this guide has you covered. Get ready to explore the world with confidence on your perfectly configured middleweight sports adventure touring bike.
#AdventureTouring #MotorcycleSetup #TouringBikeGuide #RidingCompanion #MiddleweightAdventure #UltimateTouring #BikeOptimization #AdventureReady #MotorcycleAdventure #TouringSetup #GudOlBandit, #GoodOldBandit, #SanjayMohindroo, #Motorcycle
Harmony in Silence: The Tale of Spain's Wordless National Anthem
In the intricate dance of mechanics that propels your vehicle to a halt, brake rotors take centre stage. Often overshadowed by their more conspicuous counterparts like brake pads and callipers, these circular discs play a pivotal role in ensuring your safety on the road.
Explore the heart of your vehicle's braking system with our comprehensive guide to brake rotors. Uncover their types, functions, and maintenance tips, ensuring a smooth and safe ride every time you hit the road.
The disk brake rotor is a fundamental component within a vehicle's braking system, playing a crucial role in the process of slowing down or bringing the vehicle to a halt. It is an essential part of disc brakes, which are widely used in modern automotive applications.
The disk brake rotor is typically a flat, circular metal disc that is mounted directly to the wheel hub. When the brake pedal is pressed, hydraulic pressure is applied to the brake calliper, causing it to squeeze the brake pads against the rotor. This friction between the brake pads and the rotor generates the necessary force to decelerate the vehicle.
The design of the disk brake rotor is critical for effective braking performance. Most rotors have a vented or slotted structure, allowing for better heat dissipation and minimizing the risk of brake fade. Heat is generated during the braking process, and a well-vented rotor helps dissipate this heat efficiently, preventing overheating and maintaining braking effectiveness.
Additionally, the rotor's material composition is significant. Common materials include cast iron and composite materials. Cast iron rotors are known for their durability and cost-effectiveness, while composite rotors, often made of reinforced carbon–carbon or carbon ceramic matrix composites, offer advantages in terms of weight reduction and enhanced performance, particularly in high-performance or racing vehicles.
Regular inspection and maintenance of the disk brake rotor are crucial for ensuring optimal braking performance and safety. Factors such as thickness, wear patterns, and the presence of any cracks should be carefully monitored, and the rotor may need to be replaced if it falls below-specified tolerances.
The disk brake rotor is a vital component in the braking system, providing the surface against which the brake pads generate friction to slow down and stop a vehicle. Its design and materials contribute to overall braking efficiency, heat dissipation, and the longevity of the braking system. Regular maintenance and attention to the condition of the rotor are essential for safe and reliable vehicle operation.
Unveiling the Heart of Your Braking System: A Comprehensive Guide to Brake Rotors
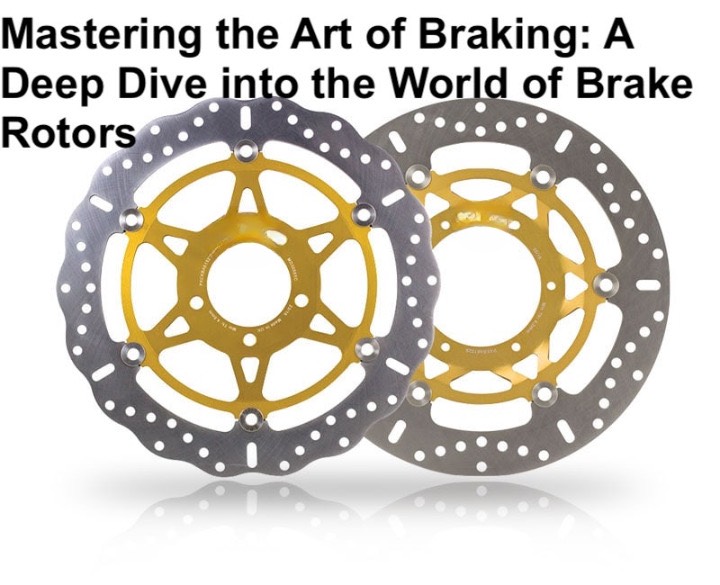
In the intricate dance of mechanics that propels your vehicle to a halt, brake rotors take centre stage. Often overshadowed by their more conspicuous counterparts like brake pads and callipers, these circular discs play a pivotal role in ensuring your safety on the road. In this comprehensive guide, we delve into the world of brake rotors, exploring their types, functions, maintenance, and the critical role they play in the symphony of your vehicle's braking system.
I. The Anatomy of Brake Rotors: Understanding the Basics
At first glance, brake rotors might seem like simple metal discs, but their design and construction are far from elementary. Typically made from cast iron or composite materials, brake rotors come in various configurations, each tailored to specific performance and durability requirements. The primary types include vented, drilled, slotted, and a combination of drilled and slotted rotors.
· Vented Brake Rotors: Known for their heat-dissipating prowess, vented rotors feature channels or fins that facilitate efficient cooling during braking. This design is often favoured in high-performance and heavy-duty applications.
· Drilled Brake Rotors: Characterized by strategically placed holes, drilled rotors offer weight reduction and can enhance the aesthetic appeal of your vehicle. However, they require careful consideration to prevent cracking under heavy use.
· Slotted Brake Rotors: Equipped with grooves on the surface, slotted rotors aid in heat dissipation and maintain a cleaner surface for brake pads, reducing the risk of uneven wear.
· Drilled and Slotted Brake Rotors: Combining the benefits of both drilling and slotting, these rotors provide a balanced solution for improved performance, heat dissipation, and debris removal.
II. The Crucial Role of Brake Rotors in the Braking Process
Brake rotors serve as the canvas upon which the friction material of brake pads creates the resistance necessary to decelerate your vehicle. When you press the brake pedal, hydraulic pressure activates the brake calliper, causing it to clamp down on the rotor. This friction generates heat, which is then dissipated by the rotor, preventing overheating and maintaining effective braking.
III. Choosing the Right Brake Rotors for Your Vehicle
Selecting the appropriate type of brake rotor is a decision that should align with your driving habits, vehicle type, and performance expectations. Vented rotors are suitable for high-performance applications, while drilled and slotted rotors offer a balanced solution. For everyday driving, solid rotors provide a cost-effective and reliable option.
IV. Maintaining Your Brake Rotors: A Recipe for Longevity
Ensuring the health and longevity of your brake rotors requires diligent maintenance. Regular visual inspections, measuring rotor thickness, and addressing issues promptly can prevent complications and preserve optimal braking performance. Additionally, proper bedding of brake pads, avoiding overheating, and using suitable brake fluid contribute to the overall well-being of your braking system.
Maintaining disk rotors is crucial for ensuring optimal braking performance, safety, and longevity of your vehicle's braking system. Here are essential steps to help you maintain disk rotors:
1. Regular Inspection:
· Visual Inspection: Regularly inspect the brake rotors for signs of wear, scoring, or damage. Look for deep grooves, cracks, or uneven wear patterns.
· Thickness Measurement: Measure the rotor thickness using a micrometre. Compare the measurements to the manufacturer's specifications. Replace the rotors if they fall below the recommended minimum thickness.
2. Brake Pad Inspection:
· Inspect the brake pads for even wear. Uneven wear could indicate issues with the calliper or other brake components.
· Ensure that the brake pads have sufficient material remaining. Replace them if they are worn beyond the recommended thickness.
3. Brake Fluid Maintenance:
· Regularly check the brake fluid level in the master cylinder reservoir.
· Follow the manufacturer's recommendations for brake fluid replacement intervals. Contaminated or old brake fluid can affect brake performance.
4. Avoiding Overheating:
· Avoid prolonged heavy braking, as it can lead to rotor overheating and warping.
· If you experience a sudden decrease in braking performance, allow the brakes to cool before resuming normal driving.
5. Minimize Corrosion:
· Apply an anti-corrosion lubricant to the rotor hat and edges during brake pad replacement to minimize corrosion.
· Clean the rotor surfaces during routine maintenance to remove debris and brake dust.
6. Proper Bedding of Brake Pads:
· Follow the manufacturer's recommendations for bedding in new brake pads. Proper bedding ensures optimal contact between the pads and rotors.
7. Avoiding Hard Stops:
· Minimize sudden or hard stops whenever possible. Gradual braking helps to prevent excessive heat buildup.
8. Maintain Suspension and Steering Components:
· Ensure that suspension and steering components are in good condition. Vibrations or irregularities in these systems can contribute to rotor wear.
9. Timely Replacement:
· Replace brake rotors as part of the recommended brake system maintenance schedule.
· If you notice signs of severe wear or damage, or if the rotors are beyond the specified thickness, replace them promptly.
10. Professional Inspection:
· If you are uncertain about the condition of your brake rotors or if you experience any brake-related issues, consult a qualified mechanic for a professional inspection.
Remember that regular maintenance is key to preserving the effectiveness of your braking system and ensuring the safety of your vehicle. Following these guidelines and addressing issues promptly will contribute to the longevity and reliability of your disk rotors.
There are several types of brake rotors, each designed to cater to specific performance, durability, and cost considerations. The two primary categories are:
- Vented (or Slotted) Brake Rotors:
- Description: Vented brake rotors have channels, or slots, on the surface that aid in heat dissipation and gas release. These channels help prevent brake fade by allowing gases that build up during braking to escape, maintaining a consistent contact surface for the brake pads.
- Benefits: Improved heat dissipation, reduced risk of brake fade, and better wet-weather performance.
- Applications: Commonly used in high-performance and heavy-duty vehicles.
- Drilled Brake Rotors:
- Description: Drilled brake rotors have holes drilled through the surface. While they also contribute to heat dissipation, their primary purpose is to reduce rotor weight and enhance the rotor's aesthetic appeal.
- Benefits: Weight reduction, improved heat dissipation, and a distinctive appearance.
- Considerations: Drilled rotors are more prone to cracking under heavy use, so they are often used in conjunction with other cooling mechanisms in high-performance or racing applications.
- Slotted Brake Rotors:
- Description: Slotted brake rotors have grooves or slots on the rotor surface, similar to vented rotors. These slots aid in heat dissipation and also help maintain a clean brake pad surface by scraping away debris and water.
- Benefits: Improved heat dissipation, reduced brake fade, and better performance in wet conditions.
- Applications: Used in various vehicle types, including those driven in diverse weather conditions.
- Drilled and Slotted Brake Rotors:
- Description: Combining both drilled holes and slots, these rotors aim to provide the benefits of both designs—weight reduction, enhanced heat dissipation, and improved brake pad cleaning.
- Benefits: A balance of weight reduction, heat dissipation, and debris removal.
- Applications: Often found in high-performance and sport-oriented vehicles.
- Solid Brake Rotors:
- Description: Solid brake rotors have a simple, unvented, and unslotted design. They are a basic and cost-effective option, commonly used in everyday vehicles for standard driving conditions.
- Benefits: Cost-effective, suitable for standard driving conditions.
- Applications: Standard passenger vehicles, where high-performance braking is not a primary concern.
It's important to note that the choice of brake rotor type depends on various factors, including the vehicle's intended use, driving conditions, and the driver's preferences. Regular inspection and maintenance are essential, regardless of the rotor type, to ensure optimal braking performance and safety.
Let's delve deeper into each type of brake rotor, exploring their characteristics, advantages, and disadvantages:
- Vented (or Slotted) Brake Rotors:
· Description: Vented rotors have channels or slots on the surface, aiding in heat dissipation and gas release during braking.
· Advantages:
· Improved Heat Dissipation: The vented design facilitates efficient heat dissipation, reducing the risk of brake fades.
· Better Wet-Weather Performance: Slots help disperse water, enhancing braking performance in wet conditions.
· Disadvantages:
· Potential for Cracking: Intense use, especially in high-performance situations, can lead to rotor cracking.
· Noise: Some vented rotors may produce noise during braking.
- Drilled Brake Rotors:
- Description: Drilled rotors have holes drilled through the surface to reduce weight and enhance aesthetics.
- Advantages:
· Weight Reduction: Drilled rotors are lighter, contributing to improved overall vehicle performance.
· Aesthetic Appeal: The drilled pattern can add a sporty or high-performance look.
- Disadvantages:
· Increased Risk of Cracking: Drilling may weaken the rotor, increasing the risk of cracking under heavy use.
· Limited Heat Dissipation: Drilled rotors may not dissipate heat as effectively as vented rotors.
- Slotted Brake Rotors:
- Description: Slotted rotors have grooves on the surface for heat dissipation and to maintain a clean brake pad surface.
- Advantages:
- Improved Heat Dissipation: Slots aid in heat dissipation, reducing the likelihood of brake fade.
- Debris Removal: Slots help remove debris and gases from the brake pad surface, ensuring consistent performance.
- Disadvantages:
- Noise: Similar to vented rotors, slotted rotors may produce noise during braking.
- Increased Pad Wear: The slots can contribute to faster brake pad wear.
- Drilled and Slotted Brake Rotors:
- Description: Combining both drilled holes and slots, these rotors aim to provide a balance of weight reduction, heat dissipation, and debris removal.
- Advantages:
- Balanced Performance: Offers a combination of weight reduction, improved heat dissipation, and effective debris removal.
- Aesthetic Appeal: Provides a sporty appearance with both drilled and slotted features.
- Disadvantages:
- Similar to the individual disadvantages of drilled and slotted rotors.
- Solid Brake Rotors:
- Description: Solid rotors have a simple, unvented, and unslotted design.
- Advantages:
- Cost-Effective: Solid rotors are generally more affordable than their vented or slotted counterparts.
- Adequate for Standard Driving: Suitable for standard driving conditions where high-performance braking is not a primary concern.
- Disadvantages:
- Reduced Heat Dissipation: Solid rotors may not dissipate heat as effectively, leading to a higher risk of brake fade.
- Limited Performance: Less suitable for high-performance or heavy-duty applications.
The choice of brake rotor type depends on factors such as the vehicle's use, driving conditions, and personal preferences. Regular inspection and maintenance are crucial to address any issues promptly and ensure optimal braking performance and safety.
Let's compare the different types of brake rotors based on various factors, including performance, durability, cost, and suitability for different driving conditions:
1. Vented (or Slotted) Brake Rotors:
· Performance:
· Advantages: Excellent heat dissipation, reduced risk of brake fades, better wet-weather performance.
· Disadvantages: Potential for cracking under intense use, may produce noise during braking.
· Durability:
· Durable but may be more prone to cracking than solid rotors.
· Cost:
· Generally more expensive than solid rotors.
· Suitability:
· Ideal for high-performance and heavy-duty applications.
2. Drilled Brake Rotors:
· Performance:
· Advantages: Weight reduction, aesthetic appeal.
· Disadvantages: Increased risk of cracking, may not dissipate heat as effectively as vented rotors.
· Durability:
· Prone to cracking under heavy use.
· Cost:
· Often more expensive than solid rotors.
· Suitability:
· Suitable for performance-oriented and aesthetic-driven applications.
3. Slotted Brake Rotors:
· Performance:
· Advantages: Improved heat dissipation, and effective debris removal.
· Disadvantages: May produce noise during braking, and increased pad wear.
· Durability:
· Durable but may contribute to faster pad wear.
· Cost:
· Generally more expensive than solid rotors.
· Suitability:
· Suitable for various driving conditions, including those with debris and wet conditions.
4. Drilled and Slotted Brake Rotors:
· Performance:
· Advantages: Balanced performance with weight reduction, improved heat dissipation, effective debris removal, and aesthetic appeal.
· Disadvantages: Similar to the individual disadvantages of drilled and slotted rotors.
· Durability:
· Combines the durability characteristics of both drilled and slotted rotors.
· Cost:
· Typically more expensive than solid rotors.
· Suitability:
· Suitable for high-performance and sport-oriented vehicles.
5. Solid Brake Rotors:
· Performance:
· Advantages: Cost-effective, suitable for standard driving conditions.
· Disadvantages: Reduced heat dissipation, limited performance.
· Durability:
· Generally durable for standard driving conditions.
· Cost:
· Typically the most affordable option.
· Suitability:
· Suitable for everyday driving where high-performance braking is not a primary concern.
The choice of brake rotor type depends on the intended use of the vehicle, driving conditions, performance requirements, and personal preferences. While vented and slotted rotors excel in high-performance scenarios, drilled rotors offer weight reduction and aesthetic appeal. Drilled and slotted rotors provide a balanced approach, and solid rotors are a cost-effective option for standard driving conditions. Regular maintenance and consideration of the specific advantages and disadvantages will help ensure optimal braking performance and safety.
Choosing the right type of brake rotor for your vehicle involves considering various factors related to your driving habits, the vehicle's use, and your performance expectations. Here's a guide to help you make an informed decision:
1. Driving Conditions:
· High-Performance Driving: If you engage in aggressive or high-performance driving, such as spirited driving or track days, consider vented or slotted brake rotors. They offer enhanced heat dissipation, reducing the risk of brake fade.
· Everyday Driving: For standard commuting and everyday driving, solid brake rotors may be sufficient and cost-effective.
2. Climate:
· Wet Conditions: Slotted rotors can be beneficial in wet conditions as they help disperse water from the braking surface, improving performance.
· Dry Conditions: In dry conditions, various types, including vented, slotted, or drilled and slotted rotors, can be suitable.
3. Vehicle Type:
· High-Performance Vehicles: If you drive a sports car or a vehicle with a high-performance focus, consider drilled or slotted rotors, or a combination of both.
· SUVs/Trucks: For heavier vehicles or those used for towing, vented rotors may provide better heat dissipation.
4. Personal Preferences:
· Aesthetic Appeal: If the appearance of your vehicle's brakes is important to you, drilled or slotted rotors can provide a sporty or performance-oriented look.
· Minimal Maintenance: Solid rotors generally require less maintenance and are suitable for those who prioritize simplicity.
5. Budget:
· Cost Considerations: Solid rotors are usually the most cost-effective option, while drilled and slotted rotors are typically more expensive. Consider your budget and the value you place on enhanced performance features.
6. Maintenance Requirements:
· Ease of Maintenance: Solid rotors generally have simpler maintenance requirements. Drilled and slotted rotors may require more attention to prevent issues such as cracking.
7. Manufacturer Recommendations:
· Consult Your Vehicle Manual: Check your vehicle's manual for any specific recommendations regarding brake rotor types. Some manufacturers guide the ideal type for your vehicle model.
8. Driving Habits:
· Aggressive Driving: If you frequently engage in aggressive driving, such as heavy braking or frequent stops, consider rotors that offer better heat dissipation, such as vented or slotted.
Remember that a combination of factors may influence your decision. It's essential to strike a balance between your driving needs, preferences, and budget. If you're unsure, seeking advice from a trusted mechanic or consulting with the vehicle manufacturer can help you make an informed decision tailored to your specific vehicle and driving conditions. Regular maintenance and timely replacement are also crucial to ensure the continued effectiveness of your chosen brake rotor type.
The choice of brake rotor type for different vehicle categories depends on various factors, including driving habits, performance expectations, and the vehicle's intended use. Here are general recommendations for each vehicle category:
1. Passenger Vehicles:
· Recommended Rotor Type: Solid Brake Rotors
· Reasoning: For everyday commuting and standard driving conditions, solid brake rotors are cost-effective and provide sufficient braking performance.
2. Performance Vehicles:
· Recommended Rotor Types: Drilled, Slotted, or Drilled and Slotted Brake Rotors
· Reasoning: Performance vehicles benefit from the enhanced heat dissipation and reduced brake fade offered by drilled or slotted rotors. A combination of drilled and slotted rotors can provide a balanced performance.
3. Motorcycles/2-Wheelers:
· Recommended Rotor Type: Solid Brake Rotors
· Reasoning: Solid rotors are commonly used in motorcycle applications due to their simplicity, durability, and effectiveness for the demands of two-wheeled vehicles.
4. Heavy-Duty Vehicles (e.g., Commercial Trucks):
· Recommended Rotor Types: Vented Brake Rotors
· Reasoning: Vented rotors provide better heat dissipation, making them suitable for heavy-duty applications where braking loads are substantial.
5. SUVs:
· Recommended Rotor Types: Vented Brake Rotors
· Reasoning: SUVs are generally heavier than passenger cars, and vented rotors can handle the increased braking demands and provide effective heat dissipation.
6. Trucks:
· Recommended Rotor Types: Vented Brake Rotors
· Reasoning: Trucks, especially those used for towing or carrying heavy loads, benefit from vented rotors to manage the additional heat generated during braking.
It's important to note that these recommendations are general guidelines, and there can be variations based on specific vehicle models and manufacturer recommendations. Additionally, personal preferences, such as a desire for a sportier appearance, can influence the choice of brake rotors.
Before making a decision, always consult your vehicle's manual for any manufacturer recommendations. If you're considering an upgrade or replacement, consult with a qualified mechanic or brake specialist to ensure that the chosen brake rotor type is compatible with your vehicle and meets your performance expectations. Regular maintenance and timely replacement are essential to ensure optimal braking performance and safety.
Selecting the right type of brake pads to complement your brake rotors is crucial for achieving optimal braking performance. The choice depends on factors such as your driving style, vehicle type, and rotor material. Here are general recommendations for the best types of brake pads for different brake rotor materials:
1. Cast Iron Rotors:
· Recommended Brake Pads: Non-metallic (Organic) or Semi-Metallic Brake Pads
· Reasoning:
· Non-metallic Brake Pads: Provide smooth and quiet braking. Suitable for everyday driving conditions.
· Semi-Metallic Brake Pads: Offer better heat dissipation and are suitable for a variety of driving conditions, making them a common choice for cast iron rotors.
2. Composite or Ceramic Rotors:
· Recommended Brake Pads: Low-metallic or Ceramic Brake Pads
· Reasoning:
· Low-Metallic Brake Pads: Provide good heat dissipation and friction. Suitable for composite rotors in high-performance or heavy-duty applications.
· Ceramic Brake Pads: Offer excellent heat resistance, low noise, and minimal dusting. Ideal for high-performance and luxury vehicles equipped with composite or ceramic rotors.
3. Drilled or Slotted Rotors:
· Recommended Brake Pads: Semi-Metallic or Ceramic Brake Pads
· Reasoning:
· Semi-Metallic Brake Pads: Provide effective braking and heat dissipation, suitable for drilled or slotted rotors in various driving conditions.
· Ceramic Brake Pads: Offer low noise, reduced dusting, and consistent performance, making them a good match for drilled or slotted rotors.
4. Vented Rotors:
· Recommended Brake Pads: Semi-Metallic or Ceramic Brake Pads
· Reasoning:
· Semi-Metallic Brake Pads: Effective in dissipating heat, making them suitable for vented rotors in high-performance or heavy-duty applications.
· Ceramic Brake Pads: Provide excellent heat resistance and low noise, making them a good choice for vented rotors.
5. Drilled and Slotted Rotors:
· Recommended Brake Pads: Low-metallic or Ceramic Brake Pads
· Reasoning:
· Low-Metallic Brake Pads: Offer good heat dissipation and friction, suitable for the demands of drilled and slotted rotors.
· Ceramic Brake Pads: Provide consistent performance, reduced noise, and minimal dusting, complementing the characteristics of drilled and slotted rotors.
Remember that these recommendations are general guidelines, and variations can exist based on specific brake pads and rotor materials, as well as individual preferences. Always follow the manufacturer's recommendations for your specific vehicle, and consider factors such as driving conditions, maintenance requirements, and your preferences when selecting brake pads. Regular inspection and maintenance of both brake pads and rotors are essential for optimal braking performance and safety.
In the intricate choreography of your vehicle's braking system, brake rotors take on the role of unsung heroes, silently ensuring your safety and the smooth operation of your vehicle. By understanding the nuances of brake rotor types, their functions, and the importance of proper maintenance, you empower yourself to make informed decisions that contribute to a reliable and efficient braking system. As you navigate the roads, let this guide serve as a reminder of the crucial role played by these unassuming discs beneath your wheels.
In the choreography of your vehicle's braking system, brake rotors take on the role of unsung heroes, silently ensuring your safety and the smooth operation of your vehicle.
#BrakeRotors #SafeDriving #CarMaintenance #BrakingSystem #VehicleSafety #AutoTech #PerformanceDriving #RoadSafety #DIYAuto #CarCareTips
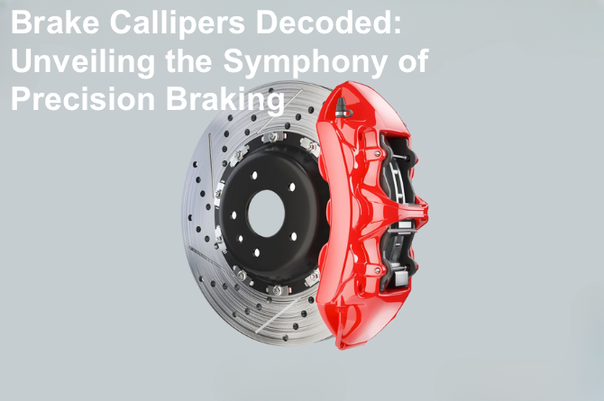
Brake Callipers Decoded: Unveiling the Symphony of Precision Braking
In the intricate realm of automotive engineering, brake calipers stand as the unsung heroes orchestrating the art of bringing your vehicle to a precise halt. Join us on a journey as we unravel the complexities of these vital components, exploring their types, functions, and the critical role they play in the harmony of a well-tuned braking system.
Discover the inner workings of brake calipers, from floating to fixed and opposed piston designs. Explore how these unsung heroes contribute to your vehicle's safety and performance in our comprehensive guide to mastering the art of precision braking.
The brake caliper is a fundamental component in the braking system of an automotive vehicle, playing a crucial role in ensuring effective and controlled deceleration. This device is positioned around the brake rotor and is a key player in converting hydraulic pressure into mechanical force, facilitating the friction required to slow down or halt the vehicle.
Constructed from durable materials such as cast iron or aluminum alloy, the brake caliper houses the brake pads and is responsible for squeezing them against the rotating brake rotor. This action generates the necessary friction to bring the vehicle to a stop. The caliper is an integral part of the disc brake system, commonly employed in modern automobiles for its superior braking performance and heat dissipation capabilities.
There are two main types of brake calipers: floating and fixed. Floating calipers move laterally on guide pins, ensuring even pressure distribution on both sides of the rotor. Fixed calipers, on the other hand, remain stationary and apply pressure equally from both sides.
In addition to their functional significance, brake calipers are often designed with aesthetics in mind. Many high-performance and luxury vehicles feature visually distinctive calipers, often painted in vibrant colors or adorned with branding, contributing to the overall visual appeal of the vehicle.
Regular maintenance and inspection of the brake calipers are essential to ensure optimal braking performance and overall safety. Any signs of wear, leakage, or malfunction should be promptly addressed to uphold the reliability and effectiveness of the braking system. In conclusion, the brake caliper stands as a vital component, seamlessly blending functionality with design to deliver a paramount aspect of automotive safety and performance.
Mastering the Art of Braking: Unveiling the Power of Brake Calipers
In the intricate dance of automotive engineering, few components are as critical to safety and performance as brake calipers. These unsung heroes play a pivotal role in converting hydraulic pressure into the mechanical force required to bring your vehicle to a halt. In this blog post, we will unravel the mysteries of brake calipers, exploring their types, functions, and the crucial role they play in the symphony of a well-tuned braking system.
The Anatomy of Brake Calipers:
Brake calipers are mechanical marvels, positioned strategically around the brake rotor and tasked with a singular mission: slowing down your vehicle safely and efficiently. There are several types of brake calipers, each designed to meet specific performance needs:
1. Floating Calipers:
· Characterized by their simplicity, floating calipers have one or two pistons on one side of the rotor. They can move laterally on guide pins, ensuring even pressure distribution on both sides of the rotor.
2. Fixed Calipers:
· Stationary in nature, fixed calipers boast pistons on both sides of the rotor. This design provides consistent and even pressure distribution, making them popular in high-performance and luxury vehicles.
3. Opposed Piston Calipers:
· Featuring pairs of pistons facing each other, opposed piston calipers offer efficient force distribution, contributing to enhanced braking performance. They are often found in high-performance sports cars.
4. Floating Calipers with Pins:
· A hybrid design that combines the simplicity of floating calipers with sliding pins for improved movement. This type strikes a balance between performance and cost.
Brake calipers come in different types, each with its own design and functionality. The two primary types are floating calipers and fixed calipers. Here, we delve into the characteristics of each:
1. Floating Calipers:
· Design: Floating calipers have a single piston (or sometimes dual pistons) on one side of the rotor.
· Movement: The caliper can move laterally on guide pins, allowing it to adjust to variations in rotor thickness and promoting even pressure distribution on both sides of the rotor.
· Functionality: When hydraulic pressure is applied, the piston(s) push the inboard brake pad against the rotor, causing the caliper to slide and apply pressure to the outboard pad as well.
2. Fixed Calipers:
· Design: Fixed calipers have pistons on both sides of the rotor and are mounted rigidly to the vehicle's spindle or knuckle.
· Stationary: Unlike floating calipers, fixed calipers do not move laterally; they remain stationary during braking.
· Functionality: When hydraulic pressure is applied, pistons on both sides simultaneously push the brake pads against the rotor, providing consistent and even pressure distribution. This design often results in enhanced braking performance.
3. Opposed Piston Calipers:
· Design: This type of caliper has pistons on both sides of the rotor, but the pistons are arranged in pairs facing each other.
· Efficiency: Opposed piston calipers are known for their efficiency in distributing force evenly across the brake pads, leading to improved braking performance and heat dissipation.
4. Floating Calipers with Pins:
· Design: Similar to traditional floating calipers, but they incorporate sliding pins that allow for the lateral movement of the caliper.
· Advantage: The addition of sliding pins helps ensure smooth and consistent movement of the caliper during braking, promoting even pad wear and performance.
The choice between floating and fixed calipers often depends on the specific requirements of the vehicle and the desired balance between performance, cost, and complexity. Brake systems in high-performance or luxury vehicles may feature advanced caliper designs to optimize braking efficiency and provide a visually distinctive appearance. Regular inspection and maintenance of brake calipers are crucial to ensure their proper functioning and contribute to overall vehicle safety.
Let's delve into more detail about each type of brake caliper:
1. Floating Calipers:
· Design: Floating calipers, also known as sliding calipers, typically have a single piston (though some may have dual pistons) located on one side of the rotor. The caliper is designed to move laterally on guide pins.
· Movement: The ability to slide or float allows the caliper to self-adjust to variations in rotor thickness. This self-adjustment is essential for even wear on the brake pads and even pressure distribution on both sides of the rotor.
· Functionality: When the driver applies the brakes, hydraulic pressure forces the piston to push the inboard brake pad against the rotor. As the caliper slides, it also applies pressure to the outboard pad, generating friction for braking.
2. Fixed Calipers:
· Design: Fixed calipers have pistons on both sides of the rotor, and the caliper is rigidly mounted to the vehicle's spindle or knuckle.
· Stationary: Unlike floating calipers, fixed calipers do not move laterally during braking. They remain stationary in their mounted position.
· Functionality: When hydraulic pressure is applied, the pistons on both sides of the rotor simultaneously push the brake pads against the rotor. The stationary nature of fixed calipers often results in more consistent and even pressure distribution, contributing to improved braking performance.
3. Opposed Piston Calipers:
· Design: Opposed piston calipers feature pairs of pistons facing each other on both sides of the rotor.
· Efficiency: The opposed piston design contributes to efficient force distribution. As hydraulic pressure is applied, the opposing pistons move simultaneously, ensuring even pressure on the brake pads. This design is known for enhancing braking performance and heat dissipation.
4. Floating Calipers with Pins:
· Design: This type of caliper is essentially a floating caliper, but it incorporates sliding pins as part of its design.
· Advantage: The addition of sliding pins enhances the smooth and consistent movement of the caliper during braking. This feature is particularly beneficial for maintaining even pad wear and optimizing braking performance.
Each type of caliper has its advantages and is chosen based on factors such as the vehicle's intended use, performance requirements, and cost considerations. High-performance and luxury vehicles often feature advanced caliper designs to achieve optimal braking efficiency, while standard commuter vehicles may use more cost-effective options that still meet safety and performance standards. Regular inspection and maintenance of brake calipers are crucial for ensuring their proper function and the overall safety of the vehicle.
Let's explore the advantages and disadvantages of each type of brake caliper:
1. Floating Calipers:
· Advantages:
· Cost: Floating calipers are often more cost-effective to manufacture and maintain, making them a common choice for standard vehicles.
· Weight: They tend to be lighter than fixed calipers, contributing to overall weight savings.
· Simplicity: The design is simpler, which can make maintenance and repair more straightforward.
· Disadvantages:
· Performance: In high-performance applications, floating calipers may exhibit slightly less consistent pressure distribution compared to fixed calipers.
2. Fixed Calipers:
· Advantages:
· Performance: Fixed calipers generally provide more consistent and even pressure distribution on both sides of the rotor, leading to enhanced braking performance.
· Heat Dissipation: The stationary design allows for better heat dissipation, making fixed calipers suitable for high-performance and heavy-duty applications.
· Aesthetics: Fixed calipers often offer a more visually appealing design and are favored in high-end and performance vehicles.
· Disadvantages:
· Cost: Fixed calipers can be more expensive to manufacture and maintain.
· Weight: They are typically heavier than floating calipers, potentially impacting overall vehicle weight.
3. Opposed Piston Calipers:
· Advantages:
· Efficiency: The opposed piston design contributes to efficient force distribution, enhancing braking performance.
· Compact Design: They often provide high braking performance in a more compact and lightweight package compared to some other designs.
· Disadvantages:
· Complexity: The design can be more complex and costly to manufacture and maintain.
4. Floating Calipers with Pins:
· Advantages:
· Smooth Movement: The addition of sliding pins improves the smooth and consistent movement of the caliper, contributing to even pad wear.
· Cost: While slightly more complex than traditional floating calipers, they are still relatively cost-effective.
· Disadvantages:
· Not as Advanced: Compared to fixed or opposed piston calipers, they may not provide the same level of braking performance, especially in high-performance applications.
The choice between these types of brake calipers often depends on the specific requirements of the vehicle, including factors such as intended use, performance goals, budget considerations, and aesthetic preferences. Manufacturers carefully select the type of caliper that aligns with the overall design and performance characteristics of the vehicle in question. Regular maintenance and consideration of these factors are crucial for optimizing the braking system's performance and ensuring the safety of the vehicle and its occupants.
The Dance of Functionality:
When the driver applies the brakes, hydraulic pressure engages the caliper's pistons, causing them to squeeze the brake pads against the rotating brake rotor. This friction generates the force needed to slow down or stop the vehicle. The choice of caliper type influences the braking system's overall performance, responsiveness, and heat dissipation.
Tailoring Calipers to Vehicle Types:
The selection of brake calipers is not a one-size-fits-all affair. Different vehicle types demand different caliper characteristics:
1. Passenger Vehicles:
· Floating calipers often suffice for standard commuting needs. Their cost-effectiveness and simplicity make them a common choice.
2. Performance Vehicles:
· Fixed or opposed piston calipers provide the precise and consistent pressure distribution required for high-performance driving.
3. SUVs and Trucks:
· Depending on the specific application, either floating calipers with pins or fixed calipers may be suitable, considering factors such as weight and towing capabilities.
4. Motorcycles:
· Cruisers and standard bikes may utilize floating calipers, while sport bikes often benefit from fixed or opposed piston calipers for enhanced braking during high-speed maneuvers.
Let's compare the different types of brake calipers based on several key factors:
· Performance:
· Floating Calipers:
· Pros: Suitable for standard driving conditions, cost-effective.
· Cons: May exhibit slightly less consistent pressure distribution compared to fixed calipers, potentially impacting high-performance applications.
· Fixed Calipers:
· Pros: Provide more consistent and even pressure distribution, leading to enhanced braking performance, especially in high-performance and heavy-duty applications.
· Cons: Can be more expensive and heavier.
· Opposed Piston Calipers:
· Pros: Efficient force distribution enhances braking performance, often in a more compact design.
· Cons: More complex and may be costlier.
· Floating Calipers with Pins:
· Pros: Improved smooth movement and even pad wear.
· Cons: May not provide the same level of braking performance as fixed or opposed piston calipers.
· Cost:
· Floating Calipers:
· Pros: Generally more cost-effective in terms of manufacturing and maintenance.
· Cons: Cost-effectiveness may come at the expense of some performance attributes.
· Fixed Calipers:
· Pros: Offer enhanced performance but can be more expensive to manufacture and maintain.
· Cons: Higher upfront cost.
· Opposed Piston Calipers:
· Pros: Efficient design, but may come with higher manufacturing and maintenance costs.
· Cons: More expensive.
· Floating Calipers with Pins:
· Pros: Relatively cost-effective, providing a balance between performance and affordability.
· Cons: Not as advanced or high-performing as some alternatives.
· Weight:
· Floating Calipers:
· Pros: Generally lighter, contributing to overall weight savings.
· Cons: May sacrifice some performance for weight savings.
· Fixed Calipers:
· Pros: Tend to be heavier due to their construction and materials.
· Cons: Increased weight may impact fuel efficiency.
· Opposed Piston Calipers:
· Pros: Can provide high performance in a more compact and lighter design.
· Cons: Weight may still be higher than floating calipers.
· Floating Calipers with Pins:
· Pros: Strikes a balance between weight and performance.
· Cons: Not as lightweight as some other options.
· Complexity:
· Floating Calipers:
· Pros: Simple design, easy to maintain.
· Cons: May lack some advanced features.
· Fixed Calipers:
· Pros: Often more complex in design.
· Cons: Greater complexity may require more specialized maintenance.
· Opposed Piston Calipers:
· Pros: Efficient design but can be more complex.
· Cons: Higher complexity may result in increased maintenance costs.
· Floating Calipers with Pins:
· Pros: Strikes a balance between complexity and simplicity.
· Cons: Not as advanced as some other designs.
The choice of brake caliper type depends on the specific requirements of the vehicle, including performance goals, budget constraints, and the intended use. While fixed calipers often offer superior performance, other types provide a balance between performance, cost, and complexity. Manufacturers carefully consider these factors to select the most suitable caliper type for a given vehicle model. Regular maintenance and considerations of performance needs are essential to ensure the optimal functioning and safety of the braking system.
The choice of brake caliper type for a vehicle depends on various factors, including the vehicle's intended use, performance requirements, and design considerations. Here's a general guideline for which type of caliper may be suited for different types of vehicles:
1. Floating Calipers:
· Suited for: Everyday commuter vehicles, compact cars, and vehicles with standard braking needs.
· Reasoning: Floating calipers are cost-effective, lighter, and have a simpler design, making them suitable for vehicles where high-performance braking is not a primary concern. They are commonly found in mainstream sedans and smaller cars.
2. Fixed Calipers:
· Suited for: High-performance cars, sports cars, luxury vehicles, and heavy-duty trucks.
· Reasoning: Fixed calipers provide more consistent pressure distribution, resulting in enhanced braking performance. They are often chosen for vehicles with higher power, increased speed, or heavier loads, where precise and efficient braking is critical.
3. Opposed Piston Calipers:
· Suited for: High-performance sports cars, racing vehicles, and some luxury cars.
· Reasoning: Opposed piston calipers offer efficient force distribution, contributing to improved braking performance. They are commonly used in performance-oriented and racing applications where precise and powerful braking is essential.
4. Floating Calipers with Pins:
· Suited for: Vehicles that seek a balance between performance and cost, such as mid-range sedans and crossover SUVs.
· Reasoning: This type of caliper combines some of the simplicity of floating calipers with the improved movement provided by sliding pins. They are suitable for vehicles that require better performance than basic floating calipers but may not demand the advanced features of fixed or opposed piston calipers.
It's essential to note that these are general guidelines, and the specific caliper choice can vary based on the manufacturer's engineering decisions, the vehicle's design philosophy, and the performance goals. Additionally, advancements in brake technology and materials may influence the suitability of different caliper types for various vehicles.
When purchasing a vehicle or considering a brake upgrade, it's advisable to refer to the manufacturer's specifications and recommendations. Vehicle manufacturers carefully choose brake components to align with the overall performance and safety characteristics of each model. If you have specific performance requirements or preferences, consulting with automotive experts or professional mechanics can help you make informed decisions tailored to your needs.
The choice of brake rotor is closely linked to the type of brake caliper and the intended use of the vehicle. Different types of brake rotors are designed to complement specific caliper designs and address various performance requirements. Here's a general guideline for the types of brake rotors that are best suited for each caliper type:
1. Floating Calipers:
· Suited Rotor: Solid or vented (slotted or drilled) rotors.
· Reasoning: Floating calipers are commonly found on everyday commuter vehicles with standard braking needs. Solid rotors are cost-effective and suitable for routine driving. Vented rotors, with internal cooling vanes, can help dissipate heat more efficiently, making them beneficial for vehicles that occasionally experience heavier braking, such as in stop-and-go traffic.
2. Fixed Calipers:
· Suited Rotor: Vented rotors (slotted or drilled) or composite rotors.
· Reasoning: Fixed calipers are often used in high-performance and luxury vehicles. Vented rotors enhance heat dissipation, making them suitable for spirited driving or situations where brakes are subjected to higher temperatures. Composite rotors, made from a combination of materials like carbon ceramic, provide even better heat resistance and are commonly found on high-performance and exotic vehicles.
3. Opposed Piston Calipers:
· Suited Rotor: Vented rotors (slotted or drilled) or composite rotors.
· Reasoning: Similar to fixed calipers, opposed piston calipers benefit from vented rotors that efficiently manage heat during aggressive driving. Composite rotors, with their superior heat resistance and lightweight construction, are often used in high-performance and racing applications.
4. Floating Calipers with Pins:
· Suited Rotor: Vented rotors (slotted or drilled).
· Reasoning: These calipers strike a balance between basic floating calipers and more advanced designs. Vented rotors are suitable for providing better heat dissipation during occasional heavy braking, making them suitable for mid-range sedans and crossover SUVs.
When selecting brake rotors, it's crucial to consider the manufacturer's specifications, driving habits, and environmental conditions. Additionally, factors such as slotted or drilled patterns on rotors can influence performance characteristics, providing benefits like improved cooling and gas evacuation. However, it's important to note that extreme patterns (excessive drilling or slotting) may compromise rotor strength.
Ultimately, for optimal brake performance and safety, it's recommended to follow the manufacturer's recommendations and choose a rotor type that complements the specific caliper design and the vehicle's intended use. Consulting with automotive professionals can provide valuable insights tailored to your vehicle and driving requirements.
The choice of brake calipers for different types of vehicles depends on factors such as the vehicle's weight, performance requirements, and intended use. Here's a general guideline for the best-suited caliper types for various vehicle categories:
1. Passenger Vehicles:
· Best Suited Caliper: Floating Calipers
· Reasoning: Floating calipers are well-suited for everyday commuter vehicles. They are cost-effective, lightweight, and provide satisfactory braking performance for routine driving conditions.
2. Performance Vehicles:
· Best Suited Caliper: Fixed Calipers or Opposed Piston Calipers
· Reasoning: Performance vehicles often benefit from fixed calipers or opposed piston calipers. These calipers offer more consistent pressure distribution, enhancing braking performance during spirited driving or high-speed situations.
3. SUVs:
· Best Suited Caliper: Floating Calipers with Pins or Fixed Calipers
· Reasoning: SUVs may use floating calipers with pins for a balance between cost and performance. Alternatively, some high-performance SUVs may feature fixed calipers for improved braking efficiency.
4. Heavy-Duty Vehicles and Trucks:
· Best Suited Caliper: Fixed Calipers
· Reasoning: Heavy-duty vehicles and trucks, especially those used for towing or carrying heavy loads, benefit from the consistent and reliable performance provided by fixed calipers. These calipers are designed to handle higher braking loads more effectively.
5. 2-Wheelers (Motorcycles):
· Best Suited Caliper: Depending on the type of motorcycle:
§ Cruisers and Standard Bikes: Floating Calipers
§ Sport Bikes: Fixed or Opposed Piston Calipers
· Reasoning: The choice for motorcycles depends on the specific type. Cruisers and standard bikes often use floating calipers, while sport bikes may employ fixed or opposed piston calipers for enhanced braking performance during high-speed maneuvers.
It's essential to note that advancements in brake technology continue to evolve, and specific vehicle models within each category may deviate from these general guidelines. Additionally, manufacturers may opt for unique caliper designs to achieve specific performance or aesthetic goals.
When considering brake upgrades or replacements, it's crucial to refer to the vehicle manufacturer's recommendations and specifications. Consulting with automotive professionals or experts can provide tailored advice based on the specific characteristics of your vehicle and your driving preferences.
Choosing the best caliper for your vehicle involves considering various factors related to your driving habits, the vehicle's specifications, and your performance expectations. Here's a step-by-step guide to help you make an informed decision:
1. Understand Your Driving Habits:
§ Consider your typical driving conditions and habits. Are you primarily driving in city traffic, engaging in spirited driving, or towing heavy loads? Your driving style and requirements will influence the type of caliper that suits your needs.
2. Know Your Vehicle's Specifications:
§ Refer to your vehicle's manual or consult the manufacturer's specifications to understand the type of caliper recommended for your make and model. The manufacturer's recommendations consider factors such as weight, performance, and intended use.
3. Identify the Caliper Types:
§ Familiarize yourself with the different types of calipers, including floating calipers, fixed calipers, and opposed piston calipers. Understand the characteristics and advantages of each type.
4. Consider Performance Needs:
§ If you have a high-performance or sports vehicle, you may benefit from fixed calipers or opposed piston calipers, which provide superior braking performance. For standard commuting, floating calipers may suffice.
5. Evaluate Budget Constraints:
§ Consider your budget for brake upgrades. While fixed and opposed piston calipers often offer better performance, they can be more expensive than floating calipers. Balance your performance needs with budget constraints.
6. Check Compatibility with Brake Pads:
§ Ensure that the chosen caliper type is compatible with the brake pads you plan to use. Some calipers work optimally with specific pad materials and designs.
7. Review Maintenance Requirements:
§ Consider the maintenance aspects of different caliper types. Floating calipers are generally simpler and may have lower maintenance requirements, while fixed and opposed piston calipers may need more attention.
8. Research Brand and Model Reputation:
§ Investigate the reputation of specific caliper brands and models. Look for customer reviews, ratings, and feedback on reliability, durability, and performance.
9. Consult with Experts:
§ If you're uncertain about the best caliper for your vehicle, consult with automotive experts, professionals, or your vehicle manufacturer. They can provide insights based on your specific vehicle model and driving needs.
10. Consider Aesthetics (Optional):
§ If aesthetics matter to you, some high-performance and luxury vehicles come with visually distinctive calipers. Consider whether the appearance of the calipers is a factor in your decision.
11. Seek Professional Installation:
§ Once you've chosen the calipers, have them installed by a qualified professional. Proper installation ensures optimal performance and safety.
Remember that the "best" caliper for your use depends on a combination of your specific vehicle, driving requirements, and personal preferences. Taking the time to research and consider these factors will help you make an informed decision tailored to your needs.
The choice of brake pads is closely linked to the type of brake calipers on a vehicle. Different caliper designs interact differently with various brake pad materials. Here's a general guideline for the types of brake pads that are suited for different caliper types:
1. Floating Calipers:
§ Suited Brake Pads: Organic or Semi-Metallic
§ Reasoning: Floating calipers are commonly found on standard commuter vehicles. Organic or semi-metallic brake pads are well-suited for these calipers, offering a good balance of cost, performance, and low noise.
2. Fixed Calipers:
§ Suited Brake Pads: Semi-Metallic or Low-Metallic Ceramic
§ Reasoning: Fixed calipers, often found in high-performance and luxury vehicles, benefit from semi-metallic or low-metallic ceramic brake pads. These pads provide enhanced performance, durability, and heat dissipation.
3. Opposed Piston Calipers:
§ Suited Brake Pads: High-Performance Ceramic or Carbon Ceramic
§ Reasoning: Opposed piston calipers, common in high-performance and racing applications, pair well with high-performance ceramic or carbon ceramic brake pads. These pads offer superior heat resistance and are capable of handling the intense demands of aggressive driving.
4. Floating Calipers with Pins:
§ Suited Brake Pads: Semi-Metallic or Low-Metallic Ceramic
§ Reasoning: Similar to fixed calipers, floating calipers with pins benefit from semi-metallic or low-metallic ceramic brake pads for a balance of performance and cost-effectiveness.
Choosing the right brake pad material is crucial for optimizing braking performance, minimizing noise, and extending the lifespan of both the pads and calipers. It's essential to consider the manufacturer's recommendations, your driving habits, and any specific performance requirements when selecting brake pads for your vehicle. Regular maintenance and inspections are also vital to ensure that both the calipers and brake pads are in optimal condition.
Maintaining your brake calipers is crucial for ensuring the optimal performance and safety of your vehicle's braking system. Here are key steps to help you maintain your calipers:
1. Regular Inspection:
· Periodically inspect the brake calipers for signs of wear, damage, or fluid leaks. Look for any unusual noises, vibrations, or changes in braking performance.
2. Brake Fluid Check:
· Ensure that the brake fluid level is within the recommended range. Low brake fluid can affect the caliper's hydraulic function and compromise braking performance.
3. Clean the Calipers:
· During routine cleaning of your vehicle, pay attention to the brake calipers. Use a soft brush to remove dust, dirt, and debris that may accumulate on the caliper and around the brake components.
4. Check Brake Pads:
· Inspect the brake pads for wear regularly. Worn-out brake pads can lead to uneven caliper wear and diminished braking efficiency. Replace the brake pads as needed.
5. Lubricate Moving Parts:
· If your vehicle has sliding calipers with pins, make sure these pins are well-lubricated. Proper lubrication ensures smooth caliper movement and helps prevent uneven wear on the brake pads.
6. Inspect Brake Hoses:
· Examine the brake hoses connected to the calipers for any signs of cracks, bulges, or leaks. Damaged hoses can lead to brake fluid leaks and compromise the braking system's integrity.
7. Check for Corrosion:
· Inspect the calipers for any signs of corrosion, especially in areas with harsh weather conditions. Corrosion can affect the caliper's structural integrity and performance.
8. Torque Check:
· During routine maintenance or when replacing brake components, ensure that all caliper bolts and fasteners are torqued to the manufacturer's specifications. Proper torque helps prevent caliper misalignment and uneven pad wear.
9. Address Unusual Sounds or Vibrations:
· If you notice any unusual sounds, vibrations, or pulling to one side during braking, it could indicate a caliper-related issue. Promptly address such symptoms by inspecting and, if necessary, servicing the calipers.
10. Professional Inspection:
· Consider having a professional mechanic inspect the entire braking system, including the calipers, during routine maintenance visits. They can identify potential issues early on and ensure proper functioning.
11. Brake Fluid Flush:
· Follow the manufacturer's recommendations for brake fluid flush intervals. Regularly flushing the brake fluid helps maintain optimal hydraulic performance within the calipers.
By following these maintenance steps, you contribute to the longevity and effectiveness of your brake calipers, ultimately ensuring the safety and reliability of your vehicle's braking system. Always refer to your vehicle's manual for specific maintenance guidelines and intervals. If you're uncertain or encounter any issues, consult with a qualified mechanic for professional advice and assistance.
Brake calipers, often overshadowed by flashier automotive components, are the unsung heroes that ensure your vehicle stops with precision and safety. As we've delved into the intricacies of their design, functionality, and application, it becomes clear that choosing the right caliper is not just a technical decision but an art—a harmonious blend of performance, efficiency, and safety. So, the next time you hit the brakes, take a moment to appreciate the dance of your brake calipers, orchestrating the perfect stop every time.Top of Form
As we conclude our exploration into the world of brake calipers, it's evident that these often-overlooked components are the backbone of a safe and efficient braking system. The dance of functionality, tailored to specific vehicle types, showcases the delicate balance between performance, responsiveness, and heat dissipation. The next time you hit the brakes, take a moment to appreciate the intricate symphony orchestrated by your brake calipers—true masters of precision.
#BrakeCalipers #PrecisionBraking #AutomotiveEngineering #VehicleSafety #PerformanceDriving #BrakeTechnology #AutomotiveInnovation #SymphonyofBraking #CarMaintenance #AutoBlog Bottom of Form
Braking Excellence: A Comprehensive Guide to Disk Brake Pads for Optimal Vehicle Safety
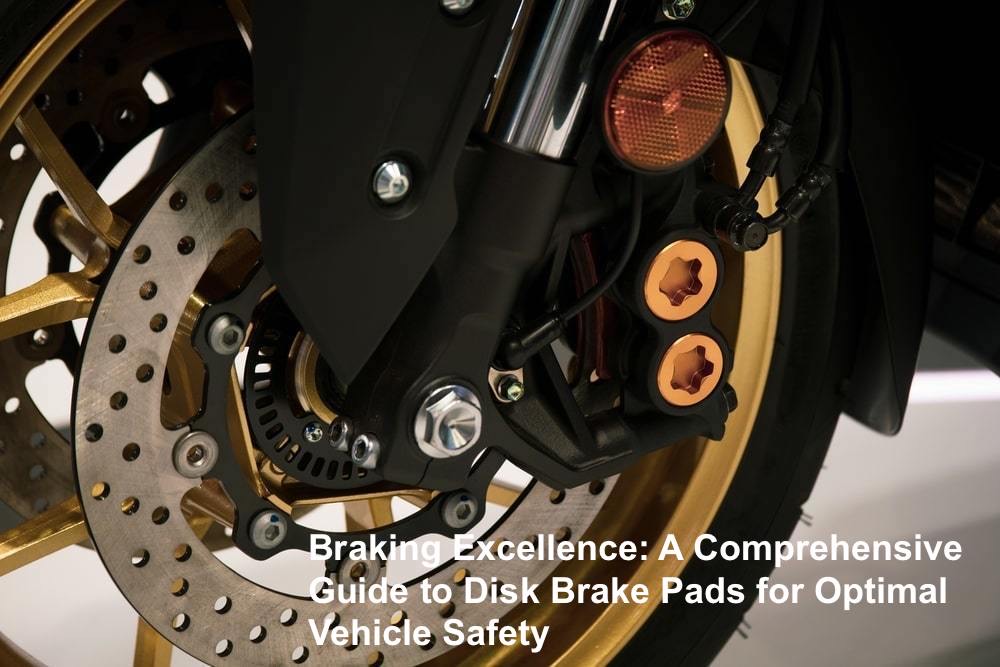
In the intricate world of automotive engineering, few components are as crucial as disk brake pads. Unveil the mysteries behind these silent guardians, exploring their types, functions, and how they contribute to both safety and performance on the road.
Unlock the secrets of disk brake pads, from their diverse types to practical maintenance tips. Learn how choosing the right brake pads can enhance your vehicle's safety and performance. Drive with confidence—master the art of breaking excellence.
Decoding Disk Brake Pads: Ensuring Safety and Performance on the Road
In the realm of automotive safety, few components are as critical as disk brake pads. These unassuming yet indispensable elements play a pivotal role in the complex system responsible for bringing your vehicle to a safe stop. This blog post aims to decode the significance, types, and maintenance of disk brake pads, shedding light on their vital role in ensuring both safety and performance on the road.
Understanding Disk Brake Pads:
1. Anatomy of a Brake Pad: Disk brake pads are composed of a carefully engineered blend of materials. The friction surface, responsible for making contact with the brake rotor, is typically crafted from materials like organic compounds, semi-metallic blends, ceramics, or even carbon-ceramic compositions. The backing plate, usually made of steel, provides structural integrity and support.
2. How Disk Brake Pads Work: When you press the brake pedal, hydraulic pressure is transmitted to the brake callipers, causing them to squeeze the brake pads against the spinning brake rotor. This action generates friction, converting kinetic energy into heat and slowing down the rotation of the wheels. The efficiency of this process is heavily influenced by the type and quality of the brake pads used.
Types of Disk Brake Pads:
1. Organic Brake Pads:
- Advantages: Quieter operation, gentler on rotors.
- Disadvantages: Faster wear, and lower heat tolerance.
2. Semi-Metallic Brake Pads:
- Advantages: Durable, better heat dissipation.
- Disadvantages: Potentially noisy, and may produce more dust.
3. Ceramic Brake Pads:
- Advantages: Low noise, less dust, excellent heat resistance.
- Disadvantages: Higher cost, may have a different initial bite.
4. Low-Metallic NAO Brake Pads:
- Advantages: Good braking performance, and effective heat dissipation.
- Disadvantages: May produce more noise and dust.
5. Non-Asbestos Organic (NAO) Brake Pads:
- Advantages: Budget-friendly, suitable for everyday driving.
- Disadvantages: Faster wear, may not handle high-stress conditions well.
6. Carbon-Ceramic Brake Pads:
- Advantages: Superior performance, lightweight, long lifespan.
- Disadvantages: High cost, often reserved for high-performance vehicles.
The disk brake pad is a crucial component in the braking system of modern vehicles. Its primary function is to generate the friction necessary to slow down or stop the rotation of the vehicle's wheels. This mechanism is essential for ensuring safe and efficient braking performance.
Here's a detailed breakdown of the disk brake pad and its role in the braking system:
Composition and Structure:
Disk brake pads are typically made from a composite material that includes heat-resistant fibres, fillers, and a binding resin. Common materials used in their construction include organic compounds, semi-metallic materials, and ceramic composites.
The pad is designed with a layered structure, often featuring a steel backing plate for strength and support. The friction material is attached to this backing plate, and it's the outer surface of the pad that comes into contact with the rotating brake disc (rotor).
Functionality:
1. Friction Generation:
o When the brake pedal is depressed, hydraulic pressure is applied to the brake calliper.
o The calliper, in turn, squeezes the brake pads against the rotating brake disc.
o The friction generated between the brake pad and the disc converts the kinetic energy of the rotating wheel into heat energy, causing the vehicle to decelerate.
2. Heat Dissipation:
o The composition of the brake pad is designed to dissipate the heat generated during braking efficiently.
o Effective heat dissipation is crucial to prevent brake fade, maintain consistent braking performance, and extend the lifespan of the brake components.
Importance:
1. Safety:
o Disk brake pads play a critical role in ensuring the safety of the vehicle and its occupants.
o Their ability to provide reliable and consistent braking performance is essential for avoiding accidents and collisions.
2. Performance:
o Quality brake pads contribute to the overall performance of the braking system.
o They are designed to provide optimal stopping power, minimize noise, and reduce wear on both the pads and the brake discs.
3. Durability:
o The durability of brake pads is crucial for minimizing maintenance costs and ensuring the longevity of the braking system.
o Regular inspection and timely replacement of worn-out brake pads are essential for sustained performance.
The disk brake pad is a fundamental element in the braking system, contributing to both safety and performance. Its design, composition, and functionality are meticulously engineered to provide efficient friction, heat dissipation, and overall reliability in diverse driving conditions. Regular maintenance and the use of high-quality brake pads are key factors in ensuring the optimal functioning of this critical automotive component.
The operation of a disc brake pad is an integral part of a vehicle's braking system, serving to slow down or stop the rotation of the wheels. Let's delve into the intricate workings of a disc brake pad:
1. Initiation of Braking:
- When the driver presses the brake pedal, hydraulic pressure is generated in the master cylinder of the brake system.
- This hydraulic pressure is transmitted through brake lines to the brake callipers located near each wheel.
2. Caliper Squeeze:
- The brake calliper houses the disc brake pads. There are usually two pads in each calliper, one on each side of the brake rotor (disc).
- The hydraulic pressure causes the calliper pistons to move outward, effectively squeezing the brake pads against both sides of the spinning brake rotor.
3. Friction Generation:
- The outer surface of the brake pads, which are in contact with the brake rotor, is made of a high-friction material.
- As the brake pads come into contact with the rotating brake rotor, friction is generated between the two surfaces.
4. Conversion of Kinetic Energy to Heat:
- The friction between the brake pads and the rotor converts the kinetic energy of the rotating wheel into heat energy.
- This process causes the wheel to decelerate or come to a complete stop, depending on the amount of pressure applied to the brake pedal.
5. Heat Dissipation:
- The brake pad is designed to efficiently dissipate the heat generated during braking.
- Effective heat dissipation is crucial for maintaining consistent braking performance and preventing brake fade, which can occur when excessive heat reduces the efficiency of the braking system.
6. Release and Return:
- Once the brake pedal is released, the hydraulic pressure in the brake calliper decreases.
- The calliper pistons retract, allowing the brake pads to release their grip on the brake rotor.
- This action permits the wheel to rotate freely again.
Key Considerations:
a. Materials:
- Brake pads are commonly made of composite materials, including heat-resistant fibres, fillers, and binding resins.
- Different types of brake pads, such as organic, semi-metallic, and ceramic, offer varying levels of performance and durability.
b. Design for Efficiency:
- The design of the brake pad, including its composition and structure, is optimized for effective friction generation, heat dissipation, and durability.
c. Maintenance:
- Regular inspection of brake pads is essential to ensure they are within the specified thickness and are in good condition.
- Worn-out brake pads should be replaced promptly to maintain the efficiency and safety of the braking system.
The disk brake pad operates by converting kinetic energy into heat through friction with the brake rotor. This process, facilitated by hydraulic pressure and the design of the brake pads, is fundamental to the safe and effective functioning of a vehicle's braking system.
Choosing the Right Disk Brake Pads:
There are several types of disc brake pads, each with its composition and characteristics. The common types include:
1. Organic Brake Pads:
- Made from a blend of organic materials such as glass, rubber, and Kevlar.
- Generally quieter than other types.
- Softer material that tends to wear faster.
- Suitable for everyday driving and lighter vehicles.
2. Semi-Metallic Brake Pads:
- Contain a mix of metal, such as copper, iron, or steel, combined with organic materials.
- Provide better heat dissipation than organic pads.
- Tend to be more durable and have a longer lifespan.
- Can produce more noise and dust compared to organic pads.
3. Ceramic Brake Pads:
- Made from a ceramic compound and filler materials.
- Offer excellent heat dissipation and resistance to brake fade.
- Produce less noise and dust compared to semi-metallic pads.
- Well-suited for high-performance and luxury vehicles.
- Generally have a longer lifespan but can be more expensive.
4. Low-metallic NAO (Non-Asbestos Organic) Brake Pads:
- Contains a mix of organic materials and a small number of metal fibres.
- Provide good braking performance and heat dissipation.
- Tend to be more aggressive than ceramic pads, making them suitable for high-performance applications.
- Can generate more noise and dust compared to ceramic pads.
5. Non-Asbestos Organic (NAO) Brake Pads:
- Made from organic materials, excluding asbestos (which is no longer used due to health concerns).
- Commonly used in economy and mid-range vehicles.
- Offer moderate braking performance and are cost-effective.
- May wear out faster than semi-metallic or ceramic pads.
6. Carbon-Ceramic Brake Pads:
- Utilize a combination of carbon fibres and ceramic materials.
- Commonly found in high-performance and exotic vehicles.
- Offer excellent heat resistance, low noise, and reduced dust.
- Lightweight and provides superior braking performance, especially under demanding conditions.
- Tend to be more expensive than other types.
Let's explore the advantages and disadvantages of each type of disk brake pads:
1. Organic Brake Pads:
Advantages:
- Quieter Operation: Generally quieter than metallic pads, producing less noise during braking.
- Gentle on Rotors: Tends to be softer, causing less wear on brake rotors.
- Environmentally Friendly: Typically made from materials that are less harmful to the environment.
Disadvantages:
- Wear Rate: Softer material wears out faster, necessitating more frequent replacements.
- Heat Dissipation: This may not dissipate heat as effectively as metallic or ceramic pads.
- Performance under Stress: May experience reduced performance under high-stress or heavy-duty braking conditions.
2. Semi-Metallic Brake Pads:
Advantages:
- Durability: More durable than organic pads, providing longer pad life.
- Heat Dissipation: Better heat dissipation compared to organic pads.
- Versatility: Suitable for a wide range of driving conditions, including heavier vehicles and performance applications.
Disadvantages:
- Noise and Dust: Tends to produce more noise and dust compared to ceramic pads.
- Rotor Wear: This can cause slightly more wear on brake rotors than organic pads.
- Cost: May be more expensive than organic pads.
3. Ceramic Brake Pads:
Advantages:
- Low Noise and Dust: Produces less noise and dust during braking.
- Heat Resistance: Excellent heat dissipation and resistance to brake fade.
- Longevity: Longer lifespan compared to organic and semi-metallic pads.
- Lightweight: Typically lighter than semi-metallic pads.
Disadvantages:
- Cost: Generally more expensive than other types of brake pads.
- Aggressive Driving: While suitable for most driving conditions, extreme performance demands may be better met by other types.
- Initial Bite: Some drivers may perceive a slightly different "feel" during the initial application of the brakes.
4. Low-Metallic NAO Brake Pads:
Advantages:
- Braking Performance: Offers good braking performance, especially in high-performance applications.
- Heat Dissipation: Provides effective heat dissipation.
- Versatility: Suitable for a range of driving conditions.
Disadvantages:
- Noise and Dust: Can generate more noise and dust compared to ceramic pads.
- Wear Rate: May wear out faster than ceramic pads.
- Rotor Wear: This may cause slightly more wear on brake rotors.
5. Non-Asbestos Organic (NAO) Brake Pads:
Advantages:
- Cost: Generally more budget-friendly compared to other types.
- Versatility: Suitable for everyday driving conditions.
- Gentle on Rotors: Tends to be softer, causing less wear on brake rotors.
Disadvantages:
- Wear Rate: Softer material may wear out faster, requiring more frequent replacements.
- Heat Dissipation: This may not dissipate heat as effectively as metallic or ceramic pads.
- Performance under Stress: May experience reduced performance under high-stress or heavy-duty braking conditions.
6. Carbon-Ceramic Brake Pads:
Advantages:
- Performance: Superior braking performance, especially in high-performance and racing applications.
- Heat Resistance: Excellent heat dissipation and resistance to brake fade.
- Lightweight: Contributes to overall weight reduction.
- Longevity: Longer lifespan compared to many other types of brake pads.
Disadvantages:
- Cost: Often significantly more expensive than other types.
- Overkill for Everyday Driving: The high-performance nature may be unnecessary for regular commuting.
- Specialized Applications: Primarily used in high-end or exotic vehicles.
Considerations for Choosing Brake Pads:
- Vehicle Type: Match the brake pads to the specific requirements of the vehicle.
- Driving Conditions: Consider the typical driving conditions, including city, highway, or performance driving.
- Personal Preferences: Prioritize factors such as noise, dust, and initial bite based on personal preferences.
- Budget: Choose brake pads that balance performance and longevity with budget constraints.
The choice of brake pads involves a careful consideration of the advantages and disadvantages of each type, taking into account the specific needs and preferences of the driver. Factors to Consider When Choosing Brake Pads:
· Vehicle Type: Different brake pads are designed for various vehicle types, from everyday commuter cars to high-performance and heavy-duty vehicles.
· Driving Conditions: Consider the typical driving conditions, such as city commuting, highway driving, or aggressive driving, as this can influence the choice of brake pads.
· Personal Preferences: Some drivers prioritize factors like minimal noise and dust, while others prioritize maximum performance.
· Budget: The cost of brake pads varies, so it's essential to consider your budget while ensuring the chosen pads meet safety and performance requirements.
Let's compare the different types of disc brake pads based on key factors such as performance, noise, dust generation, longevity, and cost:
1. Organic Brake Pads:
Performance:
- Pros: Smooth and quiet operation, suitable for everyday driving.
- Cons: May have limitations under heavy braking or high-stress conditions.
Noise and Dust:
- Pros: Generally produces less noise.
- Cons: Can generate more dust compared to ceramic pads.
Longevity:
- Pros: May be gentler on brake rotors, but the softer material wears faster.
- Cons: Shorter lifespan compared to semi-metallic and ceramic pads.
Cost:
- Pros: Typically more budget-friendly.
- Cons: Frequent replacements may offset initial cost savings.
2. Semi-metallic brake Pads:
Performance:
- Pros: Good overall performance, suitable for various driving conditions.
- Cons: May produce more noise compared to ceramic pads.
Noise and Dust:
- Pros: Better heat dissipation and less dust compared to organic pads.
- Cons: Can generate more noise.
Longevity:
- Pros: More durable than organic pads.
- Cons: May cause slightly more wear on rotors.
Cost:
- Pros: Mid-range cost, suitable for drivers seeking a balance between performance and budget.
3. Ceramic Brake Pads:
Performance:
- Pros: Excellent heat dissipation, low noise, and dust generation.
- Cons: A slightly different initial bite may be noticed by some drivers.
Noise and Dust:
- Pros: Low noise and dust.
- Cons: May be more expensive compared to other types.
Longevity:
- Pros: Longer lifespan compared to organic and semi-metallic pads.
- Cons: Higher initial cost.
Cost:
- Pros: Longer lifespan may offset the higher initial cost for some drivers.
4. Low-Metallic NAO Brake Pads:
Performance:
- Pros: Good braking performance, suitable for high-performance applications.
- Cons: May produce more noise compared to ceramic pads.
Noise and Dust:
- Pros: Effective heat dissipation.
- Cons: Can generate more noise and dust.
Longevity:
- Pros: More durable than organic pads.
- Cons: May cause slightly more wear on rotors.
Cost:
- Pros: Mid-range cost, suitable for drivers seeking good performance.
5. Non-Asbestos Organic (NAO) Brake Pads:
Performance:
- Pros: Suitable for everyday driving conditions.
- Cons: Limited performance under heavy braking.
Noise and Dust:
- Pros: Generally produces less noise.
- Cons: Can generate more dust.
Longevity:
- Pros: May be gentler on brake rotors, but the softer material wears faster.
- Cons: Shorter lifespan compared to semi-metallic and ceramic pads.
Cost:
- Pros: Generally more budget-friendly.
6. Carbon-Ceramic Brake Pads:
Performance:
- Pros: Superior braking performance, ideal for high-performance and racing applications.
- Cons: Overkill for everyday driving.
Noise and Dust:
- Pros: Low noise and dust.
- Cons: More expensive than other types.
Longevity:
- Pros: Longer lifespan compared to many other types.
- Cons: Significantly more expensive.
Cost:
- Pros: Exceptional performance but comes with a higher cost.
Summary:
- Organic Pads: Suitable for everyday driving but may wear out faster.
- Semi-Metallic Pads: Balanced performance and durability for various driving conditions.
- Ceramic Pads: Excellent all-around performance, low noise, and dust, but at a higher cost.
- Low-Metallic NAO Pads: Good braking performance with effective heat dissipation.
- Non-Asbestos Organic Pads: Budget-friendly but may have limitations under heavy braking.
- Carbon-Ceramic Pads: High-performance option for specialized applications but comes at a premium cost.
Choosing the Right Type:
- Everyday Driving: Ceramic or semi-metallic pads.
- Performance Driving: Consider ceramic or low-metallic NAO pads.
- Budget-Friendly: Organic or non-asbestos organic pads.
- High-Performance/Racing: Carbon-ceramic pads.
Ultimately, the choice depends on individual preferences, driving habits, and the specific requirements of the vehicle. Regular inspection and maintenance are crucial for optimal brake performance, regardless of the pad type chosen.
The choice of brake pads depends on a combination of factors, including vehicle type, driving conditions, personal preferences, and budget constraints. Each type of brake pad has its advantages and trade-offs, and selecting the most suitable one for your specific needs is crucial for optimal braking performance and safety.
1. Consider Driving Conditions:
- Match the brake pads to your typical driving conditions, whether it's daily commuting, highway driving, or high-performance applications.
2. Evaluate Vehicle Type:
- Different types of vehicles may require specific types of brake pads. Consider the weight, size, and purpose of your vehicle.
3. Personal Driving Style:
- Your driving habits play a role. If you have an aggressive driving style, you may need brake pads that can handle more stress.
4. Noise and Dust Preferences:
- If minimal noise and dust are priorities, ceramic brake pads are often the best choice.
5. Budget Considerations:
- While budget-friendly options exist, investing in higher-quality brake pads can pay off in terms of longevity and performance.
Maintaining Disk Brake Pads:
1. Regular Inspection:
- Visually inspect the brake pads for wear and damage regularly.
2. Listen for Warning Signs:
- Unusual noises during braking, such as squeaking or grinding, may indicate worn brake pads.
3. Monitor Brake Fluid Levels:
- Ensure that brake fluid levels are within the recommended range.
4. Avoid Heavy Braking:
- Practice smooth and gradual braking to reduce stress on the brake pads.
5. Keep Wheels and Brakes Clean:
- Regularly clean wheels to remove brake dust and debris.
6. Replace Worn Brake Pads Promptly:
- Replace brake pads when they show signs of wear or when recommended by the manufacturer.
7. Follow Manufacturer Guidelines:
- Adhere to the maintenance schedule and guidelines provided by the vehicle manufacturer.
In the intricate dance of automotive engineering, disk brake pads take centre stage, providing a symphony of safety and performance. By understanding the types, choosing wisely, and maintaining them diligently, you not only ensure the longevity of this critical component but also contribute to the overall safety and efficiency of your vehicle on the road. Brake wisely, drive safely, and let the humble brake pad be your silent guardian on every journey.
Choosing the right type of brake pads is a crucial decision that depends on various factors, including your driving habits, vehicle type, performance requirements, and personal preferences. Here's a step-by-step guide to help you make an informed decision:
1. Consider Your Driving Conditions:
· Everyday Driving:
· Recommended Type: Ceramic or semi-metallic brake pads.
· Reasoning: These types provide good all-around performance and are suitable for typical commuting and everyday driving.
· Performance Driving:
· Recommended Type: Ceramic, low-metallic NAO, or semi-metallic brake pads.
· Reasoning: These types offer better performance under more demanding driving conditions, such as spirited driving or occasional track use.
· Heavy-Duty or Towing:
· Recommended Type: Semi-metallic or low-metallic NAO brake pads.
· Reasoning: These pads can handle the increased heat generated during heavy-duty use.
2. Consider Your Vehicle Type:
· Standard Passenger Vehicles:
· Recommended Type: Ceramic or semi-metallic brake pads.
· Reasoning: These types provide a good balance of performance and longevity for typical cars and SUVs.
· Performance Vehicles:
· Recommended Type: Ceramic or low-metallic NAO brake pads.
· Reasoning: Performance vehicles may benefit from the enhanced braking capabilities of these types.
· Trucks and SUVs:
· Recommended Type: Semi-metallic or low-metallic NAO brake pads.
· Reasoning: These types can handle the higher weight and load-carrying capacity of trucks and SUVs.
3. Consider Your Driving Style:
· Aggressive Driving:
· Recommended Type: Ceramic or low-metallic NAO brake pads.
· Reasoning: These types offer better performance and heat dissipation under aggressive driving conditions.
· City Commuting:
· Recommended Type: Ceramic or organic brake pads.
· Reasoning: These types provide smooth and quiet operation suitable for stop-and-go traffic.
4. Consider Noise and Dust Preferences:
· Low Noise and Dust:
- Recommended Type: Ceramic brake pads.
- Reasoning: Ceramic pads are known for producing minimal noise and dust during braking.
· Acceptable Noise and Dust:
- Recommended Type: Semi-metallic or low-metallic NAO brake pads.
- Reasoning: While they may produce slightly more noise and dust than ceramics, they offer good performance.
5. Consider Your Budget:
· Limited Budget:
· Recommended Type: Non-asbestos organic (NAO) or semi-metallic brake pads.
· Reasoning: These types are generally more budget-friendly.
· Balanced Budget:
· Recommended Type: Ceramic or semi-metallic brake pads.
· Reasoning: These types offer a good balance between performance and cost.
· No Budget Constraints:
· Recommended Type: Ceramic or carbon-ceramic brake pads.
· Reasoning: If cost is not a significant factor, ceramic or carbon-ceramic pads provide high performance and longevity.
6. Check Manufacturer Recommendations:
· Consult Your Vehicle Manual:
· Check your vehicle's manual for recommendations regarding the type of brake pads that are suitable for your specific make and model.
· OEM Recommendations:
· Original Equipment Manufacturer (OEM) recommendations are valuable. Many vehicles come equipped with a specific type of brake pad that is well-suited for their design and intended use.
7. Seek Professional Advice:
· Mechanic Recommendations:
· Consult with a trusted mechanic or automotive professional for personalized advice based on your vehicle and driving habits.
· Online Forums and Reviews:
· Explore online forums and reviews to gather insights from other drivers who may have similar vehicles or driving conditions.
Choosing the right type of brake pads involves a combination of factors tailored to your specific needs and preferences. It's essential to strike a balance between performance, longevity, noise, dust, and budget considerations. Regular maintenance, proper installation, and adherence to manufacturer recommendations contribute to optimal brake performance and safety.
The selection of brake pads for different types of vehicles depends on various factors, including the vehicle's weight, intended use, performance requirements, and the manufacturer's specifications. Here's an overview of the key differences in brake pads used in various types of vehicles:
1. 2-Wheelers (Motorcycles and Scooters):
· Material Composition:
· Often use organic or semi-metallic brake pads.
· Lightweight and compact design for two-wheeled vehicles.
· Performance:
· Balanced performance is suitable for the weight and dynamics of motorcycles and scooters.
· Effective braking for the smaller size and lighter weight of two-wheelers.
· Heat Dissipation:
· Designed to handle the braking demands of motorcycles without excessive heat buildup.
2. Passenger Cars:
· Material Composition:
· Commonly use ceramic or semi-metallic brake pads.
· Ceramic pads are preferred for their low noise and dust characteristics.
· Performance:
· Balanced performance for everyday driving conditions.
· Focus on smooth operation, low noise, and effective braking.
· Heat Dissipation:
· Designed to handle the braking requirements of passenger vehicles during typical commuting and highway driving.
3. Performance Vehicles:
· Material Composition:
· Often equipped with high-performance brake pads.
· May use ceramic, low-metallic NAO, or specialized performance materials.
· Performance:
· Emphasis on enhanced braking capabilities for high-speed and aggressive driving.
· Designed to withstand higher temperatures and offer improved stopping power.
· Heat Dissipation:
· It has enhanced heat dissipation to handle the increased thermal stress during spirited driving.
4. SUVs (Sport Utility Vehicles):
· Material Composition:
· May use semi-metallic or ceramic brake pads.
· Selection depends on the vehicle's weight and intended use.
· Performance:
· Designed to handle the higher weight and load-carrying capacity of SUVs.
· Balanced performance for a mix of city and off-road driving.
· Heat Dissipation:
· Adequate heat dissipation to accommodate the braking demands of larger and heavier vehicles.
5. Heavy-Duty Vehicles:
· Material Composition:
· Typically equipped with semi-metallic or low-metallic NAO brake pads.
· Designed for durability and to handle heavier loads.
· Performance:
· Emphasis on robust braking performance for trucks and heavy-duty applications.
· Designed to withstand frequent and intense braking.
· Heat Dissipation:
· Robust heat dissipation to handle the increased thermal stress associated with heavy-duty use.
6. Trucks:
· Material Composition:
· Commonly use semi-metallic or low-metallic NAO brake pads.
· May have more substantial construction for durability.
· Performance:
· Focus on durability, reliability, and consistent braking performance.
· It is tailored to the specific requirements of trucks and commercial vehicles.
· Heat Dissipation:
· Adequate heat dissipation to handle the braking demands of larger and heavier trucks.
Considerations for Choosing Brake Pads:
· Manufacturer Recommendations:
· Follow the vehicle manufacturer's specifications and recommendations for brake pad types.
· Driving Conditions:
· Consider the typical driving conditions, whether it's city commuting, highway driving, off-road use, or heavy-duty applications.
· Load Capacity:
· Choose brake pads that can handle the weight and load-carrying capacity of the vehicle.
· Performance Requirements:
· Match the brake pads to the vehicle's performance requirements, especially for sports cars or high-performance vehicles.
Brake pads are selected based on the specific needs and characteristics of different types of vehicles. Factors such as weight, performance, and intended use play a crucial role in determining the appropriate brake pad type for each application.
The choice of brake pads can have varying effects on brake rotors, influencing factors such as wear, heat dissipation, and overall braking performance. Here's an overview of how different types of brake pads can affect brake rotors:
1. Organic Brake Pads:
· Effect on Brake Rotors:
· Generally gentler on brake rotors due to their softer composition.
· This may result in less wear on the rotor surface.
2. Semi-Metallic Brake Pads:
· Effect on Brake Rotors:
· Can be more abrasive than organic pads, potentially causing slightly more wear on the rotor surface.
· Effective heat dissipation helps prevent excessive heat-related damage.
3. Ceramic Brake Pads:
· Effect on Brake Rotors:
· Typically produces less wear on brake rotors due to their composition.
· They are known for generating lower levels of brake dust, contributing to cleaner rotors.
4. Low-Metallic NAO Brake Pads:
· Effect on Brake Rotors:
· Similar to semi-metallic pads, may cause slightly more wear on the rotor surface.
· Effective heat dissipation is a positive factor for rotor health.
5. Non-Asbestos Organic (NAO) Brake Pads:
· Effect on Brake Rotors:
· Generally gentler on rotors, similar to organic pads.
· May wear the rotor surface less compared to semi-metallic pads.
6. Carbon-Ceramic Brake Pads:
· Effect on Brake Rotors:
· Tend to be less abrasive on brake rotors, contributing to reduced wear.
· Excellent heat resistance helps protect rotors from thermal stress.
Considerations:
· Rotor Material:
· The material composition of the rotor (cast iron, composite, or carbon-ceramic) can influence the interaction with different types of brake pads.
· Driving Conditions:
· Heavy braking or high-stress driving conditions can accelerate rotor wear regardless of the pad type.
· Proper Bedding:
· Regardless of the pad type, proper bedding during the initial use is crucial for optimizing the interaction between brake pads and rotors.
· Rotor Maintenance:
· Regular inspection of brake rotors is essential. Smooth surfaces without deep grooves indicate healthy rotor conditions.
The impact of different brake pads on brake rotors is influenced by various factors, and the type of brake pad chosen should align with your vehicle, driving style, and performance requirements. Regular maintenance, proper bedding, and adherence to manufacturer recommendations contribute to the longevity and health of both brake pads and rotors. If you have specific concerns or preferences, consulting with a qualified mechanic can provide personalized insights based on your vehicle and driving habits.
Maintaining disk brake pads is crucial for ensuring optimal braking performance, safety, and longevity of your vehicle's braking system. Here are some tips to help you maintain disk brake pads effectively:
1. Regular Inspection:
· Visual Inspection:
· Check the thickness of the brake pads through the wheel spokes.
· Look for any signs of uneven wear, cracks, or damage on the brake pads.
2. Listen for Warning Signs:
· Squeaking or Grinding Noises:
· If you hear unusual noises during braking, it could indicate worn brake pads.
· Squeaking can sometimes be a result of dust or debris, but grinding noises may suggest more significant issues.
3. Monitor Brake Fluid Levels:
· Check Brake Fluid Regularly:
· Ensure that the brake fluid level is within the recommended range.
· Low brake fluid can affect braking efficiency.
4. Avoid Heavy Braking:
· Smooth Braking:
· Practice smooth and gradual braking to reduce stress on the brake pads.
· Avoid aggressive or sudden stops whenever possible.
5. Brake in Moderation:
· Avoid Excessive Use:
· Minimize unnecessary braking, especially when going downhill.
· Downshift to use engine braking when appropriate.
6. Keep Wheels and Brakes Clean:
· Clean Wheels Regularly:
· Remove built-up brake dust, dirt, and debris from the wheels.
· Use a soft brush or a dedicated wheel cleaner to prevent contaminants from affecting the brake pads.
7. Be Mindful of Driving Conditions:
· Wet or Muddy Conditions:
· Brake cautiously in wet or muddy conditions to prevent contamination of the brake pads.
· After driving through mud or water, apply the brakes gently to remove any debris.
8. Perform Regular Brake System Maintenance:
· Brake System Check:
· Schedule regular brake system inspections by a qualified mechanic.
· Include checks on brake pads, rotors, callipers, and brake lines.
9. Replace Worn Brake Pads Promptly:
· Monitor Wear Indicators:
· Some brake pads have wear indicators that make noise when the pads are nearing the end of their life.
· If you hear the indicator, it's time to replace the brake pads.
10. Follow Manufacturer Guidelines:
· Refer to the Owner's Manual:
· Adhere to the manufacturer's recommended maintenance schedule.
· Follow the guidelines for brake pad replacement intervals.
11. Use High-Quality Brake Pads:
· Choose Quality Pads:
· Opt for high-quality brake pads that meet or exceed the manufacturer's specifications.
· Consider the type of brake pads suitable for your driving conditions and vehicle type.
12. Brake System Bleeding:
· Regular Bleeding:
· If your vehicle has a hydraulic brake system, consider regular brake fluid bleeding to remove air and maintain optimal performance.
13. Proper Break-In for New Pads:
· Follow Break-In Procedures:
· If you install new brake pads, follow the manufacturer's recommended break-in procedures.
· This helps ensure proper bedding of the brake pads to the brake discs.
14. Temperature Management:
· Avoid Overheating:
· Minimize heavy or continuous braking that can lead to excessive heat buildup.
· Overheating can affect the performance and lifespan of brake pads.
15. Seek Professional Assistance:
· Professional Inspection:
· If you notice any unusual behaviour with your brakes or have concerns, seek the expertise of a qualified mechanic for a thorough inspection.
By following these tips, you can help maintain your disk brake pads and contribute to the overall safety and efficiency of your vehicle's braking system. Regular attention to your brakes ensures they remain in good condition and provides peace of mind during your travels.
As we conclude this journey into the heart of vehicular safety, remember that the humble disk brake pad is your ally on every road. By understanding, choosing wisely, and maintaining these critical components, you ensure not just stopping power but a symphony of safety in every drive.
#BrakePadGuide #VehicleSafety #BrakingExcellence #AutomotiveEngineering #DiskBrakePads #DriveWithConfidence #BrakeMaintenance #SafetyFirst #StoppingPower #CarCareTips
Mastering Slow-Speed Motorcycle Balancing: Exercises and Drills for Precision Riding
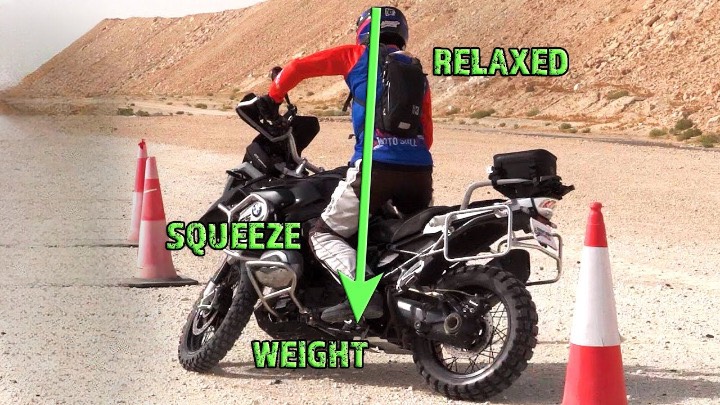
Riding a motorcycle with finesse at slow speeds is an art that distinguishes skilled riders from the rest. In this guide, we delve into a series of targeted exercises and drills designed to help you master the intricate techniques of balancing your motorcycle at slow speeds. Whether you're a novice seeking to build confidence or an experienced rider aiming to refine your skills, these exercises will elevate your control and precision on the road.
Unlock the secrets to perfecting slow-speed motorcycle balancing with our comprehensive guide. Explore a curated set of exercises and drills designed to enhance your control, confidence, and precision. Elevate your riding experience by mastering the art of slow-speed maneuvers.
Mastering the Art of Balancing Your Motorcycle at Slow Speeds
Riding a motorcycle is not just about speed and adrenaline; it's also about finesse and control. One crucial skill that every rider should master is the ability to balance the motorcycle at slow speeds. Whether you're navigating through traffic, tackling tight turns, or simply maneuvering in a parking lot, slow-speed balance is essential for a safe and enjoyable riding experience.
1. Understanding the Importance:
Balancing a motorcycle at slow speeds is vital for several reasons. It enhances your overall control, stability, and confidence on the road. Mastering this skill allows you to confidently handle your bike in various situations, making you a more skillful and safer rider.
2. Proper Body Position:
Achieving balance starts with your body position. Keep your body upright and centered over the motorcycle. Relax your grip on the handlebars, allowing the bike to move freely beneath you. Use your knees and thighs to grip the tank for added stability.
3. Feathering the Clutch:
The clutch is your best friend when it comes to slow-speed maneuvers. Feathering the clutch means partially engaging and disengaging it to control the speed of the motorcycle. This technique provides a smooth and controlled power delivery, preventing abrupt movements that can lead to loss of balance.
4. Modulating the Throttle:
Mastering the art of slow-speed balancing requires precise control over the throttle. Use a light and steady touch on the throttle to maintain a consistent speed. Small adjustments can make a significant difference, so practice modulating the throttle smoothly.
5. Rear Brake Control:
While the front brake is crucial for high-speed stops, the rear brake becomes your ally at slow speeds. Gently apply the rear brake to control the bike's speed and prevent it from rolling too quickly. This adds an extra layer of control to your slow-speed maneuvers.
6. Head and Eye Placement:
Keep your head up and look where you want to go. Your eyes play a crucial role in directing your motorcycle. By maintaining a forward gaze, you'll naturally guide the bike in the desired direction, helping you stay balanced and in control.
7. Practice, Practice, Practice:
Like any skill, mastering slow-speed balancing requires practice. Find an open parking lot or a quiet street to practice figure-eight turns, U-turns, and other slow-speed maneuvers. The more you practice, the more comfortable and confident you'll become in handling your motorcycle at slow speeds.
Balancing a motorcycle at slow speeds is an art that every rider can master with dedication and practice. By honing these skills, you not only enhance your safety on the road but also elevate your overall riding experience. Remember, it's the combination of proper body position, clutch control, throttle modulation, and consistent practice that will transform you into a master of slow-speed balance. So, gear up, hit the road, and enjoy the journey with newfound confidence and control.
Techniques Needed:
Mastering the art of balancing a motorcycle at slow speeds requires a combination of techniques that involve body control, throttle modulation, and precise coordination. Here are the key techniques to achieve slow-speed balance:
1. Proper Body Position:
· Keep your body upright and centered over the motorcycle.
· Relax your grip on the handlebars, allowing the bike to move freely beneath you.
· Use your knees and thighs to grip the tank for added stability.
2. Feathering the Clutch:
· Partially engage and disengage the clutch to control the speed of the motorcycle.
· This technique provides a smooth and controlled power delivery, preventing abrupt movements that can lead to loss of balance.
3. Modulating the Throttle:
· Use a light and steady touch on the throttle to maintain a consistent speed.
· Small adjustments in throttle control can make a significant difference in maintaining balance.
4. Rear Brake Control:
· Gently apply the rear brake to control the bike's speed at slow maneuvers.
· The rear brake helps prevent the motorcycle from rolling too quickly and adds an extra layer of control.
5. Head and Eye Placement:
· Keep your head up and look where you want to go.
· Your eyes play a crucial role in directing the motorcycle; maintaining a forward gaze helps guide the bike in the desired direction.
6. Practice Slow-Speed Maneuvers:
· Find an open space to practice figure-eight turns, U-turns, and other slow-speed maneuvers.
· Consistent practice enhances muscle memory and builds confidence in handling the motorcycle at slow speeds.
7. Smooth Control Inputs:
· Avoid abrupt movements with the controls; instead, focus on smooth and gradual inputs.
· Smooth control inputs help maintain stability and prevent sudden weight shifts.
8. Balancing with Feet:
· Keep your feet on the ground when needed, especially in situations where you may need to come to a complete stop.
· Being able to balance with your feet provides an additional layer of stability.
9. Weight Distribution:
· Distribute your weight evenly on the motorcycle, especially when making turns or navigating obstacles.
· Be mindful of your body position to maintain a balanced center of gravity.
10. Confident Mindset:
· Approach slow-speed maneuvers with confidence and a positive mindset.
· Believe in your ability to control the motorcycle, and this mental attitude can positively impact your physical control.
Mastering slow-speed balancing is an ongoing process that improves with consistent practice and a focused approach to refining these techniques. Each rider may find a slightly different approach that works best for them, so it's essential to adapt these techniques to your riding style and preferences.
Learning the techniques for balancing a motorcycle at slow speeds is a gradual process that involves a combination of knowledge acquisition and practical application. Here's a step-by-step guide to help you master these skills:
1. Take a Motorcycle Safety Course:
· Enroll in a reputable motorcycle safety course. These courses cover essential riding skills, including slow-speed maneuvers, and are often taught by experienced instructors.
2. Read and Research:
· Familiarize yourself with the principles of motorcycle balance and control by reading relevant articles, books, and manuals. Understand the role of body positioning, throttle control, and braking in slow-speed scenarios.
3. Watch Tutorial Videos:
· Online platforms, such as YouTube, offer a wealth of tutorial videos demonstrating various motorcycle riding techniques. Watch experienced riders demonstrate slow-speed maneuvers and pay attention to their body language and control inputs.
4. Practice in a Controlled Environment:
· Find an open and controlled environment, such as an empty parking lot, to practice slow-speed maneuvers without the pressure of traffic.
· Start with basic exercises like figure-eight turns, U-turns, and straight-line riding at slow speeds.
5. Focus on Body Position:
· Practice maintaining the correct body position over the motorcycle. Keep your body upright, relax your grip on the handlebars, and use your knees to grip the tank.
6. Master Clutch Control:
· Spend time practicing feathering the clutch. Learn to engage and disengage it smoothly to control the speed of the motorcycle.
7. Throttle Modulation:
· Practice modulating the throttle with a light and steady touch. Experiment with different levels of throttle input to understand its impact on the bike's movement.
8. Integrate Rear Brake Control:
· Incorporate the use of the rear brake into your slow-speed maneuvers. Gently apply the rear brake to control the bike's speed and enhance stability.
9. Gradually Increase Difficulty:
· As you gain confidence, gradually increase the difficulty of your exercises. Challenge yourself with tighter turns and more complex maneuvers.
10. Seek Feedback:
· If possible, ride with experienced riders or instructors who can provide constructive feedback on your technique.
· Attend group rides or motorcycle events where you can learn from the experiences of others.
11. Stay Patient and Persistent:
· Slow-speed balancing is a skill that takes time to develop. Be patient with yourself and stay persistent in your practice.
· Celebrate small victories and learn from any challenges you encounter.
12. Regularly Review and Reflect:
· Periodically review your progress and reflect on areas that may need improvement.
· Consider recording your practice sessions to analyze your technique and identify areas for refinement.
Remember that each rider may progress at their own pace, so tailor your learning experience to suit your comfort level. By combining theoretical knowledge with hands-on practice, you'll gradually build the confidence and skills needed to balance a motorcycle at slow speeds effectively.
Mastering the techniques for balancing a motorcycle at slow speeds requires a dedicated and systematic approach. Here's a detailed guide to help you achieve mastery of these skills:
1. Start with the Basics:
· Ensure you have a solid understanding of the fundamental riding skills, including proper body position, throttle control, and braking techniques.
2. Enroll in an Advanced Riding Course:
· Consider taking an advanced riding course specifically focused on slow-speed maneuvers. Look for courses offered by reputable motorcycle safety organizations or advanced riding schools.
3. Set Clear Goals:
· Define specific goals for improvement. Break down the skill into smaller components and work on each aspect individually.
4. Structured Practice Sessions:
· Organize your practice sessions with a structured approach. Dedicate time to focus on specific techniques, such as clutch control, throttle modulation, and body positioning.
5. Deliberate Practice:
· Engage in deliberate practice, which involves focused and intentional efforts to improve specific aspects of your riding skills.
· Identify weaknesses and target them during practice sessions.
6. Receive Professional Feedback:
· Seek feedback from experienced riders or instructors. Professional guidance can provide valuable insights and corrections to your technique.
7. Video Analysis:
· Record your practice sessions and review the footage. Analyze your body position, control inputs, and overall technique. This visual feedback can highlight areas for improvement.
8. Consistent Practice:
· Consistency is key to mastery. Regular and intentional practice is essential for refining your skills and building muscle memory.
9. Challenge Yourself Gradually:
· Gradually increase the difficulty of your practice exercises. Introduce tighter turns, varied surfaces, and more complex maneuvers as you become more comfortable with the basics.
10. Simulate Real-world Scenarios:
· Simulate real-world scenarios during your practice. Create situations that mimic common challenges you might encounter on the road, such as tight parking spaces or navigating through traffic.
11. Understand Your Motorcycle:
· Familiarize yourself with the characteristics of your specific motorcycle. Different bikes may respond differently to control inputs, and understanding these nuances is crucial for mastery.
12. Mindful Riding:
· Develop mindfulness while riding. Be present and fully engaged in the act of riding. Mindful riding enhances your ability to sense and respond to changes in balance and control.
13. Seek Community Support:
· Join motorcycle forums or local riding groups. Engage with experienced riders who can share their insights and experiences. Networking with the riding community can provide additional learning opportunities.
14. Review and Reflect:
· Regularly review your progress and reflect on your experiences. Acknowledge achievements and identify areas for further improvement.
15. Stay Physically Fit:
· Physical fitness contributes to better control of your motorcycle. Strengthening core muscles and maintaining overall fitness can enhance your balance and coordination.
16. Never Stop Learning:
· The pursuit of mastery is ongoing. Stay open to continuous learning and refinement of your skills. Attend workshops, read relevant literature, and stay informed about the latest advancements in motorcycle riding.
Remember mastery is a journey, and improvement is a continuous process. By combining structured practice, professional guidance, and a commitment to ongoing learning, you can achieve a high level of proficiency in balancing your motorcycle at slow speeds.
To learn and master the techniques for balancing a motorcycle at slow speeds, it's essential to practice specific exercises and drills that target the key skills involved. Here's a set of exercises and drills designed to enhance your slow-speed balancing abilities:
1. Figure-Eight Exercise:
· Set up two cones or markers in the shape of a figure-eight in an open space.
· Practice riding through the figure-eight at a slow, controlled speed.
· Focus on smooth throttle control, clutch modulation, and maintaining proper body position throughout the turns.
2. U-Turn Practice:
· Find a wide and open area to practice making U-turns.
· Begin with larger turns and gradually reduce the turning radius as you become more comfortable.
· Pay attention to weight distribution, body positioning, and throttle control.
3. Obstacle Weave:
· Arrange a series of cones or markers in a straight line, creating a weaving pattern.
· Ride through the weave at a slow pace, navigating between the obstacles.
· Use subtle handlebar movements, clutch control, and steady throttle input.
4. Slow-Speed Straight Line:
· Practice riding in a straight line at an extremely slow pace.
· Focus on maintaining balance and control without weaving or veering off course.
· Experiment with using both the clutch and throttle to control your speed.
5. Cone Serpentine:
· Set up a series of cones in a serpentine pattern.
· Ride through the serpentine at a controlled speed, making gentle turns.
· Emphasize smooth transitions, precise control of the handlebars, and consistent speed.
6. Emergency Brake and Avoidance:
· Practice emergency braking and swerving to avoid obstacles.
· Set up markers to simulate an obstacle, and practice coming to a controlled stop and swerving around it.
· Mastering these skills enhances your overall control and confidence.
7. Slow-Speed Circles:
· Draw a circle on the ground using chalk or markers.
· Practice riding in circles at a slow pace while maintaining control and balance.
· Gradually reduce the size of the circle as you improve.
8. Balance Beam Challenge:
· Create a narrow "balance beam" using a straight line or a piece of wood.
· Ride along the balance beam at a slow speed, challenging your ability to maintain balance in a confined space.
9. Parked Turn Exercise:
· Practice making tight turns while the motorcycle is stationary.
· Start by turning the handlebars from side to side while keeping the motorcycle in place.
· This exercise enhances your ability to control the bike at low speeds.
10. Riding in Circles with Head Turns:
· Ride in a circle while turning your head to look over your shoulder in the direction of the turn.
· This drill improves your ability to maintain balance while looking through turns, a crucial skill for slow-speed maneuvers.
11. Paddle Walk:
· In a controlled environment, practice walking the motorcycle forward with your feet while seated.
· This drill enhances your confidence in controlling the bike at extremely low speeds.
12. Tight Turnaround:
· Set up markers to simulate a narrow road or driveway.
· Practice making a tight 180-degree turnaround without putting your foot down.
Start with larger and more forgiving exercises and gradually progress to more challenging ones as you gain confidence and proficiency. Consistent and deliberate practice of these exercises will help you master the techniques required for balancing a motorcycle at slow speeds.
As you embark on your journey to master slow-speed motorcycle balancing, remember that proficiency comes with practice. These exercises are stepping stones to precision riding, offering a pathway to enhanced control and confidence. Embrace each drill with dedication, and watch as your skills evolve, transforming you into a rider who maneuvers with finesse and mastery at every turn.
#MotorcycleSkills #RidingPrecision #SlowSpeedBalancing #RiderMastery #MotorcycleManeuvers #PrecisionRiding #MotorcycleControl #SkillBuilding #RidingConfidence #RiderTraining