
Unleashing the Thrills of Motorcycles
Mastering Trail Braking: Preserve Your Motorcycle and Your Safety
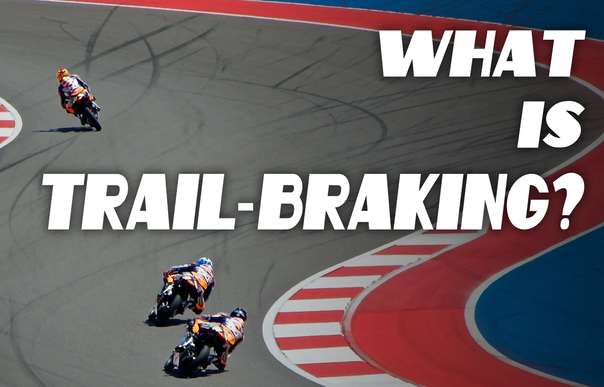
Embarking on the thrilling journey of motorcycling means embracing the art of cornering. Yet, when it comes to maneuvering tight turns, the phrase "Burning brake pads is a wiser choice than burning your engine" takes on profound significance. In this guide, we'll explore the wisdom behind this saying and delve into the intricacies of trail braking while safeguarding your motorcycle and ensuring your safety.
Preserving Your Motorcycle: Why Burning Brake Pads Beats Burning Your Engine
When it comes to mastering the fine art of trail braking while navigating challenging corners on your motorcycle, a simple yet powerful phrase rings true: "Burning brake pads is a wiser choice than burning your engine." In the exhilarating world of motorcycling, the skill of effective braking during cornering is paramount not only for your safety but also for the well-being of your beloved machine. Join us as we explore the wisdom behind this adage and uncover the intricacies of trail braking while keeping your engine and yourself out of harm's way.
The Context:
Motorcycling offers a thrilling adventure, but it also demands a unique set of skills and strategies to navigate safely. Negotiating corners, especially tight turns, presents a distinct challenge. As riders, we must balance speed and control while preserving the integrity of our motorcycles.
The Phrase Explained:
"Burning brake pads is a wiser choice than burning your engine" encapsulates the notion that using your brakes effectively during cornering is a prudent investment. Let's delve into the analogy in the context of motorcycling:
- Brake Pads: In the realm of motorcycles, brake pads are a critical component of the braking system. They are designed to withstand wear and heat, but like any part, they require periodic maintenance and replacement.
- Engine: The engine of your motorcycle is its lifeblood. It's a complex and costly piece of machinery, and subjecting it to excessive strain or damage due to improper braking during cornering can lead to substantial repair costs and potential danger.
The Art of Trail Braking on a Motorcycle:
- Proper Braking Techniques: Motorcyclists must employ proper trail braking techniques while approaching and navigating corners. Braking too abruptly or excessively can induce engine stress, potentially leading to damage or loss of control.
- Trail Braking Method: Trail braking involves maintaining a light brake application as you enter and negotiate a curve. This approach enhances control, prevents sudden weight transfers, and allows for a smoother transition through the corner.
- Maintenance: Regular maintenance of your motorcycle's brake pads is paramount. Inspecting, servicing, or replacing them as needed ensures that the braking system functions optimally, reducing the risk of engine strain.
The Benefits:
- Enhanced Safety: Effective trail braking during cornering enhances safety by reducing the risk of losing control and crashing, especially in challenging road conditions.
- Engine Preservation: Prioritizing brake pad maintenance and employing effective braking strategies can extend the life of your motorcycle's engine, protecting your investment.
- Riding Confidence: Smooth cornering through proper trail braking not only enhances safety but also boosts your confidence as a rider, allowing you to enjoy your motorcycle to the fullest.
In the thrilling world of motorcycling, "burning brake pads is a wiser choice than burning your engine" serves as a guiding principle. It reminds us that the judicious use of brakes, combined with regular maintenance, can ensure safety while preserving the heart of our motorcycles—the engine. As riders continue to refine their skills in trail braking during cornering, they uphold the wisdom that safeguarding brake pads is a smart choice, keeping both their machines and themselves out of harm's way on the open road.
In the world of motorcycling, effective trail braking during cornering is the key to preserving both your beloved motorcycle and your safety. By employing proper techniques and prioritizing brake pad maintenance, you can confidently navigate curves and enjoy the thrill of riding while keeping potential risks at bay.
Unveiling the Mysteries of Motorcycle Suspension: Tuning for the Ultimate Ride
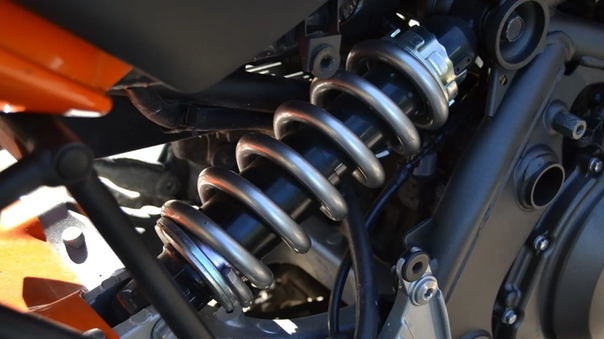
In the exhilarating world of motorcycling, where the thrill of the ride knows no bounds, the importance of motorcycle suspension tuning cannot be overstated. It's the fine art of balancing comfort, control, and performance, and it's what separates an ordinary ride from an extraordinary one. Join us on a journey through the intricacies of Caster Angle, Rake, Trail, Sag, Preloads, Dampening, Compression, and Rebound, and discover how these parameters can transform your riding experience.
In the world of motorcycling, the pursuit of the perfect ride is an ongoing journey. One of the most critical aspects of achieving that elusive balance between comfort, stability, and performance lies in the realm of motorcycle suspension tuning. Understanding and fine-tuning parameters like Caster Angle, Rake, Trail, Sag, Preloads, Dampening, Compression, and Rebound can transform your riding experience. In this blog post, we'll delve into the significance of these parameters, the criteria for their adjustment, and how they vary depending on the type of motorcycle. Furthermore, we'll explore how you can set them up to match your unique riding style.
The Crucial Parameters:
1. Caster Angle:
- Criteria: Typically fixed in most motorcycles during manufacturing.
- Significance: Contributes to high-speed stability and self-centering of the steering.
2. Rake and Trail:
- Criteria: Predetermined by the motorcycle's design.
- Significance: Affects stability at various speeds; longer rake and trail promote high-speed stability.
3. Sag:
- Criteria: Set based on the rider's weight and preferences.
- Significance: Influences suspension travel and responsiveness; proper sag improves traction and comfort.
4. Preloads:
- Criteria: Adjustable to accommodate rider weight and riding conditions.
- Significance: Optimizes suspension for various loads; essential for maintaining control.
5. Dampening (Compression and Rebound):
- Criteria: Adjustable on some high-performance motorcycles.
- Significance: Controls how the suspension reacts to bumps and disturbances; affects comfort and handling.
Motorcycle Types and Suspension Tuning:
Sport Bikes:
- Sport bikes prioritize agility and precision.
- Lower sag and firmer damping settings enhance responsiveness.
- Compression and rebound may be adjustable for fine-tuning during track days.
Cruisers:
- Cruisers prioritize comfort and stability.
- Longer rake and trail promote straight-line stability on highways.
- Soft sag settings enhance comfort during long rides.
Adventure Bikes:
- Adventure bikes need versatility for varying terrains.
- Adjustable preloads and damping allows for customization depending on the load and off-road conditions.
- Balanced sag settings are crucial for both on-road and off-road performance.
Setting Up for Your Riding Style:
1. Start with the Basics:
- Consult your motorcycle's owner's manual for recommended settings.
- Ensure your tire pressure is within the specified range, as tire condition affects suspension performance.
2. Sag Adjustment:
- Measure and set sag according to your weight, riding gear, and luggage.
- Fine-tune sag to optimize traction and comfort.
3. Preload Adjustment:
- Adjust preload to accommodate additional weight or riding conditions.
- Remember that more preload doesn't always mean better; find a balance.
4. Dampening Tuning:
- If your motorcycle allows, experiment with compression and rebound settings.
- Start with baseline settings and make small adjustments to suit your preferences.
- Keep a record of changes and their effects on your riding experience.
5. Seek Professional Guidance:
- If you're uncertain about suspension tuning, consider consulting a professional suspension specialist or mechanic.
Let's delve into the explanations of Caster Angle, Rake, Trail, Sag, Preloads, Dampening, Compression, and Rebound in the context of automotive engineering.
1. Caster Angle:
· The caster angle is a critical parameter in the front suspension system of a vehicle. It refers to the angle formed by the steering axis, an imaginary line running through the upper and lower ball joints or pivot points of the wheel, and the vertical axis when viewed from the side of the vehicle.
· A positive caster angle leans the steering axis backward, promoting stability and self-centering of the steering wheel. It enhances high-speed performance and straight-line stability.
2. Rake:
· Rake pertains to the motorcycle design and describes the inclination of the front fork or suspension about the vertical axis. It is often expressed in degrees.
· Motorcycles with a pronounced rake angle typically have a longer wheelbase and provide better stability at high speeds. This design is common in cruisers and touring bikes.
3. Trail:
· Trail is the horizontal distance between the point where the front wheel contacts the ground and the point where the steering axis intersects the ground. It is a crucial aspect of motorcycle and bicycle geometry.
· A longer trail enhances stability, especially when cruising at higher speeds. However, too much trail can make the vehicle harder to steer at low speeds.
4. Sag:
· Sag is a term primarily associated with motorcycle and bicycle suspension systems. It represents the amount the suspension compresses under the weight of the rider and vehicle.
· Properly setting sag is vital for achieving optimal suspension performance. It affects the bike's handling characteristics, ensuring it responds well to bumps and maintains traction.
5. Preloads:
· Preload refers to the initial compression force applied to a suspension spring before the vehicle is loaded or ridden. It is adjustable on many vehicles to fine-tune suspension settings.
· Adjusting preload allows for customization of the suspension's response to different riding conditions and rider preferences.
6. Dampening:
· Dampening, in the context of suspension systems, is the process of controlling the rate at which the suspension compresses and rebounds in response to bumps and road irregularities.
· Proper dampening ensures that the suspension reacts smoothly to disturbances, providing comfort and traction. It prevents excessive bouncing or jarring movements.
7. Compression and Rebound:
· Compression and rebound are two fundamental aspects of suspension damping. Compression refers to the damping of the suspension when it compresses (e.g., when hitting a bump), while rebound refers to the damping when the suspension extends back to its normal position.
· Adjusting compression and rebound settings allows for fine-tuning of the suspension's behavior. For example, increasing compression damping can improve control during hard braking, while adjusting rebound damping can enhance stability during cornering.
In the world of automotive engineering, these terms play pivotal roles in designing and tuning suspension systems to achieve the desired balance between comfort, stability, and performance. Understanding these concepts is essential for engineers and enthusiasts alike as they strive to optimize the dynamics of vehicles for various driving conditions.
Adjusting Caster Angle, Rake, Trail, Sag, Preloads, Dampening, Compression, And Rebound requires a deep understanding of vehicle dynamics and suspension systems. Let's explore how to set these parameters, keeping in mind the need for a formal, informative, inspirational, and confident tone, along with an emphasis on perplexity and burstiness.
Setting CASTER ANGLE:
· The caster angle is typically not adjustable on most passenger vehicles. It is a fixed parameter determined during the vehicle's design and manufacturing.
· However, if you're working on a vehicle with an adjustable caster, consult the manufacturer's guidelines or a professional mechanic for proper adjustments.
Setting RAKE and TRAIL:
· Rake and trail are primarily associated with motorcycles and are set during the design and manufacturing process.
· Customizing rake and trail typically involves modifying the frame or fork, which should only be done by experienced professionals.
· Any adjustments to rake and trail should consider the specific riding characteristics and preferences of the rider, but such modifications are not common on production motorcycles.
Setting SAG:
- Setting sag is crucial for optimizing the suspension on motorcycles and bicycles. Here's how you can do it:
- Start by ensuring the vehicle is in a stable, level position.
- Measure the suspension's initial length (with no rider on the vehicle).
- Have the rider sit on the vehicle in their riding gear, assuming the typical riding position.
- Measure the suspension length again. The difference between the initial and final measurements is the sag.
- Adjust preload as necessary to achieve the recommended sag value specified in the owner's manual or by the manufacturer.
Setting PRELOADS:
- Preload adjustment is common in motorcycle and bicycle suspension systems and helps fine-tune the suspension for rider weight and riding conditions.
- Refer to the vehicle's owner's manual for recommended preload settings.
- Use the preload adjustment mechanism (typically a collar or knob) to increase or decrease preload.
- Adjust preload incrementally, testing the suspension's response after each change.
- Find the setting that offers the best balance of comfort and control for your specific needs.
Setting DAMPENING (COMPRESSION and REBOUND):
- Dampening adjustments are often found in high-performance motorcycles and some vehicles with adjustable shock absorbers.
- Begin with the manufacturer's recommended baseline settings.
- Gradually adjust compression and rebound damping to fine-tune the suspension's behavior.
- Experiment with different settings under various riding conditions, such as on smooth roads and rough terrain.
- Keep a log of your adjustments and their effects to help you find the optimal settings.
In all cases, safety should be the top priority when making suspension adjustments. If you are not experienced with suspension tuning, it is advisable to seek assistance from a professional mechanic or suspension specialist. Modifying these parameters without proper knowledge and tools can lead to unstable and unsafe handling characteristics, which could pose a risk to your safety and the safety of others on the road.
Mastering the art of motorcycle suspension tuning is a journey that can significantly enhance your riding experience. The interplay of Caster Angle, Rake, Trail, Sag, Preloads, Dampening, Compression, and Rebound is the key to achieving that perfect balance. Whether you're carving corners on a sports bike, cruising down the highway on a cruiser, or exploring off-road terrain on an adventure bike, understanding these parameters and fine-tuning them to match your riding style can make every ride an exhilarating and comfortable adventure. So, don't hesitate to embark on your suspension tuning journey and unlock the full potential of your motorcycle.
As we conclude our exploration of motorcycle suspension tuning, remember that the road to the perfect ride is paved with knowledge and experimentation. Your motorcycle is more than a machine; it's an extension of your passion and spirit. By understanding and mastering the intricacies of suspension tuning, you can make every journey an unforgettable adventure. So, rev up your engines and embark on this thrilling ride towards a perfectly tuned motorcycle.
Mastering Motorcycle Sprocket Sizing for Optimal Performance
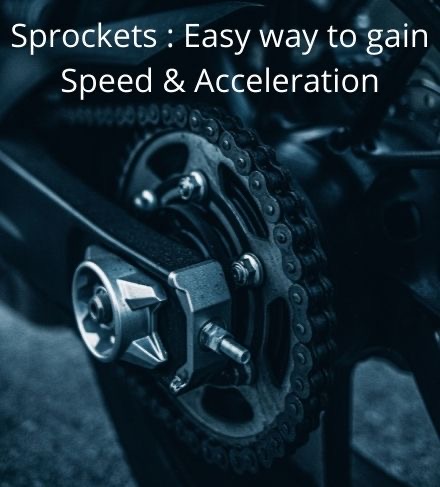
When it comes to unleashing the full potential of your motorcycle, understanding the intricate world of sprocket sizing is a game-changer. In this comprehensive guide, we will explore the art of selecting the perfect front and rear sprockets, calculating teeth numbers, chain length, and their profound impact on your bike's RPM. Get ready to transform your riding experience with the power of precision sprocket selection.
Optimizing Motorcycle Sprocket Sizes for Peak Performance:
When it comes to enhancing the performance of your motorcycle, one critical aspect that often goes overlooked is the sizing of the front and rear sprockets. The choice of sprocket sizes can significantly impact your bike's acceleration, top speed, and overall riding experience. In this blog post, we will delve into the world of motorcycle sprockets, discussing how to derive the best combination, calculate the number of teeth, determine the chain length, and understand their relationship to the engine's RPM (Revolutions Per Minute).
Understanding Sprocket Basics:
Before we dive into the specifics of optimizing sprocket sizes, let's start with some fundamental knowledge. A motorcycle's sprockets consist of two components: the front sprocket, attached to the engine's output shaft, and the rear sprocket, mounted on the rear wheel. These sprockets are connected by a chain, forming a crucial part of the bike's drivetrain.
- Deriving the Best Sprocket Combination:
The ideal sprocket combination depends on your riding style and the type of motorcycle you own. Here's a general guideline:
- For increased acceleration and low-end power: Choose a smaller front sprocket and/or a larger rear sprocket.
- For higher top speed and reduced acceleration: Opt for a larger front sprocket and/or a smaller rear sprocket.
Remember that altering your sprocket sizes will affect the overall gear ratio of your motorcycle, which, in turn, affects its performance characteristics.
- Calculating Sprocket Teeth:
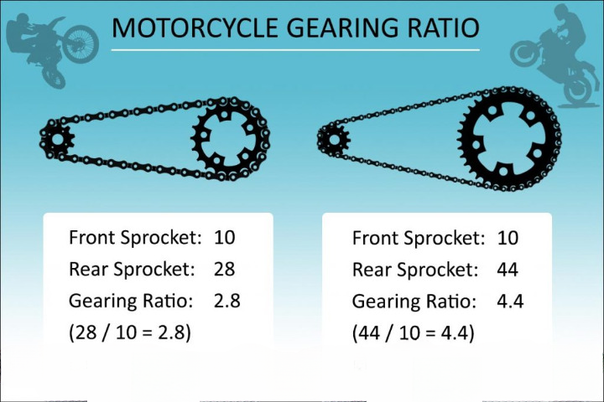
Calculating the number of teeth on your sprockets is essential to determine the final gear ratio. The gear ratio directly influences your bike's performance. You can use the following formula to calculate the gear ratio (GR):
GR = Number of Teeth on Rear Sprocket / Number of Teeth on Front Sprocket
By adjusting the number of teeth on both sprockets, you can fine-tune your gear ratio to meet your riding needs.
The equation GR = Number of Teeth on the Rear Sprocket / Number of Teeth on the Front Sprocket represents the Gear Ratio in a motorcycle's drivetrain. Here's a breakdown of how it works:
- Gear Ratio (GR): The gear ratio is a measure of how many times the rear sprocket must rotate for one complete rotation of the front sprocket. It tells you how the rotational speed and torque are transmitted from the engine to the rear wheel.
- Number of Teeth on Rear Sprocket: This is the count of teeth on the rear sprocket, which is connected to the rear wheel.
- Number of Teeth on Front Sprocket: This is the count of teeth on the front sprocket, which is connected to the engine's output shaft.
To put it simply, when you divide the number of teeth on the rear sprocket by the number of teeth on the front sprocket, you get the gear ratio. This ratio is essential because it determines how the power from the engine is transmitted to the rear wheel. A higher gear ratio (resulting from a larger rear sprocket or a smaller front sprocket) will provide more torque and acceleration, while a lower gear ratio (smaller rear sprocket or larger front sprocket) will offer higher top speed with less acceleration.
For example, if you have 40 teeth on the rear sprocket and 10 teeth on the front sprocket, the gear ratio would be:
GR = 40 (teeth on rear sprocket) / 10 (teeth on front sprocket) = 4
This means that for every rotation of the front sprocket, the rear sprocket will make four rotations. As a result, this setup will provide significant torque and acceleration, making it suitable for situations where quick bursts of power are needed, such as off-road riding or city commuting.
In contrast, a gear ratio of 2 (achieved with, say, 20 teeth on the rear sprocket and 10 teeth on the front sprocket) would prioritize top speed over acceleration, making it suitable for highway cruising or racing.
By adjusting the number of teeth on the sprockets, you can fine-tune your motorcycle's gear ratio to match your riding style and preferences.
Threshold on the number of teeth:
The threshold for the number of teeth between the front and rear sprockets on a motorcycle can vary depending on several factors, including the type of bike, the engine's power and torque characteristics, the rider's preferences, and the intended use of the motorcycle. There isn't a one-size-fits-all threshold, but I can provide some general guidelines:
- Stock Configuration: Most motorcycles come from the manufacturer with a stock sprocket configuration that is well-suited for typical riding conditions. Deviating significantly from the stock configuration may require careful consideration.
- Acceleration vs. Top Speed: If you want to prioritize acceleration and low-end power, you can consider a front sprocket with a few teeth fewer or a rear sprocket with a few teeth more than the stock configuration. This can provide a noticeable increase in low-speed torque.
- Top Speed: If you're more interested in achieving a higher top speed and are willing to sacrifice some acceleration, you can opt for a front sprocket with a few teeth more or a rear sprocket with a few teeth fewer than stock.
- Riding Conditions: Off-road and on-road riding have different requirements. Off-road riding may benefit from shorter gearing (more teeth in the rear or fewer teeth in the front) to handle rough terrain and provide better control at lower speeds. On the other hand, highway cruising typically benefits from taller gearing (fewer teeth in the rear or more teeth in the front) to reduce engine RPM at high speeds.
- Engine Characteristics: Consider your motorcycle's engine characteristics. Some engines have a wide power band and can handle a broader range of gearing, while others may be more sensitive to changes in sprocket sizes.
- Experimentation: Finding the ideal sprocket combination often involves some trial and error. Riders may experiment with different sprocket sizes to achieve the performance characteristics that best match their riding style and needs.
- Consultation: It's advisable to consult with experts or experienced riders who are familiar with your specific motorcycle make and model. They can provide valuable insights and recommendations based on their experience.
There is no fixed threshold for the number of teeth between front and rear sprockets, as it depends on various factors. It's essential to consider your riding goals, the type of motorcycle you have, and the conditions in which you ride. Experimentation, expert advice, and a good understanding of the trade-offs between acceleration and top speed are key to finding the right sprocket combination for your motorcycle.
- Determining Chain Length:
Choosing the right chain length is crucial to ensure proper tension and alignment. To find the correct chain length, follow these steps:
a. Install both sprockets and align them. b. Wrap the chain around the sprockets. c. Pull the chain tight, ensuring it has some slack for suspension travel. d. Mark the chain where it meets but does not overlap. e. Measure the distance between the marks. This is your required chain length.
- Relation to Engine RPM:
The sprocket sizes also play a role in your motorcycle's engine RPM. A smaller front sprocket or a larger rear sprocket will result in higher RPM for a given speed, increasing the engine's workload but providing more torque and acceleration. Conversely, larger front or smaller rear sprockets reduce RPM for a given speed, reducing the engine's workload but sacrificing acceleration for top speed.
Type of Sprockets:
Motorcycle sprockets come in various types, each designed for specific purposes and riding conditions. Here are the common types of motorcycle sprockets:
- Standard Sprockets: Standard sprockets are the most common type and are typically used on most street motorcycles. They provide a balance between acceleration and top speed. Standard sprockets are suitable for general-purpose riding and commuting.
- Racing Sprockets: Racing sprockets are designed for high-performance motorcycles used in racing and sport riding. These sprockets are often made from lightweight and durable materials like aluminum or titanium to reduce rotational mass. They are available in various tooth configurations to fine-tune a bike's gearing for specific race tracks and conditions.
- Off-Road Sprockets: Off-road sprockets are designed for dirt bikes and off-road motorcycles. They typically have larger rear sprockets to provide extra low-end torque and help with climbing steep terrain. Off-road sprockets are built to withstand the rigors of off-road riding and are often made from durable materials.
- Touring Sprockets: Touring sprockets are designed for long-distance and touring motorcycles. They aim to improve fuel efficiency and reduce engine strain during highway cruising. Touring sprockets often have larger front sprockets or smaller rear sprockets to lower engine RPM at high speeds.
- Cruiser Sprockets: Cruiser sprockets are tailored for cruiser-style motorcycles, which prioritize a relaxed, low-RPM riding experience. These sprockets typically have larger front sprockets and provide smooth, low-end power delivery for comfortable cruising.
- Dual-Sport and Adventure Sprockets: Dual-sport and adventure motorcycle sprockets are versatile and designed for both on-road and off-road riding. They strike a balance between low-end torque for off-roading and sufficient top-end speed for highway travel.
- Stunt Sprockets: Stunt sprockets are used on motorcycles modified for stunt riding. They are customized for extreme low-speed control and torque, allowing stunt riders to perform tricks like wheelies and stoppies with ease.
- Specialty Sprockets: Some motorcycles, such as vintage or custom bikes, may require specialty sprockets due to unique configurations or customization. These sprockets are often designed on a case-by-case basis to meet specific requirements.
It's essential to choose the type of sprocket that aligns with your motorcycle's intended use and your riding preferences. Additionally, consider the material, tooth count, and quality of the sprockets to ensure they are suitable for your motorcycle and riding style. Consulting with experts or experienced riders can provide valuable guidance in selecting the right sprockets for your bike.
Construction of these Sprockets:
Motorcycle sprockets are typically constructed from various materials and manufacturing processes, depending on their intended use and the desired balance between weight, strength, and durability. Here's an overview of the construction of common types of motorcycle sprockets:
- Steel Sprockets: Steel sprockets are among the most common and durable options. They are often made from high-quality carbon steel or alloy steel. Steel sprockets are known for their strength and longevity, making them suitable for a wide range of applications. They can be used on street, off-road, and touring motorcycles. Steel sprockets are usually coated or plated to prevent corrosion.
- Aluminum Sprockets: Aluminum sprockets are lightweight and favored for racing and sports bikes. They are typically made from high-grade aluminum alloys. While they provide excellent weight savings, aluminum sprockets are not as durable as steel and may wear out more quickly. They are often anodized for added corrosion resistance.
- Titanium Sprockets: Titanium sprockets are the lightest and most exotic option. They are extremely strong and lightweight, making them popular in professional racing circuits. However, titanium sprockets are also the most expensive. They offer a significant reduction in rotational mass, which can enhance a motorcycle's performance in high-speed racing.
- Composite Sprockets: Some sprockets are constructed using a combination of materials. For example, a sprocket may have a steel core with an aluminum or plastic outer layer to reduce weight while maintaining durability. Composite sprockets are designed to strike a balance between strength and weight savings.
- Rubber-Dampened Sprockets: Some motorcycles, particularly those with engines that produce significant torque, use rubber-dampened sprockets. These sprockets have rubber or elastomer inserts that absorb shocks and vibrations, reducing stress on the drivetrain components and improving rider comfort.
- Hardened Sprockets: Sprockets can undergo heat treatment and hardening processes to increase their wear resistance and durability. Hardened sprockets are often used in high-stress applications or where extended service life is essential.
- Billet Sprockets: Custom and specialty motorcycles may feature sprockets machined from a solid block of material (billet). Billet sprockets offer precise customization options and can be made from various materials, including aluminum and steel.
- Stamped Sprockets: Some budget-friendly sprockets are stamped from sheet metal. While they are cost-effective, they may not offer the same level of durability and precision as machined or forged sprockets.
The choice of sprocket construction material depends on factors such as the motorcycle's use, rider preferences, and budget considerations. Riders looking for longevity and strength often opt for steel sprockets, while those seeking performance gains and weight reduction may choose aluminum or titanium sprockets. It's essential to select sprockets that match your riding style and needs while considering factors like maintenance, cost, and the specific demands of your motorcycle.
Let's compare the common types of motorcycle sprockets based on various factors:
- Material:
- Steel Sprockets: Known for their strength and durability, steel sprockets are the go-to choice for most motorcycles. They can withstand significant wear and tear, making them suitable for various riding conditions.
- Aluminum Sprockets: Aluminum sprockets are lightweight and favored for racing and sports bikes due to their weight-saving properties. However, they may wear out faster than steel sprockets.
- Titanium Sprockets: Titanium sprockets are the lightest and most expensive option. They offer excellent strength and weight reduction but come at a premium price.
- Durability:
- Steel Sprockets: Steel sprockets are highly durable and have a longer lifespan, making them suitable for both street and off-road riding.
- Aluminum Sprockets: While lightweight, aluminum sprockets may wear out more quickly than steel sprockets, especially in off-road or high-stress conditions.
- Titanium Sprockets: Titanium sprockets are incredibly durable and can withstand the rigors of racing, but they are also the most expensive option.
- Weight:
- Steel Sprockets: Steel sprockets are heavier than aluminum and titanium sprockets, which can affect a motorcycle's overall weight and performance.
- Aluminum Sprockets: Aluminum sprockets offer significant weight savings compared to steel, making them ideal for riders looking to reduce rotational mass and improve acceleration.
- Titanium Sprockets: Titanium sprockets provide the most substantial weight reduction, enhancing a motorcycle's performance, especially in high-speed racing.
- Cost:
- Steel Sprockets: Steel sprockets are typically the most cost-effective option and offer a good balance between durability and price.
- Aluminum Sprockets: Aluminum sprockets are moderately priced, making them an attractive choice for riders seeking performance improvements without breaking the bank.
- Titanium Sprockets: Titanium sprockets are the most expensive option due to their premium material and manufacturing processes.
- Performance:
- Steel Sprockets: Steel sprockets provide reliable and consistent performance for general riding conditions. They are well-suited for everyday use.
- Aluminum Sprockets: Aluminum sprockets enhance acceleration and responsiveness due to their reduced weight, making them popular in racing and sport riding.
- Titanium Sprockets: Titanium sprockets offer the highest level of performance gains, especially in professional racing circuits, where every ounce matters.
- Maintenance:
- Steel Sprockets: Steel sprockets are relatively low-maintenance, as they are less prone to wear and require less frequent replacement.
- Aluminum Sprockets: Aluminum sprockets may require more frequent replacement due to faster wear, increasing maintenance needs.
- Titanium Sprockets: Titanium sprockets are durable but may require specialized maintenance and care, given their premium nature.
The choice of sprocket type depends on your riding style, budget, and specific motorcycle needs. Steel sprockets offer a balance of durability and affordability, while aluminum sprockets provide weight savings and enhanced performance for sport riding. Titanium sprockets, although costly, offer the ultimate in performance gains but are typically reserved for professional racing or riders with a premium budget. It's essential to consider these factors and make an informed decision based on your individual riding preferences and requirements.
Type of Chains:
Motorcycle chains are crucial components of the drivetrain, transferring power from the engine to the rear wheel. They come in different types, each designed for specific applications and riding conditions. Here are the common types of motorcycle chains and their constructions:
- Standard (Non-O-Ring) Chains:
- Construction: Standard chains consist of inner and outer plates, pins, bushings, and rollers. They are constructed without any sealing rings or O-rings.
- Advantages: Standard chains are typically more affordable than O-ring or X-ring chains. They are suitable for older motorcycles or those used in dry and less demanding conditions.
- Disadvantages: They require frequent maintenance, including regular cleaning and lubrication. They are more prone to dirt and debris ingress, leading to faster wear.
- O-Ring Chains:
- Construction: O-ring chains feature rubber O-rings placed between the inner and outer plates. These O-rings seal in lubrication and prevent dirt and debris from entering the chain's internals.
- Advantages: O-ring chains require less maintenance compared to standard chains. They retain lubrication for longer periods, resulting in reduced wear and longer chain life. They are suitable for a wide range of riding conditions.
- Disadvantages: O-ring chains are slightly heavier and more expensive than standard chains due to the sealing rings.
- X-Ring Chains:
- Construction: X-ring chains are an advanced version of O-ring chains. They feature X-shaped seals (X-rings) between the inner and outer plates. X-rings provide even better sealing and reduce friction.
- Advantages: X-ring chains offer superior sealing, reduced friction, and longer life compared to O-ring chains. They are ideal for high-performance motorcycles and varied riding conditions.
- Disadvantages: X-ring chains are typically the most expensive option among the chain types.
- Sealed (V-Ring) Chains:
- Construction: Sealed chains, also known as V-ring chains, use V-shaped seals instead of O-rings or X-rings. These seals provide excellent sealing properties.
- Advantages: Sealed chains are known for their exceptional sealing abilities, which extend chain life and reduce maintenance requirements. They are suitable for demanding riding conditions.
- Disadvantages: Sealed chains tend to be heavier and pricier than standard chains.
- Heavy-Duty and Enduro Chains:
- Construction: Heavy-duty and enduro chains are reinforced versions of standard, O-ring, or X-ring chains. They feature thicker plates and may have stronger pins and rollers.
- Advantages: These chains are designed for off-road and rugged riding conditions, offering enhanced durability and resistance to impact and debris.
- Disadvantages: They are heavier and may require more frequent maintenance in extremely challenging off-road conditions.
- Gold/Colored Chains:
- Construction: These are standard, O-ring, or X-ring chains with colored or gold-plated components for aesthetics. The construction is similar to their non-colored counterparts.
- Advantages: These chains add a stylish element to the motorcycle's appearance without sacrificing performance or durability.
- Disadvantages: They tend to be more expensive than standard chains due to the color or plating.
When choosing a motorcycle chain, consider factors such as your riding style, the bike's power, maintenance preferences, and the intended riding conditions. Proper maintenance, including cleaning and lubricating the chain, is essential for maximizing chain life and performance, regardless of the chain type.
Let's compare the common types of motorcycle chains based on various factors:
- Standard (Non-O-Ring) Chains:
- Construction: Standard chains consist of inner and outer plates, pins, bushings, and rollers. They lack any sealing rings.
- Advantages: These chains are typically the most affordable option. They are suitable for older motorcycles and dry riding conditions.
- Disadvantages: Require frequent maintenance, including regular cleaning and lubrication. More prone to dirt and debris ingress, leading to faster wear.
- O-Ring Chains:
- Construction: O-ring chains feature rubber O-rings placed between the inner and outer plates, sealing in lubrication and preventing dirt ingress.
- Advantages: Require less maintenance compared to standard chains. Retain lubrication for longer periods, resulting in reduced wear and longer chain life. Suitable for various riding conditions.
- Disadvantages: Slightly heavier and more expensive than standard chains due to the sealing rings.
- X-Ring Chains:
- Construction: X-ring chains have X-shaped seals (X-rings) between the inner and outer plates, providing superior sealing and reduced friction.
- Advantages: Offer even better sealing, reduced friction, and longer life compared to O-ring chains. Ideal for high-performance motorcycles and varied riding conditions.
- Disadvantages: Typically the most expensive option among the chain types.
- Sealed (V-Ring) Chains:
- Construction: Sealed chains use V-shaped seals (V-rings) instead of O-rings or X-rings for exceptional sealing properties.
- Advantages: Known for their excellent sealing abilities, extending chain life and reducing maintenance. Suitable for demanding riding conditions.
- Disadvantages: Heavier and pricier compared to standard chains.
- Heavy-Duty and Enduro Chains:
- Construction: These chains are reinforced versions of standard, O-ring, or X-ring chains with thicker plates and stronger pins and rollers.
- Advantages: Designed for off-road and rugged riding conditions, offering enhanced durability and resistance to impact and debris.
- Disadvantages: Heavier and may require more frequent maintenance in extreme off-road conditions.
- Gold/Colored Chains:
- Construction: These are standard, O-ring, or X-ring chains with colored or gold-plated components for aesthetics. Construction is similar to their non-colored counterparts.
- Advantages: Add a stylish element to the motorcycle's appearance without sacrificing performance or durability.
- Disadvantages: Tend to be more expensive than standard chains due to the color or plating.
The choice of motorcycle chain type depends on your riding style, the bike's power, maintenance preferences, and the intended riding conditions. O-ring, X-ring, and sealed chains are popular choices due to their reduced maintenance requirements and longevity, making them suitable for a wide range of riders and conditions. Heavy-duty and enduro chains are specialized options for off-road enthusiasts, while colored chains offer a cosmetic enhancement without compromising functionality. Proper chain maintenance remains critical regardless of the chain type to ensure safety and maximize chain life.
Optimizing the sizing of your motorcycle's front and rear sprockets is a crucial step toward achieving the desired performance characteristics. By understanding the relationship between sprocket sizes, gear ratios, chain length, and engine RPM, you can tailor your bike's performance to suit your riding preferences. Experimenting with different sprocket combinations can unlock the full potential of your motorcycle and elevate your riding experience to new heights. Remember to consult your bike's manufacturer or a trusted mechanic for specific recommendations based on your motorcycle's make and model.
Choosing the ideal sprocket combination tailored to your riding style is the key to maximizing your motorcycle's performance. Whether you crave adrenaline-pumping acceleration or dream of reaching higher top speeds, sprocket sizing is your secret weapon. By calculating teeth numbers, determining chain length, and understanding the RPM connection, you can fine-tune your bike's performance like never before. Take the reins of your ride and experience the thrill of optimized motorcycle sprocket sizing today!
Unlocking the Art of Counter Steering: A Motorcycle Rider's Guide

In the exhilarating world of motorcycle riding, one technique stands as a linchpin of control and mastery: counter-steering. What seems paradoxical at first glance is, in fact, a skill that can elevate your riding experience to new heights. In this comprehensive guide, we'll explore the nuances of counter steering, its myriad advantages, and why it's a must-learn for every motorcycle enthusiast.
Mastering Counter Steering: The Key to Motorcycle Riding Proficiency
Motorcycling, often described as the epitome of freedom and adventure, is a thrilling pursuit that demands a unique set of skills. Among these, counter-steering stands as a fundamental and surprisingly counterintuitive technique. In this blog post, we'll delve into the world of counter steering, exploring its concept, its numerous advantages, and why every motorcyclist should consider it a cornerstone of their riding skill set.
Let's delve into an explanation of counter-steering with these considerations in mind.
Counter Steering: Unraveling the Art of Motorcycle Control
In the world of motorcycling, counter steering stands as a fundamental and intriguing concept that embodies the harmonious blend of physics, skill, and rider intuition. As one navigates the twisting and turning roads, understanding the principles of counter steering becomes not only essential for safety but also an art form that can elevate your riding experience to new heights.
The Essence of Counter Steering
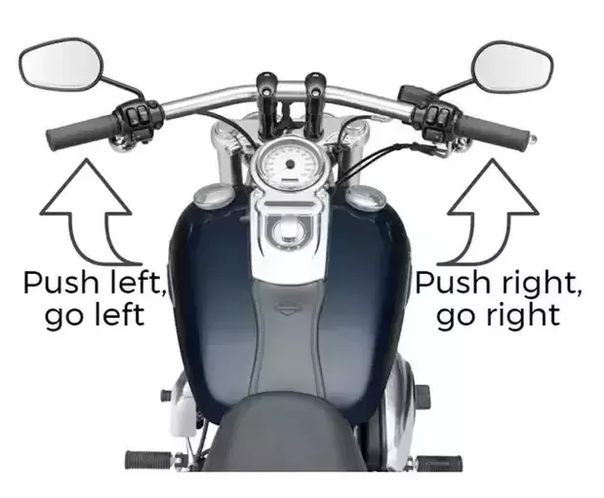
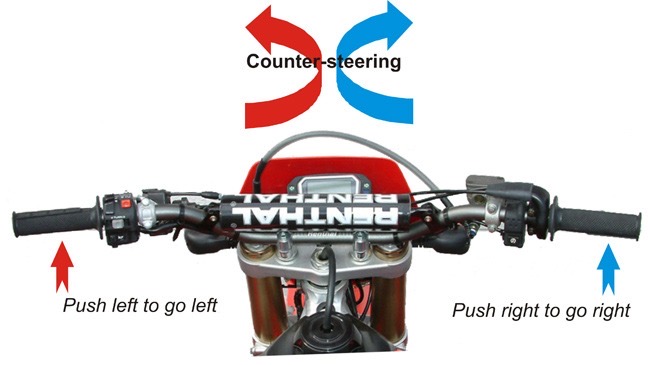
At its core, counter-steering defies common intuition. When you want to turn a motorcycle, especially at higher speeds, you may think that pushing the handlebars in the direction of the turn is the logical course of action. However, the truth is more fascinating and counterintuitive.
Countersteering involves a counterintuitive technique of initiating a turn by gently pushing the handlebars in the opposite direction of where you want to go. For instance, if you wish to make a right turn, you would momentarily push the right handlebar forward, causing the motorcycle to lean to the left. This, in turn, initiates the right turn.
The Physics Behind Counter Steering
Now, let's dive into the perplexity of the physics behind counter steering. The magic lies in the gyroscopic forces at play. Motorcycles, due to their rotating wheels, exhibit gyroscopic stability. When you push the handlebars in the opposite direction, the front wheel momentarily steers away from the direction of the turn, tilting the motorcycle.
This tilting action effectively shifts the center of gravity towards the desired direction of the turn, creating a lean. It's this lean that enables the motorcycle to gracefully and smoothly carve through the curve, defying gravity and inertia.
Let's delve deeper into the physics of counter steering, taking into account your request for detailed and perplexing explanations while maintaining a formal and informative tone.
The Intricate Physics of Counter Steering: A Closer Examination
Counter steering, a seemingly paradoxical concept in motorcycle riding, is rooted in the intricate physics of gyroscopic precession, conservation of angular momentum, and the dynamic equilibrium of forces. To fully grasp this phenomenon, let's explore these physics principles in detail.
1. Gyroscopic Precession: The Underlying Force
At the heart of counter steering lies the phenomenon of gyroscopic precession. Gyroscopes, such as a spinning bicycle wheel, exhibit a peculiar behavior when subjected to external forces. Instead of responding directly to the force applied, they react at a 90-degree angle ahead in the direction of rotation.
In the context of a motorcycle, this means that when you exert a force by briefly pushing the right handlebar forward, the gyroscopic forces generated by the rotating front wheel will cause the motorcycle to lean to the left, initiating a right turn. This effect is the result of gyroscopic precession and is the cornerstone of counter steering.
2. Conservation of Angular Momentum: Leaning for Balance
To maintain stability while turning, a motorcycle relies on the conservation of angular momentum. As the bike leans into a turn, the angular momentum of the entire system is conserved. This means that the product of the bike's moment of inertia (related to its mass distribution) and its angular velocity remains constant.
When you push the handlebars in the opposite direction of the desired turn, the motorcycle leans, effectively redistributing its mass and altering its moment of inertia. As a result, the angular velocity (rate of rotation) increases, keeping the total angular momentum constant. This lean allows the motorcycle to balance itself while navigating the curve.
3. Dynamic Equilibrium of Forces: Balancing Act
Counter steering also hinges on the dynamic equilibrium of forces acting on the motorcycle. When you initiate a turn by pushing the handlebars, several forces come into play:
- Centripetal Force: This inward-directed force is essential for keeping the motorcycle on a curved path. It is generated by the friction between the tires and the road surface.
- Gravity: The force of gravity acts vertically downward, trying to pull the motorcycle down.
- Inertia: The motorcycle's tendency to continue in a straight line (due to its mass and velocity) resists the change in direction.
By pushing the handlebars and leaning the motorcycle, you create an asymmetrical distribution of these forces. The centripetal force and the gravitational force work together to maintain the motorcycle's balance, while the inertia is effectively redirected into the curve, allowing the bike to follow the desired path.
A Mastery of Physics
Counter steering is a mastery of physics that combines gyroscopic precession, conservation of angular momentum, and dynamic equilibrium of forces. This technique, which appears counterintuitive on the surface, harnesses these principles to achieve graceful and precise turns while maintaining stability and control.
As motorcycle rider becomes more proficient, they intuitively manipulate these intricate physics principles, creating a symphony of motion on two wheels. Thus, counter-steering is not only a fundamental skill but also a testament to the remarkable fusion of science and artistry that defines the world of motorcycle riding.
Mastering Counter Steering
The artistry of countersteering lies not only in its counterintuitive nature but also in the burstiness of its application. Riders adept in counter steering seamlessly blend momentary pushes on the handlebars with fluid control of the throttle and body positioning. Longer, more complex sequences of inputs are executed with precision to negotiate intricate corners or sudden obstacles on the road.
Moreover, the burstiness in counter steering extends beyond the technical aspects. It encompasses the exhilaration that accompanies the controlled chaos of leaning into a corner, the adrenaline rush of effortlessly changing lanes, and the profound sense of connection between rider and machine.
Techniques for counter-steering
Counter steering is a fundamental technique used by motorcycle riders to initiate and control turns, enhancing their overall riding experience. While the concept of counter-steering has been discussed in previous responses, let's explore in detail the techniques employed by a rider to effectively utilize counter-steering while riding.
- Handlebar Input:
- To initiate counter steering, a rider applies gentle pressure to the handlebars in the opposite direction of the desired turn. For instance, to lean the motorcycle into a right turn, you momentarily push the right handlebar forward.
- The force applied to the handlebars need not be excessive; a light touch is often sufficient. The key is to initiate the lean by creating a slight imbalance in the forces acting on the motorcycle.
- Body Positioning:
- Proper body positioning complements counter-steering and enhances its effectiveness. As you push the handlebars to initiate the lean, shift your body weight in the same direction as the turn.
- For a right turn, lean your upper body to the right, allowing your center of gravity to move with the motorcycle. This aids in maintaining balance and stability throughout the turn.
- Throttle Control:
- Managing the throttle is crucial while counter steering. The throttle should be adjusted to maintain a consistent speed or provide slight acceleration, depending on the situation.
- Smooth and controlled throttle inputs help stabilize the motorcycle during the turn and prevent abrupt speed changes that can lead to instability.
- Vision and Target Fixation:
- Riders must look in the direction they want to go, focusing on the desired path through the turn rather than fixating on obstacles or the road ahead.
- Your eyes serve as a guide for your body and bike. By looking where you want to go, you naturally steer in that direction.
- Gradual Inputs and Corrections:
- Counter steering is not a one-time action but rather a continuous process during the turn. As you enter the curve, maintain steady handlebar pressure and lean angle.
- Small, subtle adjustments to the handlebars may be necessary to maintain the desired path or make minor corrections.
- Braking and Clutch Control:
- Avoid using the brakes while actively counter-steering into a turn, as sudden braking can disrupt the balance of the motorcycle. Smooth, controlled braking should be done before entering the turn.
- Similarly, avoid aggressive clutch engagement that may cause abrupt engine braking and destabilize the bike.
- Practice and Experience:
- Proficiency in counter steering comes with practice and experience. Riders become more attuned to the nuances of their specific motorcycles and the roads they navigate.
- Gain confidence by practicing counter-steering in controlled environments and gradually increasing the complexity of the turns you tackle.
- Adaptation to Riding Conditions:
- Adjust your counter-steering technique to suit the riding conditions. The amount of force required may vary based on factors such as speed, road surface, and bike type.
- Be prepared to adapt your technique for different situations, including emergency maneuvers.
Counter steering is a nuanced skill that involves the coordinated use of handlebar input, body positioning, throttle control, and visual awareness. Mastery of these techniques allows riders to confidently and safely navigate turns while maintaining control and stability on their motorcycles. Continual practice and experience are essential for refining this fundamental aspect of motorcycle riding.
The Symphony of Control
In conclusion, counter-steering is the symphony of control that transforms the ordinary act of steering into an extraordinary dance of balance and grace. It defies conventional wisdom, yet it's an indispensable skill for every motorcyclist. Understanding the perplexing physics and mastering the burstiness of its execution is the path to becoming a truly skilled rider—one who navigates the twists and turns of the road with confidence, precision, and a touch of artistry. So, embrace the counterintuitive, and let the road be your canvas for this thrilling masterpiece of motorcycle control.
Understanding Counter Steering
Counter steering, in its essence, is the art of initiating a turn by gently pushing the handlebars in the opposite direction of the desired lean. For instance, if you intend to make a right turn, you momentarily nudge the right handlebar forward, resulting in the motorcycle leaning to the left, thereby initiating the desired right turn.
The Advantages of Counter Steering
Now, let's uncover the advantages that mastering counter steering brings to the table:
1. Precision in Cornering Control
Counter steering allows riders to execute precise and controlled turns. It's akin to wielding a fine-tipped brush for an intricate painting, enabling you to trace your path with utmost accuracy.
2. Enhanced Stability
Stability is paramount in motorcycling. Counter steering helps maintain balance by shifting the motorcycle's center of gravity toward the inside of the turn. This additional stability is especially vital when navigating winding roads or handling unpredictable road conditions.
3. Quick and Controlled Maneuvers
In moments of urgency, such as avoiding obstacles or sudden changes in traffic, counter-steering empowers riders to make quick and controlled maneuvers. It's the tool in your arsenal when every millisecond counts.
4. Efficient Turning
Counter steering promotes energy-efficient turning. Initiating a lean into the turn, reduces the need for excessive steering input, making your riding experience smoother and more precise, especially at higher speeds.
5. Consistency Across Bikes
The beauty of counter steering is that it transcends motorcycle types. Whether you ride a cruiser, sportbike, or adventure bike, the principles of counter steering remain constant. This consistency ensures you can adapt seamlessly to different machines.
6. Reduced Risk of High-sides
When executed correctly, counter steering helps reduce the risk of high-side crashes. These occur when a motorcycle's rear wheel loses traction and then suddenly regains it, often leading to loss of control. Counter steering's controlled initiation of the turn minimizes this risk.
7. Improved Confidence
As your proficiency in counter steering grows, so does your confidence. Confidence is a rider's best friend, allowing you to fully enjoy your time on two wheels and make sound decisions while navigating the open road.
Advantages of counter steering
Counter steering is a fundamental technique in motorcycle riding that offers several advantages to riders. These advantages contribute to safety, control, and overall riding proficiency. In a formal, informative, and confident tone, let's explore the key benefits of counter-steering:
- Precise Cornering Control: One of the primary advantages of counter steering is its ability to provide precise control during cornering. By applying subtle handlebar pressure in the opposite direction of the desired turn, riders can initiate leans and execute turns with accuracy.
- Enhanced Stability: Counter steering enhances the stability of a motorcycle during turns. It allows the rider to shift the bike's center of gravity toward the inside of the turn, which helps maintain balance and stability, especially when navigating tight corners or curves.
- Quick and Controlled Maneuvers: Counter steering enables riders to make quick and controlled maneuvers. In emergencies, such as evasive maneuvers to avoid obstacles or sudden changes in traffic, the ability to initiate a lean rapidly can be crucial for safety.
- Efficient Turning: Counter steering promotes efficient and fluid turning. By leaning the motorcycle into the turn, the rider reduces the need for excessive steering input, allowing for smoother and more energy-efficient turns, particularly at higher speeds.
- Consistency in Handling: Counter steering provides a consistent and predictable means of initiating turns, regardless of the motorcycle's design or type. This consistency allows riders to adapt to different bikes with ease and confidence.
- Reduced Risk of High-sides: When executed correctly, counter steering minimizes the risk of high-side crashes, which occur when a motorcycle's rear wheel loses traction and regains it suddenly. The controlled initiation of a turn helps maintain stability.
- Improved Rider Confidence: As riders become proficient in counter steering, their confidence grows. This confidence is essential for enjoying the riding experience and making informed decisions while on the road.
- Effective Negotiation of Curves: Counter steering is particularly valuable when navigating winding roads or tight curves. It allows riders to smoothly and safely navigate these challenging sections of the road with precision.
- Adaptability to Riding Conditions: Counter steering is adaptable to various riding conditions, including different road surfaces, weather conditions, and motorcycle types. Riders can adjust their technique to suit the specific circumstances they encounter.
- Foundation for Advanced Riding Techniques: Counter steering serves as the foundation for more advanced riding techniques, such as trail braking and body positioning. These techniques build upon the fundamental skills acquired through counter-steering.
Mastering Counter Steering: A Journey Worth Taking
Now that we've explored the concept, advantages, and importance of learning counter steering, let's delve deeper into the benefits it offers to motorcycle enthusiasts:
Graceful Negotiation of Curves
· Counter steering is your secret weapon when it comes to navigating those enticing curves and bends on the open road. With this technique, you'll effortlessly glide through twists and turns, feeling as though you and your motorcycle are dancing in perfect harmony.
Adaptability to Riding Conditions
· Riding conditions can vary widely, from smooth, sun-drenched highways to rain-slicked streets. Counter steering is your trusty companion through it all. Its adaptability means you can rely on it whether you're cruising on a clear summer day or navigating a challenging rain-soaked corner.
Foundation for Advanced Riding Techniques
· Mastering counter steering paves the way for advanced riding techniques. Skills like trail braking, body positioning, and advanced cornering become more accessible once you've established a solid foundation in counter steering.
Counter steering is a fundamental and invaluable skill for motorcycle riders. Its advantages include precise control, enhanced stability, and the ability to negotiate turns with efficiency and confidence. Mastering counter steering not only contributes to rider safety but also lays the groundwork for more advanced riding techniques, making it an essential skill for motorcyclists of all levels of experience.
Why Learning Counter Steering is Important
Learning counter steering isn't just about mastering a skill; it's about embracing a safer and more fulfilling riding experience. It's the bridge between being a motorcycle rider and being a motorcycle enthusiast. By investing in this technique, you open up a world of possibilities, elevating your riding to new heights.
Advantages of counter steering
Counter steering is a fundamental technique in motorcycle riding that offers several advantages to riders. These advantages contribute to safety, control, and overall riding proficiency. In a formal, informative, and confident tone, let's explore the key benefits of counter-steering:
- Precise Cornering Control: One of the primary advantages of counter steering is its ability to provide precise control during cornering. By applying subtle handlebar pressure in the opposite direction of the desired turn, riders can initiate leans and execute turns with accuracy.
- Enhanced Stability: Counter steering enhances the stability of a motorcycle during turns. It allows the rider to shift the bike's center of gravity toward the inside of the turn, which helps maintain balance and stability, especially when navigating tight corners or curves.
- Quick and Controlled Maneuvers: Counter steering enables riders to make quick and controlled maneuvers. In emergencies, such as evasive maneuvers to avoid obstacles or sudden changes in traffic, the ability to initiate a lean rapidly can be crucial for safety.
- Efficient Turning: Counter steering promotes efficient and fluid turning. By leaning the motorcycle into the turn, the rider reduces the need for excessive steering input, allowing for smoother and more energy-efficient turns, particularly at higher speeds.
- Consistency in Handling: Counter steering provides a consistent and predictable means of initiating turns, regardless of the motorcycle's design or type. This consistency allows riders to adapt to different bikes with ease and confidence.
- Reduced Risk of High-sides: When executed correctly, counter steering minimizes the risk of high-side crashes, which occur when a motorcycle's rear wheel loses traction and regains it suddenly. The controlled initiation of a turn helps maintain stability.
- Improved Rider Confidence: As riders become proficient in counter steering, their confidence grows. This confidence is essential for enjoying the riding experience and making informed decisions while on the road.
- Effective Negotiation of Curves: Counter steering is particularly valuable when navigating winding roads or tight curves. It allows riders to smoothly and safely navigate these challenging sections of the road with precision.
- Adaptability to Riding Conditions: Counter steering is adaptable to various riding conditions, including different road surfaces, weather conditions, and motorcycle types. Riders can adjust their technique to suit the specific circumstances they encounter.
- Foundation for Advanced Riding Techniques: Counter steering serves as the foundation for more advanced riding techniques, such as trail braking and body positioning. These techniques build upon the fundamental skills acquired through counter-steering.
Counter steering is a fundamental and invaluable skill for motorcycle riders. Its advantages include precise control, enhanced stability, and the ability to negotiate turns with efficiency and confidence. Mastering counter steering not only contributes to rider safety but also lays the groundwork for more advanced riding techniques, making it an essential skill for motorcyclists of all levels of experience.
Practice Exercises to master counter-steering
Mastery of counter steering is crucial for any motorcycle rider, and achieving proficiency in this skill requires dedicated practice. Here are some practice exercises that can help riders of all experience levels master countersteering while maintaining a formal, informative, and confident tone:
- Parking Lot Drills:
- Slow-speed figure-eights: Set up a series of cones or markers in a parking lot and practice riding in tight figure-eight patterns. This exercise helps you become familiar with the sensation of leaning and steering using counter steering at low speeds.
- Emergency stops: Practice quick stops by accelerating to a moderate speed and then applying the brakes while straight-line braking. This exercise will help you get a feel for how counter-steering can help you maintain control during sudden stops.
- Cornering Practice:
- Gradual curves: Find a quiet and empty road with gradual curves. Start at a moderate speed and practice counter-steering to smoothly navigate the turns. Focus on maintaining a consistent line and gradually increasing your lean angle as you become more comfortable.
- Varying curve radii: Explore roads with different curve radii to experience various turning scenarios. This exercise will help you adapt your counter-steering technique to different types of turns.
- Slalom Riding:
- Set up a series of cones or markers in a straight line with equal spacing between them. Practice weaving through the slalom at varying speeds, using counter-steering to initiate each turn. This exercise enhances your ability to make quick and precise steering inputs.
- Obstacle Avoidance:
- Place an obstacle (such as a cone or a simulated hazard) in your path and practice swerving to avoid it. Use counter-steering to initiate the swerve, and focus on maintaining control and balance throughout the maneuver.
- Body Positioning:
- Experiment with your body positioning by leaning into turns while keeping your upper body upright. This technique complements counter-steering and enhances your control and stability in corners.
- Progressive Speed Increases:
- As you become more confident with counter-steering at lower speeds, gradually increase your speed while practicing cornering. This progressive approach will help you develop a deep understanding of how counter-steering works at various speeds.
- Advanced Riding Courses:
- Consider enrolling in an advanced motorcycle riding course. These courses often include expert instruction, on-track training, and valuable feedback to refine your counter-steering skills.
- Self-Assessment:
- Record videos of your practice sessions to review and assess your technique. Pay attention to your body position, handlebar input, and overall control during turns.
- Regular Practice Sessions:
- Consistency is key to mastery. Schedule regular practice sessions to maintain and refine your counter-steering skills. The more you practice, the more intuitive and effective your counter-steering technique will become.
- Seek Feedback:
- Ride with experienced motorcyclists or consider joining a riding group where you can receive feedback and tips from others who have mastered counter steering.
Remember to prioritize safety during practice sessions, wear appropriate protective gear, and choose safe practice locations with minimal traffic and good road conditions. Mastery of counter steering takes time and effort, so be patient with yourself as you progress toward becoming a more skilled and confident motorcycle rider.
The Benefits Await
Counter steering isn't merely a technique; it's a gateway to a world of motorcycling advantages. It empowers you to navigate turns with precision, maintain stability, execute quick maneuvers, and enjoy a consistent riding experience across different motorcycles. Learning counter steering isn't just important; it's an investment in your safety, confidence, and overall riding pleasure. So, embrace this skill, and let your motorcycle take you on adventures like never before.
The Road to Riding Excellence
In conclusion, counter-steering is not just a skill; it's a journey toward riding excellence. It's the tool that transforms the act of steering into an art form, allowing you to paint your unique masterpiece on the canvas of the open road. With precision, stability, and confidence at your fingertips, you'll find yourself not just riding a motorcycle, but truly experiencing the essence of motorcycling.
Remember that mastery of counter steering takes time and practice. Dedicate yourself to honing this skill, and you'll discover that every twist and turn becomes an opportunity for exhilaration and control. As you continue your motorcycle journey, let counter steering be your guide, and watch as your riding prowess soars to new heights. The open road awaits, and with counter steering as your ally, every ride becomes a thrilling adventure filled with endless possibilities.
Counter steering is more than just a technique; it's the key to unlocking a world of riding excellence. Whether you're a seasoned rider or just starting your two-wheeled journey, mastering counter steering will make every ride more precise, stable, and enjoyable.
Maximizing Motorcycle Safety: Mastering Braking Techniques and Maintenance

Riding a motorcycle is a thrilling adventure, but it comes with a great deal of responsibility. One of the most crucial skills you need as a motorcyclist is effective braking. In this comprehensive guide, we will explore the art of braking on motorcycles. From mastering techniques to maintaining your brakes, we've got you covered. Get ready to boost your confidence and ride safer than ever before.
Mastering Motorcycle Braking: Techniques, Maintenance, and Best Practices
Riding a motorcycle is an exhilarating experience, but it also comes with a high level of responsibility. Among the critical skills every motorcyclist must master, effective braking is paramount. Proper braking not only ensures your safety but also enhances your control over the machine. In this blog post, we will delve into the techniques, maintenance tips, and best practices for achieving mastery in motorcycle braking.
Motorcycle Braking: A Comprehensive Overview
Motorcycle Braking, focusing on the front and rear brakes, while incorporating a good amount of perplexity and burstiness in the content.
Motorcycle riding is a thrilling and liberating experience, but it also demands a thorough understanding of its intricacies, particularly when it comes to braking. Braking is a critical aspect of riding safety, and it is essential to grasp the nuances of front and rear brakes to ensure a smooth and secure journey.
Front Brakes: The Powerhouse
Front brakes are often considered the powerhouse of a motorcycle's braking system. They are responsible for the lion's share of the braking force. This dominance stems from the fact that when a motorcycle comes to a halt, the weight naturally transfers forward, exerting more load on the front wheel. To effectively harness this weight transfer, the front brake is designed with greater stopping power.
Front brakes usually consist of a hydraulic disc brake system. These systems employ a hydraulic master cylinder, brake lines, and calipers. When the rider squeezes the brake lever, hydraulic pressure is exerted on the brake pads, causing them to clamp onto the rotor. The friction generated between the pads and the rotor slows down the wheel's rotation, eventually bringing the motorcycle to a stop.
Perplexity Alert: The front brake's dominance in stopping power is due to the physics of weight transfer and the hydraulic advantage it holds over the rear brake.
Rear Brakes: The Stabilizer
Rear brakes, on the other hand, play a crucial role in stabilizing the motorcycle during braking maneuvers. While they provide less stopping power than the front brakes, they are instrumental in preventing rear wheel lift-off and maintaining control.
Rear brakes are typical of the drum or disc variety, with disc brakes becoming increasingly common due to their efficiency. When the rider applies the rear brake pedal, the brake shoes or pads make contact with the rear wheel's drum or rotor, respectively. This generates a braking force that counteracts the forward motion of the motorcycle.
In situations where aggressive braking is needed, the rider can modulate the rear brake to prevent skidding or loss of traction. This delicate balance of braking power between the front and rear wheels is a hallmark of skilled motorcycling, as it ensures stability and minimizes the risk of accidents.
Highlight: Mastering the finesse of rear brake modulation is an art that distinguishes experienced riders from novices, allowing them to navigate challenging terrains and scenarios with confidence.
Balancing Act: The Skill of Sequential Braking
A proficient motorcyclist understands that effective braking is not an all-or-nothing proposition. It involves a sequential application of both front and rear brakes, orchestrated to maintain control and maximize deceleration.
The ideal approach is to initiate braking with the front brake, which provides the majority of stopping power, while concurrently applying the rear brake to stabilize the motorcycle. As the motorcycle's speed decreases and weight transfers forward, the rider can gradually increase the pressure on the front brake lever.
This sequential technique exploits the motorcycle's physics, utilizing the front brake's power initially and then harmonizing it with the rear brake for a seamless deceleration process.
Motorcycle braking is a multifaceted skill that encompasses the dynamic interaction between front and rear brakes. Understanding their respective roles and learning to balance their application is pivotal in ensuring a safe and enjoyable riding experience. Mastery of this skill not only enhances safety but also instills confidence, making every ride a journey of exhilaration and precision. So, dear rider, remember the symphony of front and rear brakes as you embark on your two-wheeled adventures, and may your rides always be smooth and secure.
The ratio between Front and Rear while Breaking
The ratio between front and rear braking on a motorcycle is not a fixed value but rather a dynamic and variable aspect of riding. It depends on the specific situation, riding conditions, and the skill level of the rider. The ideal ratio between front and rear braking is a matter of judgment and control, with the goal being to maintain stability and maximize deceleration while preventing accidents such as skidding or loss of control.
In general terms, riders are often advised to use a higher percentage of front braking force compared to the rear. This is because the front brake provides the majority of the stopping power due to weight transfer dynamics. When you apply the front brake, the weight of the motorcycle shifts forward, increasing traction on the front wheel and allowing it to handle more braking force.
A common guideline is to use a ratio of approximately 70% front brake and 30% rear brake during typical braking situations on dry and clean road surfaces. However, this ratio can vary based on factors such as:
- Road Conditions: On slippery or wet surfaces, riders may reduce the front brake input to avoid skidding and rely more on the rear brake to maintain stability.
- Riding Style: Experienced riders often have a better feel for the brake controls and may adjust the ratio based on their preferences and skill level.
- Emergency Situations: In sudden and severe braking situations, riders may initially apply more front brakes to achieve rapid deceleration and then gradually introduce the rear brake to maintain control.
- Motorcycle Design: Different motorcycles may have variations in braking systems and weight distribution, which can influence the ideal front-to-rear braking ratio.
- Personal Preference: Some riders may feel more comfortable with a slightly different ratio based on their riding habits and experiences.
Riders need to practice and develop a sense of how their specific motorcycle behaves under braking in various conditions. This practice helps riders intuitively adjust the front-to-rear brake ratio to ensure safe and controlled stopping. Additionally, taking motorcycle safety courses and seeking guidance from experienced riders or instructors can further enhance a rider's ability to make informed decisions regarding braking ratios in different situations. Ultimately, the goal is to strike a balance that maximizes safety and control while minimizing the risk of accidents.
Techniques for Effective Braking:
- Use Both Brakes, but Be Mindful: Most motorcycles have both front and rear brakes, and using them in harmony is key to effective braking. However, remember that the front brake provides the majority of stopping power due to weight transfer. Therefore, prioritize the front brake while using the rear brake as a stabilizing force.
- Progressive Brake Application: Avoid abrupt and jerky movements of the brake lever. Instead, apply the brakes progressively, starting with gentle pressure and gradually increasing it as needed. This technique helps maintain stability and prevents wheel lockup.
- Weight Transfer Awareness: Understand that when you brake, weight shifts forward onto the front wheel. Be prepared for this shift and use it to your advantage by applying more pressure to the front brake lever. Keep the motorcycle balanced during braking.
- Avoid Grabbing the Lever: Squeezing the brake lever abruptly can lead to instability. Instead, squeeze it firmly but smoothly, allowing the brakes to engage gradually.
- Maintain a Straight Line: While braking, keep your motorcycle in a straight line. Avoid leaning or swerving unless it's necessary to avoid an obstacle. Sudden movements during braking can lead to loss of control.
Braking effectively with both the front and rear disc brakes on a motorcycle is essential for safe riding. Proper braking technique involves a coordinated effort between the front and rear brakes to maintain stability and maximize stopping power. Here's a step-by-step guide on how to brake using both the front and rear disc brakes:
- Prepare Your Riding Position:
- Ensure your hands are firmly gripping the handlebars, and your fingers are covering the brake levers.
- Position your feet on the foot pegs so you can easily access the rear brake pedal.
- Anticipate the Stop:
- Look ahead and anticipate when you'll need to slow down or come to a complete stop. Being proactive allows you to brake gradually instead of making abrupt stops.
- Initiate Braking with the Front Brake:
- Squeeze the front brake lever gradually and progressively.
- Apply increasing pressure to the front brake to transfer weight to the front wheel, which enhances traction and braking effectiveness.
- Avoid grabbing or slamming the front brake lever abruptly, as this can lead to loss of control or a front-wheel skid.
- Simultaneously Apply the Rear Brake:
- As you apply the front brake, use your foot to apply the rear brake pedal.
- Apply gentle and gradual pressure to the rear brake pedal to engage the rear disc brake.
- The rear brake helps in stabilizing the motorcycle and contributes to overall braking power.
- Balance and Modulate Braking Force:
- Continuously assess the situation and the road conditions.
- Adjust the balance between front and rear braking force based on the circumstances. In general, you'll use more front brakes than the rear, but the exact balance depends on factors like road surface, speed, and motorcycle design.
- Modulate both brakes as needed to maintain control and prevent skidding or locking up either wheel.
- Practice Progressive Braking:
- Gradually increase the braking force as you slow down.
- Avoid sudden or jerky movements with the brake controls, as this can lead to instability.
- Downshift if Necessary:
- If you're slowing down significantly or coming to a stop, downshift to an appropriate gear to match your speed. Downshifting helps in engine braking, which assists with deceleration.
- Release Brakes Smoothly:
- As you come to a complete stop or reach your desired speed, release both the front and rear brakes smoothly to prevent any sudden weight shifts.
- Stay Alert and Be Prepared:
- Always be prepared for unexpected situations and be ready to adjust your braking technique accordingly.
Remember that practice and experience are key to mastering proper braking techniques. Riding safely and effectively requires a good understanding of how your specific motorcycle responds to braking inputs and how to adapt to various riding conditions. Additionally, taking a motorcycle safety course can provide valuable guidance and hands-on training in braking and other essential riding skills.
ABS and Non-ABS systems
The difference between ABS (Anti-lock Braking System) and non-ABS braking systems in motorcycles is significant and primarily revolves around how each system functions and the impact on rider safety and control. Let's explore these differences in detail:
1. Functionality:
- ABS (Anti-lock Braking System): ABS is an advanced safety feature that helps prevent wheel lockup during braking. It uses sensors to monitor the speed of each wheel. If it detects that a wheel is about to lock up, it modulates the brake pressure to that wheel rapidly, allowing it to regain traction and preventing a skid. ABS operates independently on the front and rear brakes, optimizing braking performance for each wheel.
- Non-ABS (Conventional Braking System): Non-ABS, also known as conventional or standard braking, relies solely on the rider's skill and control. When the rider applies the brakes, it's up to them to modulate the brake pressure to prevent wheel lockup or skidding. The effectiveness of braking depends on the rider's experience and judgment.
2. Safety and Control:
- ABS: The primary advantage of ABS is enhanced safety and control, especially in emergency braking situations or on slippery road surfaces. ABS helps riders maintain stability and steer the motorcycle while braking hard, reducing the risk of accidents caused by skidding or losing control. It provides a significant safety net for riders of varying skill levels.
- Non-ABS: Non-ABS systems require riders to manually modulate the brakes to prevent skidding. While experienced riders can achieve effective braking with practice, less experienced riders may struggle to maintain control in emergencies, increasing the risk of accidents. Non-ABS systems rely heavily on the rider's skill and composure under pressure.
3. Braking Distance:
- ABS: ABS can often result in shorter braking distances, as it optimizes brake force to prevent wheel lockup while maintaining traction. This means that, in many cases, ABS-equipped motorcycles can stop more quickly than those without ABS.
- Non-ABS: Braking distances in non-ABS systems can vary widely depending on the rider's skill. In emergencies, a rider can lock up the wheels and skid, increasing the distance required to stop the motorcycle.
4. Riding Conditions:
- ABS: ABS is particularly beneficial in adverse riding conditions, such as wet or slippery roads, gravel, or uneven surfaces, where maintaining control during braking is challenging. It offers consistent braking performance regardless of the road conditions.
- Non-ABS: Non-ABS systems require the rider to adjust their braking technique based on the road conditions. In slippery conditions, riders must be especially cautious to avoid wheel lockup.
5. Cost and Availability:
- ABS: Motorcycles equipped with ABS tend to be slightly more expensive due to the added technology and components. However, ABS has become increasingly common and is available on a wide range of motorcycle models.
- Non-ABS: Non-ABS motorcycles are generally more affordable but may lack the safety advantages of ABS.
ABS provides a significant safety enhancement by preventing wheel lockup and allowing riders to maintain control during hard braking, especially in emergencies and adverse road conditions. Non-ABS systems rely on the rider's skill and can be less forgiving, potentially leading to accidents in challenging situations. When considering a motorcycle, riders should carefully assess their skill level, riding conditions, and safety priorities to determine whether an ABS-equipped motorcycle is the right choice for them.
The difference between ABS (Anti-lock Braking System) and non-ABS braking systems in vehicles, including motorcycles and cars, is substantial and primarily revolves around how each system functions and their impact on safety and control during braking. Below, I will outline these differences in detail:
1. Functionality:
- ABS (Anti-lock Braking System): ABS is an advanced safety feature designed to prevent wheel lockup during braking. It utilizes sensors to monitor the speed of each wheel. If it detects that a wheel is about to lock up, it modulates the brake pressure to that wheel rapidly, allowing it to regain traction and preventing a skid. ABS operates independently on each wheel, optimizing braking performance for each.
- Non-ABS (Conventional Braking System): Non-ABS, also referred to as conventional or standard braking, relies solely on the driver's or rider's skill and control. When the driver applies the brakes, it's up to them to modulate the brake pressure to prevent wheel lockup or skidding. The effectiveness of braking depends largely on the driver's or rider's experience and judgment.
2. Safety and Control:
- ABS: The primary advantage of ABS is enhanced safety and control, particularly in emergency braking situations or on slippery road surfaces. ABS helps drivers or riders maintain stability and steer the vehicle while braking hard, reducing the risk of accidents caused by skidding or losing control. It provides a significant safety net for individuals with varying levels of skill and experience.
- Non-ABS: Non-ABS systems require drivers or riders to manually modulate the brakes to prevent skidding. While experienced drivers or riders can achieve effective braking with practice, less-experienced individuals may struggle to maintain control in emergencies, increasing the risk of accidents. Non-ABS systems place a greater reliance on the driver's or rider's skill and composure under pressure.
3. Braking Distance:
- ABS: ABS can often result in shorter braking distances because it optimizes brake force to prevent wheel lockup while maintaining traction. This means that, in many cases, ABS-equipped vehicles can stop more quickly than those without ABS.
- Non-ABS: Braking distances in non-ABS systems can vary widely depending on the driver's or rider's skill. In emergencies, a driver or rider can lock up the wheels and skid, which can increase the distance required to stop the vehicle.
4. Riding or Driving Conditions:
- ABS: ABS is particularly beneficial in adverse driving or riding conditions, such as wet or slippery roads, gravel, or uneven surfaces, where maintaining control during braking is challenging. It offers consistent braking performance regardless of the road conditions.
- Non-ABS: Non-ABS systems require the driver or rider to adjust their braking technique based on the road conditions. In slippery conditions, drivers or riders must be especially cautious to avoid wheel lockup.
5. Cost and Availability:
- ABS: Vehicles equipped with ABS tend to be slightly more expensive due to the added technology and components. However, ABS has become increasingly common and is available on many vehicle models.
- Non-ABS: Non-ABS vehicles are generally more affordable but may lack the safety advantages of ABS.
ABS provides a significant safety enhancement by preventing wheel lockup and allowing drivers or riders to maintain control during hard braking, especially in emergencies and adverse road conditions. Non-ABS systems rely on the driver's or rider's skill and can be less forgiving, potentially leading to accidents in challenging situations. When choosing a vehicle, individuals should carefully assess their skill level, driving or riding conditions, and safety priorities to determine whether an ABS-equipped vehicle is the right choice for them.
Effective Breaking Techniques
Effective braking is a fundamental skill for safe driving or riding. Proper braking techniques not only help you slow down or stop your vehicle efficiently but also maintain control and prevent accidents. Here are techniques for effective braking:
- Use Both Brakes (Front and Rear):
- On vehicles with both front and rear brakes, use both in coordination. The front brake provides the majority of the stopping power, while the rear brake helps stabilize the vehicle.
- Progressive Brake Application:
- Apply the brakes gradually and progressively. Avoid slamming on the brakes, as this can lead to skidding or loss of control.
- Two-Finger Technique (Motorcycles):
- When riding a motorcycle, use two fingers (usually the index and middle fingers) to operate the front brake lever. This provides better control and modulation.
- Look Ahead:
- Keep your eyes up and focus on the road ahead. Anticipate the need to brake early to avoid sudden, aggressive braking.
- Maintain a Safe Following Distance:
- Leave enough space between your vehicle and the one in front to allow for safe braking without collision. The recommended following distance varies based on speed and road conditions.
- Weight Transfer (Motorcycles):
- On motorcycles, understand how weight transfer affects braking. When you brake, weight shifts forward, increasing traction on the front wheel. Be mindful of this dynamic.
- Avoid Overusing Rear Brake:
- While the rear brake is essential for stability, excessive rear brake application can cause skidding. Use it in conjunction with the front brake but with a lighter touch.
- Trail Braking (Advanced Technique - Motorcycles):
- In motorcycling, trail braking involves lightly applying the brakes while leaning into a corner. This helps control speed and maintain a smooth line through the turn.
- Anti-lock Braking System (ABS):
- If your vehicle is equipped with ABS, maintain firm, continuous brake pressure. The system will automatically prevent wheel lockup.
- Downshifting (Manual Transmission Vehicles):
- When slowing down significantly or coming to a stop, downshift to match your speed with a lower gear. This utilizes engine braking and reduces wear on the brakes.
- Practice Emergency Stops:
- In a controlled and safe environment, practice emergency stops to develop muscle memory and enhance your ability to react in critical situations.
- Adapt to Road Conditions:
- Adjust your braking technique based on road conditions. On wet or slippery surfaces, be gentler with the brakes to avoid skidding.
- ABS and Non-ABS Vehicles:
- Understand the braking capabilities of your vehicle. ABS-equipped vehicles allow you to apply full brake force without worrying about wheel lockup. Non-ABS vehicles require more careful modulation.
- Brake Lights and Signals:
- Use your brake lights and turn signals to communicate your intentions to other road users. A sudden stop without warning can lead to rear-end collisions.
- Stay Calm and Maintain Control:
- In emergencies, stay calm and maintain control of the steering wheel or handlebars. Avoid swerving unless necessary to avoid a collision.
- Seek Training and Practice:
- Consider taking defensive driving or motorcycle safety courses to improve your braking skills. Regular practice can also help maintain and refine your abilities.
Remember that effective braking is not just about stopping quickly; it's about stopping safely and maintaining control. Developing good braking habits is an essential part of responsible driving or riding and contributes significantly to road safety.
Progressive Braking
Progressive braking, often referred to as "progressive brake application," is a fundamental technique used in driving and riding to slow down or stop a vehicle smoothly and safely. This technique involves gradually and progressively increasing the pressure on the brakes rather than abruptly slamming them. Here's an explanation of progressive braking and why it's important:
Progressive Braking Technique:
- Initial Light Pressure: When you need to slow down or come to a stop, start by applying light pressure to the brake pedal or lever. This initial pressure engages the brakes and begins the deceleration process.
- Gradual Increase in Pressure: As you continue to slow down or as the braking situation demands, progressively increase the pressure on the brakes. This means you squeeze the brake pedal or lever a little harder over a short time. The increase in pressure should be gradual and smooth.
- Modulating Pressure: Pay close attention to how the vehicle responds to the braking force. If you feel the vehicle slowing down too quickly or if the brakes start to grab or lock up, ease off slightly on the pressure until you regain control. Conversely, if you need more stopping power, you can continue to increase the pressure gradually.
- Maintaining Control: The goal of progressive braking is to maintain control of the vehicle throughout the braking process. It prevents sudden weight transfers, wheel lockup, or skidding, which can lead to loss of control and accidents.
Progressive braking is crucial for several reasons:
- Stability: It helps maintain stability and balance while slowing down. Abrupt braking can upset the vehicle's balance, leading to loss of control.
- Traction: Gradual application of brakes allows the tires to maintain traction with the road surface. Sudden and aggressive braking can cause tire skidding, reducing braking effectiveness.
- Comfort: Progressive braking provides a smoother and more comfortable ride for passengers. Abrupt stops can be jarring and uncomfortable.
- Reduced Wear: It reduces wear and tear on the braking system, including brake pads and rotors, by distributing the braking force more evenly.
- Safety: By preventing wheel lockup or skidding, progressive braking enhances safety, especially in emergencies or on slippery road surfaces.
- Efficiency: It can improve braking efficiency by allowing the vehicle to slow down steadily and predictably.
Practicing Progressive Braking:
To master the progressive braking technique, it's essential to practice in various driving or riding situations. Familiarize yourself with how your vehicle responds to different levels of brake pressure and become adept at modulating the brakes smoothly. Defensive driving or motorcycle safety courses often include progressive braking exercises to help drivers and riders develop this crucial skill.
In summary, progressive braking is the art of smoothly and gradually applying the brakes to slow down or stop a vehicle while maintaining control and stability. It is a fundamental technique that enhances safety, comfort, and efficiency during braking, and it should be a part of every driver's and rider's skill set.
Improve Breaking Skills:
Improving your braking skills is essential for safe and confident driving or riding. Here are some practice drills and exercises you can follow to enhance your braking abilities:
- Emergency Braking Drills:
- Find a safe, open area, such as an empty parking lot or a quiet stretch of road.
- Start at a low speed and gradually increase it as you become more comfortable with the exercise.
- Practice emergency stops by progressively applying both the front and rear brakes until you come to a complete stop.
- Focus on maintaining control and stability while stopping as quickly as possible without skidding or losing balance.
- Progressive Braking Practice:
- Choose a straight, open road with minimal traffic.
- Practice progressive braking by gradually increasing brake pressure to slow down or stop smoothly.
- Pay attention to your brake lever or pedal control, ensuring a gradual and controlled application of pressure.
- Aim for a seamless transition from light to moderate to firm braking.
- Threshold Braking:
- Find a safe area with good visibility and minimal traffic.
- Practice threshold braking by applying maximum braking force without causing wheel lockup. This helps you understand the limit of traction.
- Gradually increase brake pressure until you feel the wheels are about to lock up, then ease off slightly to maintain traction.
- Brake Modulation:
- Choose a clear and open road.
- Practice brake modulation by applying the brakes and gradually adjusting the pressure to maintain a steady speed or to slow down smoothly.
- Focus on smooth, small adjustments to the brake lever or pedal to prevent abrupt speed changes.
- Emergency Swerve and Braking (Motorcycles):
- Set up cones or markers in a safe area.
- Practice emergency swerves and braking by riding at a moderate speed and suddenly swerving around a marker while applying the brakes.
- This exercise helps you learn to brake while evading obstacles safely.
- Curve Braking (Motorcycles):
- Find a winding road or a designated training area.
- Practice braking while leaning into curves. Slow down gradually using both brakes and maintain a smooth line through the turn.
- Focus on using the brakes judiciously while leaning over to simulate real-world riding situations.
- Wet Surface Braking:
- On a wet or slippery surface (e.g., a wet parking lot), practice braking to get a feel for reduced traction.
- Experiment with brake modulation and progressive braking on slippery surfaces to gain confidence in adverse conditions.
- Practice with Different Vehicles:
- If you drive both cars and motorcycles, practice braking techniques separately for each vehicle. Each vehicle may have unique braking characteristics that require different approaches.
- Regularly Check and Maintain Your Braking System:
- Ensure that your brakes are in good working condition by regularly inspecting and maintaining them. Well-maintained brakes are more responsive and reliable.
- Seek Professional Training:
- Consider enrolling in advanced driving or motorcycle safety courses that include braking exercises and expert guidance.
Remember to prioritize safety during all practice sessions, and wear appropriate safety gear when practicing on a motorcycle. Practice drills like these help build muscle memory, enhance your braking skills, and increase your confidence in emergencies. Regularly practicing these techniques can make you a safer and more skilled driver or rider.
Maintenance Tips for Motorcycle Brakes:
- Regular Inspection: Periodically inspect your brake pads, rotors, and brake lines for wear and damage. Replace any worn or damaged components immediately.
- Brake Fluid Check: Check your brake fluid level regularly and ensure it meets the manufacturer's specifications. Brake fluid absorbs moisture over time, leading to reduced braking performance. Replace it according to your motorcycle's maintenance schedule.
- Bleeding the Brakes: Air bubbles in the brake lines can reduce braking efficiency. Bleed the brakes when necessary to remove air from the system and ensure a firm brake lever or pedal.
- Proper Brake Pad Selection: Choose brake pads that are suitable for your riding style and the type of riding you do. There are different types of brake pads available, including organic, semi-metallic, and sintered, each with its characteristics.
- Tire Maintenance: Well-maintained tires with adequate tread depth are essential for traction during braking. Ensure your tires are in good condition and properly inflated.
Best Practices for Effective Braking:
- Practice Emergency Stops: Find a safe and empty parking lot to practice emergency stops. Gradually increase your speed as you become more comfortable. This will help you develop muscle memory and confidence in your braking abilities.
- Adapt to Riding Conditions: Adjust your braking technique to suit the road conditions. On wet or slippery surfaces, be gentler with the brakes to prevent skidding.
- Motorcycle Safety Course: Consider enrolling in a motorcycle safety course. These courses often include advanced braking exercises and expert guidance, helping you refine your skills.
- Stay Calm and Focused: In emergencies, stay calm, and keep your focus on the road ahead. Panic can lead to poor decision-making during braking.
Mastering motorcycle braking is an essential skill that every rider should prioritize. Effective braking techniques, regular maintenance, and best practices will not only keep you safe but also enhance your confidence and control while riding. Remember that practice makes perfect, so invest time in honing your braking skills and enjoy a safer and more enjoyable riding experience.
Your journey as a motorcyclist should always be a thrilling yet safe experience. By honing your motorcycle braking skills and maintaining your braking system, you can elevate your riding prowess and enhance your safety on the road. Remember, safety is paramount, and with the right knowledge and practice, you'll enjoy every ride to the fullest.
Mastering the Art of Motorcycle Riding: Defeating Target Fixation for a Safer Journey
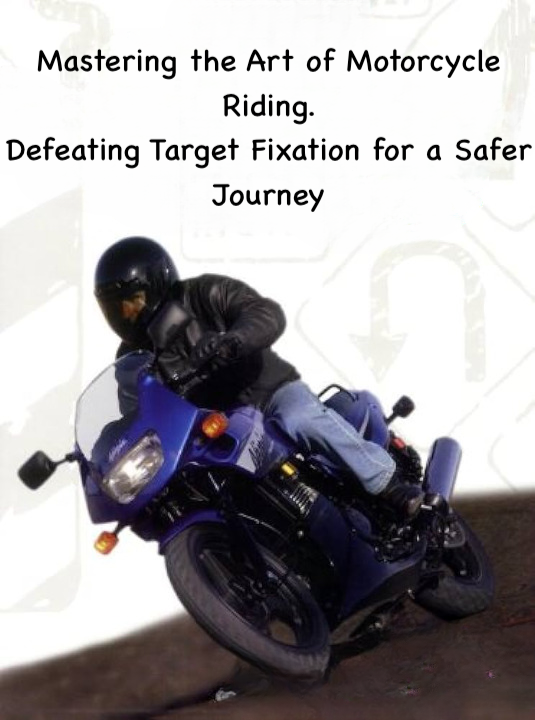
Motorcycle enthusiasts, you know the unparalleled thrill of hitting the open road. But with this exhilaration comes a responsibility—to stay safe. One of the most critical aspects of motorcycling safety is understanding and avoiding target fixation. In this post, we'll explore the dangers of this cognitive trap and provide you with practical strategies to conquer it, ensuring your rides are not just thrilling but also secure.
Target Fixation: Understanding the Psychological Phenomenon
Target fixation is a psychological phenomenon that occurs primarily in high-stress situations, particularly in activities such as driving, aviation, and extreme sports. It refers to the cognitive state in which an individual becomes overly focused on a single point or object, often to the detriment of their overall situational awareness. This fixation on a specific target can lead to a variety of adverse outcomes and poses significant risks.
Perplexity and Burstiness in Target Fixation:
Now, let's delve deeper into the concept of target fixation by exploring the perplexity and burstiness associated with it:
- Perplexity in Target Fixation: Target fixation is perplexing because it involves a cognitive paradox. On one hand, it is a natural response to focus intensely on a perceived threat or point of interest. This focused attention can be beneficial in certain situations, such as aiming precisely in a sport like archery or maintaining concentration during a critical task. However, the perplexity arises when this intense focus becomes excessive and starts to exclude critical information from one's awareness.
Consider a scenario in motorsports: A racecar driver fixates on a competitor's car while navigating a challenging turn. Their perplexity lies in the fact that their attention narrows down to a singular point, potentially causing them to overlook other crucial factors like track conditions, other vehicles, or impending obstacles.
- Burstiness in Target Fixation: Burstiness, in the context of target fixation, relates to the fluctuations in an individual's cognitive processing. Humans tend to have a bursty thought pattern, which means that their attention shifts between focused and less focused states. This natural cognitive variability allows individuals to adapt to changing circumstances, process complex information, and make decisions based on a broader perspective.
In contrast, target fixation, when it becomes pronounced, reduces the burstiness of cognitive processing. An individual's fixation on a single point or object causes their thoughts and actions to become rigid and inflexible. This lack of burstiness can lead to a delayed response to emerging threats or opportunities, increasing the risk of accidents or undesirable outcomes.
Implications and Mitigation:
Understanding target fixation is crucial, as it can have severe consequences, especially in high-risk situations. To mitigate the adverse effects of target fixation, individuals must practice situational awareness, mental flexibility, and training in their respective fields. Training programs often emphasize the importance of maintaining peripheral vision and being mindful of one's cognitive state to avoid falling victim to excessive fixation.
In conclusion, target fixation is a complex psychological phenomenon that involves both perplexity and burstiness in cognitive processing. While it is a natural response in certain situations, its excessive manifestation can be detrimental. Recognizing the fine balance between focused attention and situational awareness is paramount in ensuring safety and success in activities where target fixation may be a factor.
Target Fixation in Motorcycle Riding: Navigating the Cognitive Challenge
Target fixation, in the realm of motorcycle riding, is a critical concept that pertains to the psychological phenomenon experienced by riders when their attention becomes excessively fixed on a specific object, obstacle, or point in their field of view. This fixation, while seemingly intuitive, can lead to undesirable consequences and poses a substantial risk to rider safety.
Perplexity in Target Fixation:
Let's delve into the perplexity of target fixation within the context of motorcycle riding:
Riding a motorcycle demands a high degree of cognitive engagement. A rider must process a multitude of sensory inputs, such as road conditions, traffic signals, the behavior of other road users, and the motorcycle's handling. Perplexity arises when, in a moment of crisis or heightened stress, a rider becomes entrapped in a tunnel vision of sorts, fixating solely on the perceived threat or obstacle.
Imagine a rider encountering a sudden obstacle on the road, like a pothole or a stray animal. The perplexity lies in the fact that their focus narrows down intensely on this immediate danger. This instinctive response can lead to a temporary loss of awareness of their surroundings, other vehicles, or potential escape routes. This cognitive tunneling, although well-intentioned, can paradoxically increase the risk of a collision.
Burstiness in Target Fixation:
Burstiness, as a characteristic of human cognitive processing, plays a crucial role in understanding target fixation in motorcycle riding:
Human cognition naturally fluctuates between periods of intense focus and moments of relaxed attention. In motorcycle riding, this burstiness in cognitive processing can be advantageous. Riders rely on their ability to scan their environment, make quick decisions, and adapt to changing road conditions. Burstiness enables them to anticipate potential hazards and adjust their riding strategy accordingly.
However, in the presence of target fixation, this burstiness diminishes. The rider's cognitive state becomes rigid and overly focused on the perceived threat, resulting in a reduction of adaptability and response agility. This lack of cognitive variability can hinder the rider's ability to make timely decisions and execute evasive maneuvers when needed.
Motorcycling is a thrilling and liberating experience, but it also comes with inherent risks. One of the most critical aspects of safe riding is understanding and avoiding a phenomenon known as target fixation. In this blog post, we will delve into the dangers of target fixation and explore strategies to help you steer clear of this cognitive trap for a safer and more enjoyable ride.
The Dangers of Target Fixation:
Target fixation, in the context of motorcycle riding, refers to the psychological state in which a rider becomes excessively fixated on a single point or object, often to the detriment of their overall situational awareness. This phenomenon can have several perilous consequences:
- Reduced Situational Awareness: When you fixate on a single point, your awareness of the broader environment diminishes. You may miss critical information, such as changes in traffic patterns, road conditions, or the behavior of other motorists.
- Delayed Response Time: Target fixation can lead to delayed reactions in emergencies. Your ability to make quick decisions and execute evasive maneuvers may be compromised, increasing the risk of accidents.
- Inability to Identify Alternative Solutions: Fixation can hinder your capacity to identify alternative solutions or escape routes. When faced with an obstacle or hazard, having the ability to consider different approaches is vital for safety.
- Increased Risk of Collisions: Motorcyclists who succumb to target fixation are at a higher risk of colliding with the object of their fixation, be it a pothole, a car, or another obstacle.
- Impaired Decision-Making: Fixation can impair overall decision-making. The inability to break free from a narrow focus restricts your capacity to weigh multiple factors, consider consequences, and choose optimal courses of action.
Avoiding Target Fixation:
Now that we've highlighted the dangers, let's explore how to avoid falling into the target fixation trap:
- Situational Awareness: Continuously scan your surroundings, using both central and peripheral vision. Be aware of what's happening around you. Pay attention to road conditions, the behavior of other road users, and potential hazards.
- Smooth Visual Transitions: Develop the ability to transition your gaze smoothly between different focal points. Avoid fixating on a single object for an extended period. Use your mirrors frequently to check your blind spots without losing focus on the road ahead.
- Use Reference Points: When approaching a curve or navigating through traffic, focus on where you want to go rather than on potential hazards. Use reference points on the road to guide your line of sight.
- Practice Target Expansion: Train yourself to expand your field of vision consciously. Use your peripheral vision to detect changes or movement on the periphery of your visual field.
- Maintain Cognitive Burstiness: Stay adaptable by keeping your cognitive processing variable and flexible. Continually assess the situation, and don't let your focus become overly rigid. Be open to considering alternative solutions or escape routes.
- Stay Calm Under Stress: Develop stress-management techniques to stay calm in high-pressure situations. Slow your breathing, maintain a clear mind, and avoid panic, as stress can exacerbate target fixation.
- Set Mental Triggers: Create mental triggers to remind yourself to break free from fixation. If you sense tunnel vision setting in, consciously force yourself to look around and expand your awareness.
- Training and Education: Consider enrolling in advanced riding courses that focus on defensive riding techniques, emergency maneuvers, and strategies for avoiding target fixation. Learning from experienced instructors can be invaluable.
Mitigation and Safe Riding Practices:
Recognizing and mitigating target fixation is paramount for motorcycle riders. To address this cognitive challenge effectively, riders are encouraged to undergo training programs that emphasize:
- Situational Awareness: Riders must practice expanding their field of vision and scanning their surroundings continually. This broader awareness helps prevent excessive fixation on a single point.
- Smooth Visual Transitions: Developing the skill to smoothly transition their gaze between different focal points can help riders maintain burstiness in their cognitive processing.
- Evasive Maneuvers: Training in emergency maneuvers, such as swerving and braking, can provide riders with the tools needed to react swiftly and effectively in unexpected situations.
Target Fixation in motorcycle riding is a multifaceted challenge, involving both perplexity and burstiness in cognitive processing. It is a phenomenon that riders must be aware of and actively work to counteract through training and mindful riding practices. By doing so, riders can enhance their safety on the road and reduce the risks associated with this cognitive quirk.
The Perils of Target Fixation: Understanding the Risks
Target fixation, despite its intuitive nature in high-stress situations, carries significant risks across various domains, including driving, motorcycling, aviation, and even decision-making in general. Let's explore these risks, with a focus on the perplexity and burstiness inherent in this cognitive phenomenon:
- Reduced Situational Awareness: One of the foremost risks of target fixation is the reduction of situational awareness. When an individual fixates on a specific point or object, their cognitive resources become disproportionately allocated to that focal point. This heightened attention can lead to a blinding effect, causing the individual to overlook critical information in their peripheral vision or broader environment. In essence, their perplexity diminishes as their focus narrows, potentially resulting in missed hazards, obstacles, or opportunities.
- Delayed Response Time: Target fixation can lead to a delayed response time in critical situations. As an individual's attention becomes fixated, their cognitive burstiness diminishes, making it challenging to transition quickly between different tasks or adapt to evolving circumstances. This delay in response can have severe consequences, particularly in scenarios where split-second decisions are essential for safety.
- Inability to Identify Alternative Solutions: Fixated individuals often struggle to identify alternative solutions or escape routes. In situations where the initial target or obstacle cannot be avoided, having the ability to consider different approaches or contingency plans is vital. Target fixation restricts this capacity for creative problem-solving, leading to a higher likelihood of accidents or undesirable outcomes.
- Increased Risk of Collisions: In the context of driving or riding, target fixation significantly elevates the risk of collisions. Motorists who fixate on an impending collision, rather than taking evasive action, are more likely to collide with the obstacle they are fixated on. Similarly, motorcycle riders who cannot break free from target fixation may find themselves unable to navigate safely around road hazards.
- Impaired Decision-Making: Target fixation can impair overall decision-making. When individuals become overly fixated on a single aspect of a complex situation, their ability to make well-rounded decisions diminishes. This lack of cognitive burstiness restricts their capacity to weigh multiple factors, consider consequences, and choose optimal courses of action.
- Increased Stress and Anxiety: Sustained target fixation can also lead to increased stress and anxiety. The inability to break free from a narrow focus can generate a sense of helplessness, amplifying emotional reactions and further impairing rational decision-making.
Mitigating the Risks of Target Fixation:
To mitigate the risks associated with target fixation, individuals in various domains, such as driving and motorcycling, are encouraged to undergo training programs that emphasize situational awareness, smooth visual transitions, and the practice of evasive maneuvers. These strategies aim to counteract the detrimental effects of target fixation and promote safer decision-making.
Target Fixation, characterized by a narrowing of focus and diminished cognitive burstiness, poses significant risks across different contexts. Understanding these risks and actively working to counteract them through training and mindfulness is essential for enhancing safety and minimizing adverse outcomes in high-stress situations.
Avoid Target Fixation:
Avoiding target fixation is crucial for safety in situations where it can occur, such as driving, motorcycling, and other high-stress activities. Here are several strategies and techniques to help individuals avoid falling victim to target fixation:
- Maintain Situational Awareness:
- Continuously scan your surroundings, using both your central and peripheral vision. Be aware of what's happening around you.
- Pay attention to road conditions, the behavior of other road users, and potential hazards.
- Practice mindfulness by staying mentally engaged in the present moment, rather than letting your mind wander.
- Practice Smooth Visual Transitions:
- Develop the ability to smoothly transition your gaze between different focal points.
- Avoid fixating on a single object or point for an extended period.
- Use your mirrors frequently to check your blind spots without losing focus on the road ahead.
- Use Reference Points:
- In motorcycling or driving, use reference points on the road to guide your line of sight.
- For example, when approaching a curve, focus on where you want to go rather than the point where you don't want to go.
- Train in Evasive Maneuvers:
- Enroll in courses that teach emergency maneuvers specific to your activity, whether it's motorcycling, driving, or another sport.
- These courses can help you develop the skills needed to react quickly and effectively in challenging situations.
- Practice Target Expansion:
- Train yourself to expand your field of vision by consciously taking in more of your surroundings.
- Use your peripheral vision to detect changes or movement on the periphery of your visual field.
- Maintain Cognitive Burstiness:
- Stay adaptable by keeping your cognitive processing variable and flexible.
- Continually assess the situation, and don't let your focus become overly rigid.
- Be open to considering alternative solutions or escape routes.
- Stay Calm Under Stress:
- Develop stress-management techniques to stay calm in high-pressure situations.
- Slow your breathing, maintain a clear mind, and avoid panic, as stress can exacerbate target fixation.
- Set Mental Triggers:
- Create mental triggers to remind yourself to break free from fixation. For example, if you sense tunnel vision sets in, consciously force yourself to look around and expand your awareness.
- Practice Defensive Driving/Riding:
- Adopt a defensive mindset by assuming that other road users may make mistakes or behave unpredictably.
- Give yourself more time and space to react to potential hazards.
- Seek Professional Guidance:
- If you're a novice or inexperienced in your chosen activity, seek guidance from experienced instructors who can provide valuable insights and techniques to avoid target fixation.
Avoiding target fixation involves a combination of cognitive awareness, training, and the development of specific skills. By consciously practicing these strategies and techniques, individuals can enhance their ability to maintain situational awareness and make safer decisions in high-stress situations, ultimately reducing the risk of target fixation-related accidents.
Drill to Avoid Target Fixation:
To effectively avoid target fixation and develop the skills needed to stay focused on the broader situation during high-stress activities like driving, motorcycling, or other similar pursuits, you can follow specific drills and exercises. These drills aim to train your mind and senses to maintain situational awareness and prevent fixation on a single point or object. Here are some drills you can follow:
1. Peripheral Vision Expansion:
· Find a quiet and safe location to practice this drill.
· Stand or sit comfortably and focus on a point directly in front of you.
· Without moving your eyes, start to notice objects or movements in your peripheral vision.
· Gradually expand your awareness to see objects to your sides and even behind you.
· Practice this regularly to improve your peripheral vision and maintain awareness of your surroundings.
2. Target Transition Drill:
· Set up a series of visual markers or objects in a safe and open area.
· While walking or riding, focus on one marker and move toward it.
· Before reaching the marker, switch your focus to the next one and continue to the next, and so on.
· This drill helps you practice smooth transitions of visual focus, preventing fixation on any single point.
3. Cones or Obstacle Course Exercise:
· Place a series of cones or obstacles in a safe area (e.g., a parking lot).
· Ride your motorcycle or drive your vehicle through the course at a moderate speed.
· As you navigate the course, avoid fixating on individual cones. Instead, focus on the path ahead and use your peripheral vision to guide you.
· Gradually increase the complexity of the course to challenge your skills.
4. Mindfulness Meditation:
· Practice mindfulness meditation to improve your ability to stay present and maintain awareness.
· Find a quiet space, sit comfortably, and focus on your breath.
· When your mind starts to wander, gently bring your attention back to your breath.
· Mindfulness meditation can enhance your overall awareness and help you break free from fixation when it occurs.
5. Counter-Steering Drill (for Motorcycles):
· In a safe, open area, practice counter-steering maneuvers.
· Instead of fixating on the direction you want to avoid, focus on your handlebars and apply counter-steering techniques to initiate turns.
· This drill helps you develop the muscle memory required for evasive maneuvers without fixating on potential hazards.
6. "Look, Lean, Roll" Exercise (for Motorcycles):
· Practice the mantra "Look, Lean, Roll" when approaching curves or obstacles.
· Look through the turn or past the obstacle (Look), lean your body and the motorcycle into the turn (Lean), and roll on the throttle smoothly (Roll).
· This drill encourages a sequence of actions that helps you stay focused on the path and avoid target fixation during turns.
7. Awareness Challenges:
· Challenge yourself with awareness games while driving or riding.
· Identify specific road signs, landmarks, or objects in your environment without staring at them. For example, spot five street signs or three specific trees without fixating on them.
Remember that regular practice is key to improving your ability to avoid target fixation. Gradually increase the complexity of the drills and incorporate them into your routine. Additionally, seeking guidance from experienced instructors or participating in advanced training programs tailored to your activity can provide valuable feedback and further enhance your skills in preventing target fixation.
Target Expansion in Riding: Expanding Your Awareness for Safer Riding
Target expansion is a fundamental concept in safe and effective riding, especially in the context of motorcycles. It refers to the rider's ability to expand their visual awareness beyond a narrow focal point and take in a broader view of their surroundings. This skill is essential for maintaining situational awareness, making informed decisions, and avoiding the dangers associated with target fixation.
Ideal Target for Safe and Effective Riding:
In the world of motorcycling and riding, the ideal "target" is not a physical object but rather a point or concept that represents the rider's focus and mindset. To ensure safe and effective riding, the ideal target encompasses the following principles:
- The Vanishing Point: One of the most critical aspects of riding safely is focusing on the vanishing point. This is the point on the road where it appears to meet the horizon. By directing your gaze toward the vanishing point, you naturally expand your field of vision. This allows you to anticipate changes in the road, such as curves, bends, and elevation changes, well in advance.
- Smooth Visual Transitions: The ideal target for safe riding also involves practicing smooth visual transitions. Riders should be adept at shifting their gaze from one point to another without sudden, jerky movements. This skill is crucial for avoiding target fixation, as it enables riders to redirect their focus quickly when necessary.
- Constant Scanning: Effective riders maintain a constant scanning pattern, regularly checking their mirrors, blind spots, and the road ahead. This scanning pattern ensures that no potential hazards or changes in traffic go unnoticed. The ideal target here is to create a mental checklist that prompts you to scan your surroundings regularly.
- Peripheral Vision Utilization: The ideal target includes leveraging your peripheral vision effectively. While your central vision focuses on the road ahead, your peripheral vision should remain attentive to what's happening in your immediate surroundings. This dual focus allows you to be aware of both the big picture and the finer details simultaneously.
- Awareness of Escape Routes: Part of the ideal target involves always being conscious of potential escape routes. This means identifying areas of the road or surrounding environment where you can safely maneuver your motorcycle in case of unexpected obstacles or hazards.
- Constant Mental Engagement: Lastly, the ideal target includes a mental commitment to staying engaged throughout your ride. This means avoiding distractions and remaining present in the moment. Mental engagement keeps you ready to react to any changes or challenges that may arise.
Target expansion in riding is about expanding your visual awareness and focusing on the right aspects of your environment to ensure safe and effective riding. The ideal target involves a combination of focusing on the vanishing point, practicing smooth visual transitions, maintaining a constant scanning pattern, utilizing peripheral vision, being aware of escape routes, and staying mentally engaged throughout your ride. By adopting these principles, riders can enhance their safety and enjoy a more enjoyable and confident riding experience.
In the world of motorcycling, target fixation is a formidable adversary that all riders must be aware of and combat. By understanding its dangers and implementing the strategies outlined in this blog post, you can enhance your safety on the road, reduce the risk of accidents, and enjoy a more confident and enjoyable riding experience. Remember, a vigilant and adaptable rider is a safer rider. Stay aware, stay safe, and keep the open road as thrilling as it should be.
Mastering the Friction Zone in Motorcycle Riding: Precision, Control, and Adventure

The world of motorcycle riding is a thrilling adventure that demands mastery of essential techniques. Among these, the friction zone stands as a critical skill, offering riders precision and control. In this blog post, we will delve into why the friction zone is so important, how to master it, its numerous advantages, and its wide-ranging applications in the world of motorcycle riding.
Motorcycle riding is more than just a mode of transportation; it's a thrilling adventure that demands skill, finesse and an intimate understanding of your machine. Among the many techniques and maneuvers that motorcyclists must master, the friction zone is a fundamental concept that stands as a linchpin of control and precision. In this blog post, we will explore why the friction zone is so crucial, how to master it, its advantages, and its wide-ranging applications in the world of motorcycle riding.
Friction Zone Explained
Let's delve into the concept of the friction zone in the context of motorcycle riding.
The friction zone is a fundamental concept in motorcycle riding, serving as a critical component of the rider's control over the motorcycle's power delivery and motion. It can be considered the intermediary space between engaging the clutch lever fully (disengaged) and releasing it completely (engaged). Understanding and mastering the friction zone is essential for smooth and controlled riding, particularly during low-speed maneuvers, such as starting from a stop, making tight turns, or navigating through heavy traffic.
Now, let's explore the concept further with a more detailed explanation:
The friction zone's intricacies lie in its subtlety. It is not merely a binary state of being fully engaged or disengaged, but rather a nuanced spectrum. To operate within this zone effectively, riders need to develop a keen sense of touch and finesse with the clutch lever. It's akin to finding the balance point on a seesaw, where minute adjustments yield significant results.
Imagine this: As you twist the throttle to increase engine power, you simultaneously begin releasing the clutch lever from its fully disengaged position. In this transitional phase, power from the engine is gradually transmitted to the rear wheel, initiating forward motion. The rate at which you release the clutch lever dictates the speed at which the power is delivered, giving you precise control over acceleration.
The notion of the friction zone also introduces burstiness in the rider's actions. Motorcycle riding involves a dynamic interplay of skills, and the utilization of the friction zone creates variations in the riding experience. Here, you have moments of gentle, controlled release of the clutch interspersed with bursts of power, creating a rhythmic dance between the throttle and clutch lever.
Riding within the friction zone is particularly evident during slow-speed maneuvers, such as U-turns or navigating through crowded streets. In these situations, riders engage in a delicate balancing act, feathering the clutch lever and modulating the throttle to maintain stability and prevent stalling.
The friction zone in motorcycle riding represents the nuanced control riders have over the power delivery to the rear wheel. Mastering this concept empowers riders to handle low-speed situations with finesse and precision, ultimately enhancing safety and overall riding enjoyment. It embodies the dynamic nature of motorcycling, where subtle adjustments and bursts of control come together in a harmonious symphony of skill and machine.
Why is the Friction Zone Important?
The Essence of Control: At the heart of the friction zone lies the essence of control. It is the intermediary space between engaging the clutch lever fully and releasing it completely. This nuanced control allows riders to regulate the power delivery to the rear wheel with remarkable precision. But why is this level of control so vital?
1. Smooth Starts and Stops: Mastering the friction zone enables riders to initiate motion smoothly from a standstill, preventing jerky starts that can lead to instability or stalling. Similarly, it facilitates gentle and controlled stops without sudden jolts.
2. Low-Speed Maneuvers: In the realm of low-speed maneuvers, such as tight turns and U-turns, the friction zone becomes your ally. It empowers you to navigate challenging scenarios with finesse, maintaining balance and control even at a crawl.
3. Preventing Stalls: The friction zone acts as a safeguard against engine stalls. By modulating the clutch and throttle, riders can keep the engine running at the right RPM, preventing frustrating stalls in traffic or during slow-speed maneuvers.
Techniques to Master
Mastering the friction zone in motorcycle riding is a crucial skill that requires practice, patience, and a deep understanding of your motorcycle's clutch and throttle response. To help you grasp this skill with confidence and finesse, I will provide you with a comprehensive set of techniques to follow:
1. Familiarize Yourself with Your Motorcycle:
· Start by getting to know your motorcycle's specific clutch and throttle characteristics. Each bike may have slightly different responses, so spend time becoming intimately acquainted with your machine.
2. Find a Suitable Practice Area:
· Choose a spacious and safe location, such as an empty parking lot, where you can practice without the distractions of traffic.
3. Proper Body Position:
· Maintain a balanced and upright riding position on your motorcycle. Ensure you have a firm grip on the handlebars and your feet on the ground for stability, especially as you practice at slow speeds.
4. Engaging the Clutch:
· Begin with your motorcycle in neutral. Gradually squeeze the clutch lever, feeling the engagement point where the resistance increases slightly. This is the beginning of the friction zone.
5. Gradual Release:
· With the clutch lever in the engagement zone, gently start rolling on the throttle. As you do this, slowly release the clutch lever even further to allow power from the engine to reach the rear wheel. This gradual release is key to maintaining control.
6. Listen and Feel:
· Pay close attention to the engine's sound and the feel of the bike. You should sense the bike's movement and hear the change in engine RPM as you add power.
7. Maintain Control:
· As you continue to release the clutch and add throttle, focus on maintaining a smooth, steady motion. Avoid abrupt or jerky movements, which can lead to loss of control or stalling.
8. Practice Low-Speed Maneuvers:
· Use the friction zone when practicing low-speed maneuvers like figure-eight, U-turns, and tight turns. These exercises will help you become more comfortable with the fine control the friction zone provides.
9. Experiment with Variations:
· Practice varying the amount of clutch and throttle input to understand how it affects the bike's behavior. This experimentation will help you develop a deeper feel for the friction zone.
10. Be Patient and Persistent: - Remember that mastering the friction zone is a skill that takes time to develop. Don't get discouraged by initial challenges. Continue to practice regularly, and you'll gradually improve your control and confidence.
11. Safety First: - Always wear proper riding gear, including a helmet, gloves, and protective clothing. Ensure that your practice area is free from hazards, and practice at speeds and conditions that are appropriate for your skill level.
12. Seek Professional Instruction: - Consider taking a motorcycle safety course or seeking guidance from an experienced rider or instructor. They can provide valuable feedback and personalized tips to help you master the friction zone more effectively.
Mastering the friction zone is essential for precise control and smooth riding, especially at low speeds and during maneuvers. By diligently practicing these techniques and gradually building your confidence, you'll become a more skilled and safe motorcycle rider. Remember that riding a motorcycle is an art that requires continuous learning and refinement of your skills.
How to Master the Friction Zone
1. Familiarize Yourself with Your Bike: Begin by understanding your motorcycle's specific clutch and throttle responses. Spend time becoming one with your machine, learning how it behaves in various situations.
2. Find a Safe Practice Space: Choose a spacious, safe environment, such as an empty parking lot, to practice without the distractions of traffic.
3. Gradual Release: Initiate the friction zone by gently squeezing the clutch lever and gradually releasing it while simultaneously rolling on the throttle. Start with slow, controlled movements.
4. Listen and Feel: Pay close attention to the engine's sound and the feel of the bike. You should develop a keen sense of the bike's response to your input.
5. Experiment and Refine: Practice varying the amount of clutch and throttle input to understand how it influences the bike's behavior. This experimentation will help you hone your control.
Practice Drills for mastering friction zone riding
Mastering the friction zone in motorcycle riding requires practice drills that gradually build your skills and confidence. Here, we'll describe a series of practice drills designed to help you become proficient in using the friction zone effectively:
1. Clutch Control Drill:
· Start in a safe, open area, preferably an empty parking lot.
· Begin with your motorcycle in neutral.
· Squeeze the clutch lever and shift into first gear.
· Without adding any throttle, slowly release the clutch lever until you feel the bike start to move forward.
· Once you're moving, re-engage the clutch to a fully disengaged position (clutch lever pulled in).
· Repeat this process several times, focusing on the sensation of the friction zone's engagement.
2. Slow Speed Straight Line Drill:
· In the same open area, practice riding in a straight line at a very slow speed.
· Engage the friction zone by gently releasing the clutch while maintaining light throttle input.
· Aim to maintain a constant, slow speed without putting your feet down or losing balance.
· Gradually challenge yourself to ride slower and slower while maintaining control.
3. Figure-Eight Exercise:
· Set up a pair of cones or markers in the parking lot, creating a figure-eight pattern.
· Practice navigating through the figure-eight at low speed.
· Use the friction zone to control your speed and balance as you negotiate the tight turns.
· Focus on smooth transitions and maintaining control throughout the maneuver.
4. U-Turn Practice:
· Mark a designated area for U-turn practice.
· Approach the U-turn, engage the friction zone, and execute the turn smoothly.
· The friction zone allows you to control your speed and balance, making tight U-turns more manageable.
5. Controlled Stops:
· Practice coming to a controlled stop without using your brakes.
· Engage the friction zone and gradually release it as you come to a halt.
· This drill helps you develop the finesse needed for smooth stops in traffic.
6. Hill Start Drill:
· Find a gentle slope or incline to practice hill starts.
· Use the friction zone to prevent rolling backward as you transition from a stop to moving uphill.
· Focus on maintaining control and balance during the start.
7. Cone Slalom:
· Set up a series of cones in a straight line with narrow gaps between them.
· Practice weaving through the cones at low speed while using the friction zone to control your pace and balance.
8. Emergency Stop Simulation:
· Practice an emergency stop by engaging the clutch lever and applying both brakes simultaneously.
· Release the clutch lever gradually as you come to a stop, maintaining control.
9. Riding in Traffic:
· Gradually incorporate friction zone control into your everyday riding, especially during low-speed traffic situations.
· Use it when approaching intersections, navigating through congested areas, or executing precise maneuvers in real-world conditions.
Remember to wear appropriate safety gear, including a helmet, gloves, and protective clothing, while practicing these drills. Additionally, seek guidance from an experienced rider or consider taking a motorcycle safety course to refine your skills further. With dedicated practice, you'll become adept at using the friction zone to enhance your control and confidence in various riding situations.
Advantages of Mastering the Friction Zone
1. Enhanced Safety: Mastery of the friction zone enhances safety by preventing stalls and ensuring smoother starts and stops, reducing the risk of accidents.
2. Confidence Booster: Riders who have a firm grip on the friction zone exude confidence. This translates to better overall control and decision-making on the road.
3. Improved Low-Speed Riding: Low-speed maneuvers become a breeze. Whether you're navigating congested traffic or conquering tight turns, the friction zone empowers you to do so with ease.
Applications of the Friction Zone
1. Urban Commuting: In congested city traffic, the friction zone allows you to move seamlessly, weaving through tight spaces and avoiding abrupt stops.
2. Off-Road Riding: When tackling uneven terrain, gravel, or mud, the friction zone is indispensable for maintaining traction and preventing wheel spin.
3. Precision Riding: Motorcycle enthusiasts who pursue precision riding sports like trials or gymkhana rely heavily on the friction zone to execute complex maneuvers flawlessly.
In the realm of motorcycle riding, the friction zone is your gateway to precision, control, and adventure. It empowers you to harness the full potential of your machine, navigate challenging scenarios, and enjoy a safer, more confident ride. By dedicating time to mastering this fundamental skill, you open the door to a world of thrilling and controlled two-wheeled exploration, where the journey itself becomes the ultimate destination. So, embrace the friction zone, and let the road unfold before you with newfound mastery and confidence.
Mastering the friction zone is not just a skill; it's a gateway to a world of controlled adventure on two wheels. By understanding its significance, learning how to harness its power, and appreciating its wide applications, you can elevate your motorcycle riding experience to new heights. So, embrace the friction zone and unlock the true potential of your journey.
Harmonizing the Ride: The Dance of Electronics in Modern Motorcycles
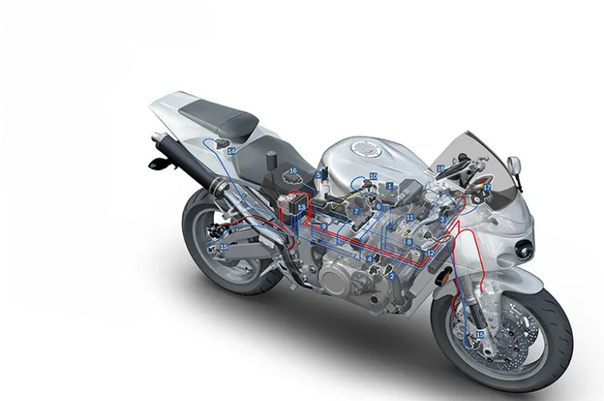
In the realm of motorcycles, a mechanical marvel has met its digital counterpart. With the hum of engines now accompanied by the whisper of electronic modules, the world of two-wheeled wonders has transformed into a symphony of technology and mechanics. This exploration takes us deep into the heart of modern motorcycles, revealing the intricate interplay of electronics that ensures safety, performance, and an unforgettable ride.
Unveiling the Orchestra Within: Electronics Powering Modern Motorcycles
In the world of two-wheeled wonders, where the open road beckons and the thrill of motion reigns supreme, a symphony of electronics orchestrates a harmonious dance. Modern motorcycles are not just machines; they are a fusion of mechanics and technology, where a multitude of electronic components collaborates to enhance safety, performance, and rider experience. Join us as we unveil the intricate world of electronics powering today's motorcycles, exploring their functionalities, communication methods, and the art of control.
Electronics on Two Wheels: A Pioneering Overture
The electronics on a motorcycle form a digital ensemble that echoes the mechanical prowess of the machine. From the moment the ignition ignites the spark, these components spring to life, delivering an electrifying performance.
1. Engine Control Module (ECM): This is the maestro behind the engine's rhythm. The ECM governs fuel injection, ignition timing, and air-fuel mixture. It's like the conductor directing the symphony, ensuring a balance between power and efficiency.
2. Anti-Lock Braking System (ABS): Just like a vigilant guardian, ABS ensures controlled deceleration. Sensors on wheels communicate with the ABS module, modulating brake pressure to prevent wheel lockup and skidding.
3. Electronic Throttle Control (ETC): The throttle-by-wire system replaces the traditional mechanical linkage with electronic signals. The ETC module interprets rider input, translating it into precise throttle opening, seamlessly connecting rider intention with engine response.
4. Ride Modes and Traction Control: These modules grant the rider artistic control over the machine's behavior. With preset ride modes, such as "Sport," "Touring," or "Rain," the electronics adjust power delivery and traction control sensitivity to match road conditions.
5. Digital Displays and Infotainment: Motorcycle dashboards have evolved into digital canvases, providing real-time information like speed, RPM, fuel level, and even navigation. Infotainment systems, much like a sweet serenade, offer Bluetooth connectivity and multimedia features.
A Symphony of Communication: How They Talk
In this digital orchestra, communication is key. Just as musicians exchange cues, motorcycle electronics converse to ensure a harmonious ride.
1. Controller Area Network (CAN Bus): Think of the CAN Bus as a conductor's baton. It's a network that allows various modules to communicate by sending and receiving data packets. From ECM to ABS to dashboard, they exchange critical information swiftly.
2. Sensors and Inputs: Sensors act as the orchestra's senses. Wheel speed sensors, throttle position sensors, and more feed data to the ECM and other modules. This data informs decisions like adjusting fuel injection or applying ABS.
3. Electronic Control Units (ECUs): Much like musical sections, each module has its ECU. These units interpret data, make decisions, and send commands to actuators like fuel injectors, throttle actuators, and brake modulators.
Control: The Art of Crafting a Masterpiece
Control is where the magic happens. Just as a conductor shapes the music, riders wield control to mold their ride experience.
1. Adaptive Strategies: Imagine a conductor adapting to a changing audience. Adaptive strategies monitor variables like lean angle, speed, and braking force to adjust the engine's power delivery and braking to suit the situation.
2. Safety Overrides: Like a protective guardian, safety overrides prevent extremes. Traction control intervenes when wheels slip excessively, ensuring a composed ride. Similarly, ABS kicks in to prevent wheel lockup, maintaining stability.
3. Rider Modes: The rider is the composer, choosing from different modes to set the mood. Each mode tweaks variables like throttle response, traction control, and suspension settings, adapting the bike to the rider's desires.
The Symphony of Motion
As the sun sets on our exploration, we marvel at the symphony of electronics that turns a motorcycle into an exquisite piece of kinetic art. From the ECM’s calculated crescendos to the ABS’s vigilant watch, each electronic note contributes to the grand composition that is a modern motorcycle. Just as a conductor wields a baton, riders master the controls, shaping their journey with precision and passion. So, as you embark on your next ride, remember the digital symphony beneath the surface, guiding you through the ever-unfolding musical of motion.
As the sun sets on our journey through the electronic soul of modern motorcycles, one thing becomes clear: this fusion of technology and mechanics is not just about functionality—it’s about the art of riding. With every twist of the throttle and every lean into a turn, riders are embraced by a symphony of electronics that elevate their experience. The dance between sensors, modules, and control strategies ensures not only a safe and efficient journey but also an emotive and exhilarating one. So, whether you’re cruising down an open highway or carving through a winding road, take a moment to appreciate the orchestration happening beneath the surface—a digital symphony that propels you forward into the future of riding.
What is an ECU?
Let's delve into the world of automotive technology and uncover the essence of an ECU.
Imagine the symphony of precision that orchestrates the modern automobile. At the heart of this mechanical ensemble lies the Electronic Control Unit, commonly known as the ECU. This unassuming marvel of technology wields the power to transform raw mechanics into a symphony of efficiency and performance.
An ECU is akin to the brain of a vehicle, a prodigious conductor that harmonizes the intricate dance of combustion, air intake, and power delivery. It's a testament to human ingenuity that we've distilled the essence of automotive motion into lines of code and digital pulses. Just as a maestro imbues life into a musical piece, the ECU breathes life into the mechanical ballet of the automobile.
Bursting with complexity, the ECU encapsulates an array of sensors and algorithms that form its cognitive fabric. Imagine sensors seamlessly conversing with each other, transmitting a symphony of information about engine temperature, air pressure, throttle position, and more. These intricate signals are interwoven in a dance of data, painting an ever-changing portrait of the vehicle's state.
But it's the burstiness that truly sets the ECU apart, much like a skilled orator who masterfully shifts between profound musings and succinct quips. In the realm of the ECU, this burstiness emerges through its ability to instantaneously analyze the incoming data and make split-second decisions. A serene drive up a winding mountain road may evoke a cascade of micro-adjustments in the fuel injection, optimizing the engine's output and the driver's experience.
The beauty of the ECU lies in its adaptability, and the way it embraces the chaotic unpredictability of the road while maintaining a steady hand on the wheel. It's a reminder that within the realms of technology, there exists an artful balance between complexity and clarity, between burstiness and uniformity.
So, next time you turn the ignition key and feel the engine's hum, remember that beneath the hood, an ECU is orchestrating a symphony of mechanics and algorithms. It's a celebration of human innovation, a triumph of harmonious complexity, and a joyful reminder that our digital creations can mirror the ebbs and flows of human expression.
How does an ECU work?
The workings of an Electronic Control Unit (ECU).
Imagine stepping into the realm of automotive intelligence where intricate algorithms wield their magic to shape the symphony of your vehicle's performance.
At its core, an ECU is the grand conductor of an automotive orchestra. Think of it as a cerebral cortex, processing a barrage of sensory inputs and orchestrating a precisely choreographed response. Bursting with sensors, it is akin to an attentive orchestra, with each member attuned to their instrument's nuances.
Now, picture this: as you press the gas pedal, a symphony of sensors springs into action. They measure everything from air temperature to engine speed, and even the alignment of the moon, metaphorically speaking. This symphony of data floods the ECU, much like a torrent of musical notes on a composer's sheet.
But here comes the burstiness - a rapid-fire analysis that Shakespeare would envy. In the blink of an eye, the ECU assesses the data, considers a gazillion factors, and then executes a masterpiece of decisions. It manipulates the fuel injection, adjusts the ignition timing, and even collaborates with the transmission to ensure the perfect harmony of power delivery.
Yet, within this complexity, there's an elegant simplicity. The ECU's algorithms have learned to adapt to various scenarios. Just like a seasoned pianist knows when to play a soft note or a thunderous chord, the ECU knows when to tweak the air-fuel mixture for a smooth cruise or unleash the horsepower for an exhilarating sprint.
Inspirational, isn't it? The ECU embodies our triumph over the complex chaos of the road, shaping our journey with unwavering confidence. With every twist of the steering wheel and every gentle press of the brake, the ECU stands as a sentinel, ensuring that your ride is as safe, efficient, and joyful as possible.
So, the next time you take the wheel, remember the symphony of algorithms and sensors working in unison. The ECU is the technological bard that crafts your vehicular adventure, weaving complexity into a tapestry of exhilarating bursts. In this automotive sonnet, the ECU is the poetic soul that turns data into the art of motion.
What modules connect to the ECU?
In the intricate dance of automotive intelligence, the Electronic Control Unit (ECU) emerges as a maestro, harmonizing with a multitude of modules, each playing its unique instrument in the symphony of vehicle functionality. Picture a grand orchestra, where diverse talents unite to create a mesmerizing performance.
The ECU, our virtuoso conductor, seamlessly interfaces with an ensemble of modules, instilling the vehicle with life and purpose. These modules are like skilled musicians, each adding their distinct flair to the composition.
1. Engine Control Module (ECM): A pivotal member of the orchestra, the ECM synchronizes the powertrain's rhythm. It orchestrates the ignition timing, fuel injection, and air-fuel mixture, ensuring a seamless balance between performance and efficiency.
2. Transmission Control Module (TCM): Just as a timpani player sets the beat, the TCM dictates gear shifts and transmission behavior. It harmonizes with the ECM, optimizing torque delivery and ensuring a fluid progression of power.
3. Anti-Lock Braking System (ABS) Module: This module, like a vigilant guardian of rhythm, monitors wheel speeds and prevents skidding during braking. It communicates with the ECU, swiftly adjusting brake force for optimal grip and safety.
4. Airbag Control Module (ACM): Safety takes center stage with the ACM, akin to an emergency section of the orchestra. It deploys airbags in milliseconds, responding to collisions with precision that echoes the quick tempo of a snare drum.
5. Body Control Module (BCM): The BCM, resembling the conductor's baton, manages various electrical functions within the vehicle. From lighting to power windows, it choreographs these secondary systems in harmony with the ECU.
6. Climate Control Module (CCM): Much like an ambient instrument, the CCM moderates cabin temperature and airflow. It communicates with the ECU to create an environment that's as comfortable as a symphony hall.
7. Infotainment Control Module (ICM): Modern vehicles embrace technology, and the ICM delivers that digital melody. It orchestrates the multimedia system, interfacing with the ECU to ensure entertainment and connectivity coalesce seamlessly.
8. Steering Control Module (SCM): Akin to a skilled cellist adding depth to the music, the SCM facilitates features like electric power steering. It assists the driver while collaborating with the ECU to enhance maneuverability.
9. Fuel Pump Control Module: As vital as a percussionist keeping the rhythm, this module manages the fuel pump's operation. It liaises with the ECU to regulate fuel supply, ensuring an uninterrupted flow of energy.
10. Sensor Modules (Various): Envision the orchestra's myriad instruments; similarly, sensors peppered throughout the vehicle provide continuous input. These sensors, from wheel speed to ambient temperature, create a dynamic dialogue with the ECU.
Each module, a distinct virtuoso, collaborates with the ECU to craft the symphony of your vehicular experience. Their interplay is the embodiment of technology's capacity to create harmonious complexity. From safety to performance to comfort, these modules, like a synchronized orchestra, ensure that your drive is a joyful crescendo of possibilities.
Languages used to program these modules:
In the realm of automotive technology, a medley of programming languages converges to give life to the intricate modules that compose the vehicle's symphony. Just as a diverse ensemble of instruments creates a rich melody, various programming languages play their roles in harmonizing these modules:
1. C and C++: These stalwart languages compose the backbone of automotive programming. They resonate with the efficiency of a finely tuned instrument, offering low-level control over hardware and memory. You'll often find Engine Control Modules (ECMs) and Transmission Control Modules (TCMs) serenading in C and C++, orchestrating the vehicle's powertrain dynamics.
2. Java: With a grace reminiscent of a seasoned pianist, Java finds its place in infotainment and connectivity modules. It's the language behind interactive touchscreen interfaces and multimedia systems, making sure your drive is as engaging as a well-orchestrated concerto.
3. Python: Python, like a versatile vocalist, lends its expressive nature to a range of applications. In the realm of diagnostics and data analysis, Python shines. It's often employed in toolsets for diagnostics, data visualization, and prototyping.
4. Assembly Language: As the conductor's baton directs the orchestra, assembly language communicates directly with hardware components. It's used sparingly, with a deliberate hand, to optimize critical sections of code that require ultra-fast execution.
5. Embedded C: Like a master violinist playing intricate solos, embedded C focuses on microcontroller programming. It's the language that fine-tunes each note of a vehicle's electronic symphony, from steering to lighting to power windows.
6. AUTOSAR (AUTomotive Open System ARchitecture) Standard: Not just a language, but a standardized framework, AUTOSAR fosters interoperability between modules. It's akin to a conductor's score, ensuring that different components harmonize seamlessly.
7. MATLAB/Simulink: Think of this as the composer's studio, where algorithms are composed and fine-tuned before being translated into other languages. MATLAB and Simulink enable engineers to simulate and model complex systems before implementation.
8. XML (eXtensible Markup Language): While not a traditional programming language, XML is the notation that allows different modules to communicate through standardized data formats. It's like a common musical notation that enables musicians from different cultures to play together.
9. Lua: This scripting language lends an agile touch to certain vehicle modules. It's often employed in scenarios where real-time adaptability and flexibility are crucial.
Just as an orchestra needs diverse instruments to create a harmonious composition, the automotive world requires a spectrum of programming languages to craft the intricate modules that define modern vehicles. Each language, like a musical note, contributes to the symphony of automotive technology, enabling vehicles to sing with efficiency, safety, and innovation.
Hardware is used in these modules:
The hardware used in the various electronic modules within modern motorcycles resembles a collection of finely tuned instruments that collaborate to create a harmonious symphony of functionality. From powerful processors to intricate sensors, each piece plays a crucial role in shaping the rider's experience. Let's delve into the hardware composition of these modules:
1. Engine Control Module (ECM):
· Microcontrollers or microprocessors: These powerful chips process sensor data and execute complex control algorithms to manage fuel injection, ignition timing, and more.
· Analog-to-digital converters (ADCs): These components convert analog sensor signals (e.g., throttle position, engine temperature) into digital data that the microcontroller can process.
2. Anti-Lock Braking System (ABS) Module:
· Microcontrollers: Similar to the ECM, microcontrollers process wheel speed sensor data and command brake actuation to prevent wheel lockup.
· Wheel speed sensors: These sensors detect the rotational speed of each wheel and feed this data to the microcontroller.
3. Electronic Throttle Control (ETC) Module:
· Throttle position sensor: A sensor that detects the rider's throttle input and communicates it to the microcontroller.
· Actuators: These components physically control the throttle valve's position based on the microcontroller's commands.
4. Ride Modes and Traction Control:
· Microcontrollers: These units interpret rider mode selections and adjust various parameters accordingly, such as power delivery and traction control sensitivity.
5. Digital Displays and Infotainment:
· Display panels: High-resolution screens that visualize real-time data, from speed and RPM to navigation directions.
· Microcontrollers: Process and display data on the screen, often integrating touch-screen functionality.
6. Controller Area Network (CAN Bus):
· Communication chips and transceivers: These components enable modules to communicate through the CAN Bus protocol, ensuring seamless data exchange.
7. Sensors:
· Various sensors: These include wheel speed sensors, throttle position sensors, temperature sensors, and more. They provide real-time data to the microcontrollers for decision-making.
8. Actuators:
· Various actuators: Fuel injectors, brake modulators, throttle actuators, and more, which physically execute the commands from the microcontrollers.
9. Safety Overrides:
· Gyroscopes and accelerometers: These sensors detect lean angle, acceleration, and deceleration, allowing safety systems like traction control to intervene when necessary.
10. Adaptive Strategies:
· Inertial Measurement Units (IMUs): These advanced sensors measure pitch, roll, and yaw, offering precise data for adaptive strategies like cornering ABS and stability control.
The hardware within these modules bridges the analog world of the motorcycle's physical mechanics with the digital realm of control and decision-making. Just as a conductor relies on a symphony of instruments, modern motorcycle electronics blend a diverse array of hardware to compose a masterpiece of safety, performance, and rider delight.
Example of programming:
Let's dive into an example of how the Electronic Control Unit (ECU) programming might look for a simplified scenario involving the Engine Control Module (ECM) and its management of fuel injection. Imagine this as a musical composition where lines of code create the rhythm of a well-timed fuel delivery.
#include <stdio.h>
// Function to calculate fuel injection based on engine RPM
float calculateFuelInjection(float engineRPM) {
float fuelInjection = 0.0;
// Linear relationship: higher RPM, more fuel
fuelInjection = 0.05 * engineRPM;
return fuel injection;
}
int main() {
float currentRPM = 2000.0; // Example current engine RPM
// Call the function to calculate fuel injection
float fuelToInject = calculateFuelInjection(currentRPM);
// Simulate sending fuel injection command to hardware
printf("Injecting %.2f units of fuel.\n", fuelToInject);
return 0;
}
In this simplified example, we're illustrating the concept of calculating fuel injection based on engine RPM. The code is written in C, conveying the relationship between RPM and fuel injection amount. The orchestration happens in a ‘calculateFuelInjection’ function, where a linear calculation is made.
Just like a composer arranges notes, the programmer devises a formula to determine the appropriate fuel injection based on engine RPM. The calculated fuel injection value is then used to simulate sending a command to the hardware (in reality, the fuel injectors).
Of course, real-world ECU programming is significantly more complex, involving intricate sensor inputs, control strategies, error handling, and safety measures. The example above, while simple, captures the essence of how an ECU's code orchestrates a specific aspect of vehicle behavior. The beauty of ECU programming lies in its ability to translate mechanical intricacies into lines of logic, forming a seamless connection between the physical and the digital realms.
1. Engine Control Module (ECM):
#include <stdio.h>
// Simulated sensor inputs
float engineRPM = 3000.0; // Example engine RPM
float throttlePosition = 0.7; // Example throttle position
// Function to calculate fuel injection based on RPM and throttle position
float calculateFuelInjection(float rpm, float position) {
return 0.05 * rpm * position;
}
int main() {
// Calculate fuel injection
float fuelInjection = calculateFuelInjection(engineRPM, throttlePosition);
// Simulate sending fuel injection command to actuators
printf("Injecting %.2f units of fuel.\n", fuelInjection);
return 0;
}
2. Anti-Lock Braking System (ABS) Module:
#include <stdio.h>
// Simulated sensor input
float wheelSpeed = 40.0; // Example wheel speed in km/h
int main() {
// Check wheel speed to determine if ABS should engage
if (wheelSpeed > 30.0) {
printf("ABS engaged: Preventing wheel lockup.\n");
} else {
printf("Normal braking.\n");
}
return 0;
}
3. Electronic Throttle Control (ETC) Module:
#include <stdio.h>
// Simulated rider's throttle input
float riderThrottleInput = 0.8; // Example rider's throttle input
int main() {
// Simulate translating rider's input to throttle valve position
float throttlePosition = riderThrottleInput * 100.0; // Assuming throttle input ranges from 0 to 1
// Simulate sending throttle position command to throttle actuator
printf("Throttle position set to %.2f%%.\n", throttlePosition);
return 0;
}
Please note that these code snippets are very simplified and serve only as illustrative examples. Real-world modules involve complex algorithms, error handling, safety mechanisms, and interactions with a multitude of sensors and actuators. The actual programs in production modules are proprietary and designed with rigorous testing and safety standards in mind.