
Unleashing the Thrills of Motorcycles
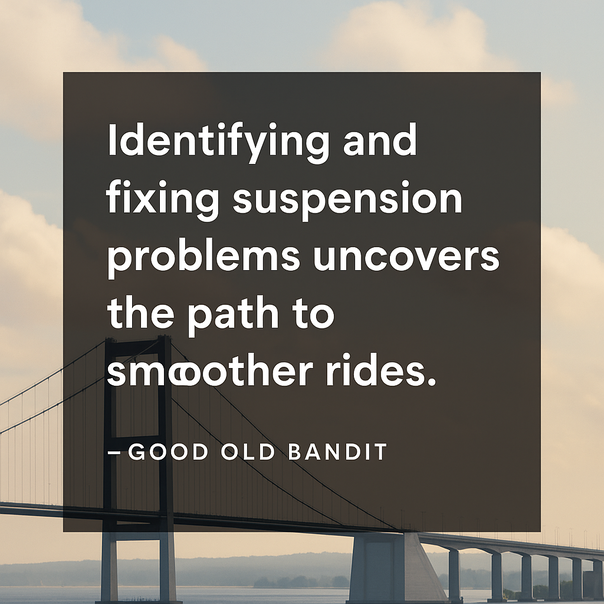
Ride Smoother, Ride Smarter: Identifying and Fixing Suspension Problems.
Good Old Bandit
Smooth your ride and sharpen your skills by identifying and fixing suspension problems like a pro.
The Unsung Hero Beneath You
Why Suspension Deserves More Respect Than It Gets
Let’s kick this off with a truth bomb: your suspension isn’t just there for comfort—it’s the difference between control and chaos. Between a bike that sticks to the line and one that wobbles through every turn like a confused duck.
Your suspension—front forks and rear shock(s)—is doing the heavy lifting every time your wheels hit a bump, dip, or pothole. It affects braking, acceleration, and even how long your tires last. Yet, for some reason, we tend to overlook it unless something feels off.
Let’s change that, shall we?
The Feel Test
Your Hands, Feet, and Butt Know Before You Do
Motorcycles talk. Not with words (obviously), but through vibrations, jolts, and the way they respond when you roll into a corner or grab a fistful of brake.
Suspension issues often whisper before they scream. Are you feeling chatter through the handlebars? Does your rear feel like it’s bouncing after every bump? Does the bike dive like a submarine under braking?
Yeah, those are symptoms. It’s not your imagination.
Common Red Flags:
· Excessive fork dive under braking
· Rear-end squat when accelerating
· Harsh, jarring ride on rough roads
· Uneven tire wear (often overlooked!)
· Mid-corner instability or wallowing
· Fork oil leaks (you see this one)
Each of these is a hint that your suspension might be out of tune, worn out, or just plain wrong for your style or weight.
Sag Isn’t Just a Mood
Why Rider Sag is the First Thing You Should Set
Let’s talk numbers—but stay with me. Rider sag is how much your suspension compresses under your weight. Too much sag? You’re bottoming out. Too little? You’re not using the travel you paid for.
Ideal Sag Range:
· Street Riding: 25-30% of total travel
· Track/Racing: 30-35% for rear, slightly less for front
· Adventure/Off-Road: Can vary, but similar logic applies
How to Check It:
· Get a buddy. Or a paddock stand.
· Measure the fully extended length of the suspension (off the ground).
· Sit on the bike in full gear.
· Measure the compressed length.
· Subtract and compare.
Adjust the preload if you’re outside the target zone.
This is your baseline. Your foundation. #RiderSagMatters #SuspensionTuning
Damping Isn’t a Dirty Word
Compression and Rebound Make or Break Your Ride
Once sag is dialed, damping is next. This is the sauce that keeps your bike from pogo-sticking through life.
Compression Damping:
Controls how fast your suspension compresses when it hits a bump. Too soft? It bottoms out. Too firm? It kicks you.
Rebound Damping:
Controls how fast it returns to normal. Too fast? It’s unstable. Too slow? It packs down and gets harsh.
Tweak one click at a time. Ride. Feel. Adjust again. Suspension is an art as much as it is science. #DampingDialed #ClickByClick
When to Service, When to Replace
Knowing When It's Time to Call in Reinforcements
No shame in getting help. Even the best suspension needs love.
Signs You Need a Service:
· 20K+ km without an oil change? Time.
· Oil on fork legs? Seal time.
· Bouncy ride despite correct sag? Internal wear.
· Clicking or clunking? Something’s loose or broken.
Fork oil degrades. Bushings wear. Springs fatigue. Shocks leak. It happens. That doesn't mean you're doing it wrong—it means you're riding. And riding is living.
Get a rebuild or replace with quality parts. Performance goes up, confidence goes through the roof. #SuspensionService #RideConfident
Tuning For You
The Best Suspension Is the One That Matches Your Ride Style
Stock suspension? It’s made for averages. And you, my friend, are anything but average.
Tuning suspension to your weight, riding style, and terrain transforms the bike. Suddenly, corners make sense. Braking is sharper. Traction is better.
Dial it in. Experiment. Write down your settings. Adjust for different rides.
Adventure riders? Softer damping, longer travel. Track day junkies? Firm settings, less dive. Daily commuters? Comfort wins.
It’s all about matching the setup to your soul. #SuspensionSetups #RideYourWay
Let’s Talk Tools and Toys
Gear That Makes Suspension Tuning Easier and More Precise
Want to get precise? Get the right tools.
· Sag measuring tools (or a buddy with a tape measure)
· Suspension spanners or preload wrenches
· Zip ties (for fork travel tracking)
· Torque wrench (don’t strip bolts!)
· Notepad or an app for logging settings
Bonus toys? Upgraded springs, gold valve kits, or aftermarket shocks like Ohlins or Race Tech. #ToolsMatter #MotorcycleUpgrades
Wrapping the Ride
Smooth Suspension Equals Rider Confidence
Here’s the thing: fixing suspension isn’t just about the bike. It’s about YOU.
When your ride feels right, you ride better. Safer. Faster. More confident. You start hitting apexes like a surgeon and gliding over rough patches like you're flying a magic carpet.
And once you feel that difference? You’ll never go back.
So, get in there. Check your sag. Tweak your damping. Listen to your machine. And share your setup stories with your crew—we’re all wrenching and riding toward better days. #RideSmooth #SuspensionMatters #MotorcycleLife #GoodOldBandit
The Perfect Grip
Good Old Bandit
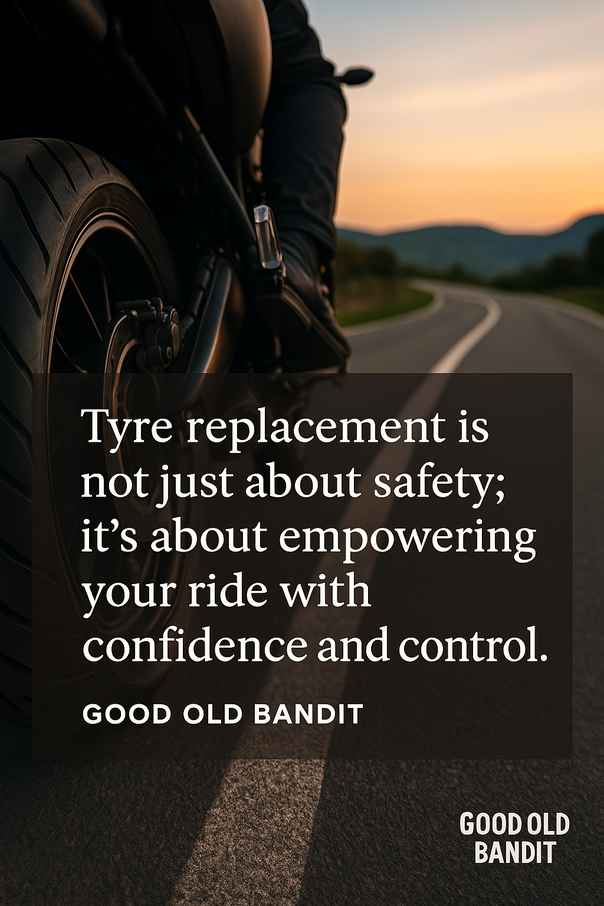
Choosing the Right Tyre for Safety, Performance, and Thrill
Upgrade your journey with new tyres that match your style and safety—make the right choice for a confident, smooth ride every time!
Your Comprehensive Roadmap to Safety, Performance, and Confidence on Every Journey
When it comes to replacing your tyres, you’re not just putting on new rubber; you’re stepping into a world that affects your safety, the performance of your ride, and even your overall driving enjoyment. Choosing the right tyres is a decision that blends art, science, and a touch of personality. Whether you’re a daily commuter, an adventure seeker, or simply value peace of mind on the road, this discussion is for you. Let’s dive into a friendly yet insightful conversation about making this critical choice with confidence and clarity. #TyreReplacement
The Moment of Truth: Recognizing the Need for New Tyres
When Your Old Companions Signal It’s Time for a Change
Every journey you take leaves its mark on your tyres, and over time, even the best tyres show signs of wear. But how do you know when it’s time to swap out the old for something new? Sometimes it’s as simple as noticing a loss in tread grip, or maybe a small puncture that just won’t hold up. Other times, it may be an unexpected vibration or a slight change in your car’s handling.
The key is to keep an eye on the tread depth—the deeper the groove, the longer you can enjoy that smooth ride. However, when you notice tread wear below safe levels, or if your tyres start to look cracked, blistered, or uneven, it’s time to consider replacements. Safety is paramount, so trust your instincts and get professional help if needed. After all, every tyre tells a story, and sometimes it’s a story that ends with a signal to upgrade. #SafetyFirst
Decoding the Essentials: What to Consider When Choosing New Tyres
Factors That Blend Safety, Performance, and Style
Choosing new tyres isn’t just picking out a set of rubber circles; it’s about matching them to your unique driving habits and the personality of your car. Here are some essential factors that you should consider:
Tread Design and Pattern: The tread pattern plays a central role in handling, traction, and even noise levels. Patterns vary from deep grooves that help channel water away to interlocking blocks designed for enhanced grip. Think about the conditions you face most—are your roads slick with rain, or do you traverse more dry, dusty highways?
Tyre Size and Fit: Your vehicle’s performance is closely tied to the correct tyre size. Check your owner’s manual or the placard near the driver’s door for the manufacturer’s recommendation. A proper fit ensures the best contact patch with the road and prevents unnecessary wear.
Speed Rating and Load Capacity: These numbers and letters on the tyre’s sidewall are not just decoration—they tell you how fast the tyre can safely go and how much weight it can carry. Matching these specifications with your driving style is essential. If you’re a spirited driver, you might benefit from a tyre with a higher speed rating.
Weather and Seasonal Needs: Consider if you need tyres that perform well in summer, handle moderate conditions all year, or excel in winter’s chill. All-season tyres are versatile, but specific climates sometimes call for specialized options. For instance, if you get heavy snowfall or icy roads, winter tyres are a wise investment.
Longevity and Treadwear Warranty: A reliable treadwear warranty can provide insight into how long a tyre is expected to last under normal conditions. This is especially important if you cover long distances, as it directly relates to both safety and cost-effectiveness.
Budget and Brand: While it might be tempting to go for the cheapest option available, investing in quality tyres from a reputable brand can make a difference in performance and durability. Sometimes spending a bit more means investing in peace of mind.
By weighing these factors, you’ll be better positioned to choose tyres that not only fit your car’s needs but also bring out the best in your driving experience. #PerformanceMatters
Understanding Different Tyre Types
Match Your Tyres to Your Driving Lifestyle
Tyres come in various types, each designed for specific driving environments and preferences. Here’s a closer look at the most common types:
All-Season Tyres: Designed for versatility, these tyres offer balanced performance in a variety of conditions. They work well in dry and damp conditions and can handle light winter weather. Ideal for drivers who want one set of tyres year-round.
Summer Tyres: Optimized for warmer temperatures, summer tyres excel in dry and wet conditions during the warm season. They provide superior cornering and responsive handling but lose their grip when the temperature drops.
Winter Tyres: Engineered for cold weather, these tyres remain flexible in freezing temperatures. Their deeper grooves and unique rubber compounds ensure better traction and braking on snow and ice. They’re not meant for warm conditions but are crucial for safe winter driving.
Performance Tyres: These tyres are usually found on sportier vehicles. They offer excellent grip and handling but might sacrifice some ride comfort and have shorter lifespans under harsh road conditions.
All-Terrain and Off-Road Tyres: For those who take their vehicles off the beaten track, these tyres provide increased durability and traction on uneven surfaces. They might be a bit noisier on paved roads, but they excel where most tyres can’t.
The right type will depend on where and how you drive. If your daily route takes you through urban streets with occasional rainy days, all-season tyres might be your go-to. For those who face extreme seasonal changes, switching between summer and winter tyres can provide the best performance. #DrivingInStyle
The Right Fit: Getting Your Tyre Size Perfect
A Key Element to Optimizing Your Vehicle’s Performance
Imagine wearing shoes that are too tight or too loose—the same goes for tyres. Your vehicle’s performance, comfort, and safety hinge on proper tyre size. When your tyres fit perfectly, they ensure the best contact with the road, leading to improved handling and stability.
Check your tyre’s sidewall for the correct size notation. It usually looks something like 205/55R16, where:
· The first number (205) represents the tyre’s width in millimeters.
· The second number (55) is the aspect ratio, a percentage that tells you the height of the sidewall compared to the width.
· The letter R stands for radial construction (which is standard today).
· And finally, 16 indicates the diameter of the wheel in inches.
Following the manufacturer’s recommendations isn’t just a suggestion—it’s a must for maintaining your vehicle’s designed performance. Over time, your car’s performance can suffer if the tyre size is off, so check that number and stick to it. This simple step can save you a lot of headaches down the road. #PerfectFit
Tyre Maintenance: More Than Just Replacement
Keeping Your Investment in Top Shape
While choosing new tyres is exciting, maintaining them is just as crucial. Regular maintenance ensures that your tyres wear evenly and last as long as possible. Here are a few practical tips:
Regular Checks: It’s smart to check your tyre pressure at least once a month. Proper inflation reduces wear and improves fuel efficiency.
Rotation and Balancing: Rotating your tyres every few thousand miles promotes even wear. Also, balancing them helps avoid vibrations and extends their lifespan.
Alignment Checks: Poor alignment can cause uneven tyre wear. If you notice your vehicle pulling to one side, have your wheels aligned.
Tread Inspections: Always keep an eye on your tread depth. The penny test is a simple, quick way to ensure you’re within safe limits.
Cleanliness: Keeping your tyres clean removes road salts, dirt, and chemicals that can degrade the rubber over time.
By spending a little time on maintenance, you can keep your tyres in great condition, saving money and enhancing your safety. Regular upkeep is a small price to pay for the confidence of a smooth, balanced drive. #TyreCare
Avoiding Pitfalls: Mistakes in Tyre Replacement
Common Missteps That Could Cost You More Than Money
In the rush to upgrade your tyres, it’s easy to fall into a few traps. Here are some common mistakes and how to sidestep them:
Mixing Old with New: Installing new tyres alongside worn ones can lead to uneven handling. Your best bet is to replace all four tyres at once.
Ignoring the Load and Speed Ratings: These numbers aren’t decoration—they’re safety guidelines. Ensure that the new tyres meet or exceed the manufacturer’s specifications.
Overlooking Seasonal Needs: Using summer tyres in winter conditions (or vice versa) can seriously compromise your grip on the road. Tailor your tyre choice to the climate you face.
Wrong Tyre Size: While it might be tempting to change the size for a sportier look or improved fuel efficiency, deviating from the recommended tyre size can affect your vehicle’s handling and safety.
Underestimating the Impact of Tyre Age: Even if a tyre looks fine, its rubber can degrade over time. Always check the DOT code to know the tyre’s age.
By being aware of these pitfalls, you can save yourself from potentially dangerous mishaps and unnecessary expenses. It’s all about making informed choices and trusting a bit of common sense along with professional advice. #AvoidMistakes
Taking the Leap: Transitioning to New Tyres with Confidence
Embrace Change and Accelerate Your Driving Experience
Replacing your tyres is much more than a routine update—it’s a chance to refresh your ride, boost your safety, and enhance your overall driving pleasure. Picture it as swapping out an old pair of sneakers for something that not only looks stylish but also gives you the boost you need on a morning run. With new tyres, every ride feels more confident and controlled, igniting a sense of optimism and excitement for the journey ahead.
The idea of change can be daunting, especially when it means parting ways with a set of tyres that have been with you through countless adventures. However, every mile you travel with worn-out tyres chips away at your safety and performance potential. Embracing new tyres is an investment in your future—a step toward more secure stops, tighter handling, and an overall smoother ride.
It’s also an opportunity to consider the latest technology. Advances in tyre manufacturing mean that modern tyres often offer better fuel efficiency, lower road noise, and improved durability compared to older models. So when you take the plunge and update your tyre set, you’re not just meeting a need; you’re upgrading your entire driving experience. #NewBeginnings
Let’s Talk Tyres
An Invitation for Your Stories and Experiences
Now that we’ve talked about the ins and outs of choosing new tyres, it’s over to you. What has your experience been like with tyre replacement? Have you ever faced a situation where a tyre signaled its time long before you expected? Maybe you found that a quick rotation or proper inflation made all the difference on a rainy day. Let’s use this space to exchange tips, share stories, and spark conversations about what works best on the road.
Perhaps you’ve discovered a hidden gem from a tyre brand known for longevity and performance, or maybe a friend’s recommendation turned out to be a lifesaver on a slippery road. Every experience enriches our collective knowledge about being safe and enjoying our journeys—so don’t hold back. Your insights might just inspire someone else to take action and invest wisely in their driving future.
Remember, every drive is a chance to experience the joy of the road. As you share your stories, think about the moments when the right set of tyres transformed an ordinary trip into an adventure. #TyreStories #RoadConversations
Your Road to Confidence Starts Now
Steer Into a Brighter, Safer Future with the Right Tyres
At the end of the day, choosing the right tyres is a blend of practical know-how and the willingness to embrace change for the better. It’s about taking a moment to assess the condition of your current set, understanding your driving needs, and matching those with a tyre that offers safety, performance, and value. New tyres aren’t just about replacement—they’re about renewal. They open the door to a smoother ride, better handling, and the kind of peace of mind that can only come from knowing you’re well-equipped to tackle every twist and turn on the road ahead.
So here’s to new journeys, adventurous drives, and the enduring joy that comes with every road trip. Make your tyre choice with confidence, and step into a future where safety and performance go hand in hand. Your ride, your rules, your adventure—it's all waiting for you. #DriveSafe #TyreConfidence
Replacing Worn Brake Pads: When and How to Keep Your Ride Safe.
Good Old Bandit
Master brake pad replacement with our inspiring guide. Learn when and how to keep your ride safe and smooth.
Brake pads are a rider’s silent guardian. They ensure each stop is smooth and safe. This post dives deep into the art of brake pad replacement. We explore the signs, the timing, and the step-by-step process needed to maintain your brakes. With a mix of practical advice and inspiring insights, this guide will keep you confident on every ride. Let’s spark some discussion and share our passion for safe riding!
Understanding Brake Pads
The Basics of Braking Safety
Brake pads play a key role in your bike’s safety system. They press against the rotor to slow your ride. Over time, they wear down. This wear is normal but must be checked often. Keeping brake pads in good shape means your bike stays safe. Riders who understand the basics tend to care for their machines better. This knowledge helps you spot issues before they turn serious. In our journey as riders, every detail matters. Regular checks can make a big difference. #BrakeBasics #MotorcycleSafety
Brake pads are made from a mix of metals and friction materials. These materials are designed to stop your bike quickly. They handle high temperatures and heavy use. But no material lasts forever. Each ride adds a little wear, and the signs can be subtle at first. The soft hum of a squeal or a slight change in braking feel might be your brake pads calling for help. Staying alert to these signs can save you from a more costly fix later.
Signs That Your Brake Pads Need Replacing
Spot the Warning Signs Early
Noticing when your brake pads are worn is vital. The first sign is often a high-pitched squeal. This sound is not meant to be ignored. It tells you that the pads are thinning out. A soft or spongy brake feel may also hint at wear. When you press the brake, it should respond sharply and firmly. If you feel a delay or a pull, your pads might be unevenly worn. #BrakeWarning #RideSmart
Other signs include a visible decrease in pad thickness. Sometimes you can see a metal indicator through a small window. This metal shows up when there is not much friction material left. If you hear grinding or feel a vibration, you should check your brakes right away. Regular inspections are key. Remember, a small sound can lead to a big issue if left unchecked. It is wise to follow your bike’s manual and check your brake pads at regular intervals.
When to Replace Brake Pads: Timing is Everything
Knowing the Right Moment for Maintenance
The timing for replacing brake pads depends on how much you ride and the style of your braking. On average, most brake pads need a change between 15,000 and 30,000 miles. However, hard braking and riding in tough conditions may shorten their life. It is best to inspect your pads every few months or after long rides. #MaintenanceMatters #BrakeTiming
You should check your brake pads if you notice a drop in performance. A worn pad can reduce your stopping power. In addition, riding with old pads can lead to rotor damage. Early replacement is the best approach. It is a small task that prevents big problems. Frequent checks and timely replacements keep your ride smooth. Regular care also extends the life of other parts in your braking system.
How to Replace Brake Pads: A Step-by-Step Walkthrough
A Simple Guide for the DIY Rider
Replacing brake pads might seem daunting at first. However, a clear guide and the right tools can make it a fun task. Let’s break down the process into clear steps. #DIYBrakes #RiderTips
· Gather Your Tools Essential Equipment for the Job First, gather all the needed tools. You will need a lug wrench, a C-clamp, and a clean cloth. Ensure your bike is parked on a level surface. Having the right tools makes the job easier and safer.
· Lift Your Bike Prepare Your Ride for Maintenance Use a stand or secure the bike firmly. This step ensures stability while you work on the brakes. A steady bike allows for safe and precise work.
· Remove the Wheel Access the Brake Assembly Remove the wheel to gain clear access to the brakes. This gives you a better view of the brake pads and rotors. Follow the bike manual for the correct procedure. Small mistakes here can affect the overall process.
· Take Off the Brake Caliper Expose the Brake Pads Carefully remove the bolts that hold the brake caliper. Once removed, set the caliper aside. Avoid letting it dangle; use a piece of wire or a hanger to secure it.
· Remove the Old Brake Pads Clear Out the Worn Material Slide out the old brake pads. Note any debris or dust that has built up. Cleaning this area is crucial for a smooth replacement. Look for uneven wear or damage on the pads.
· Clean the Brake Assembly Prepare the Surface for New Pads Use a clean cloth and brake cleaner to wipe the area. Cleaning removes residue and helps the new pads work better. A clean assembly is key for safety.
· Insert the New Brake Pads: Install Your New Guards Fit the new pads into the caliper. They should sit snugly and evenly. Check your bike’s manual to ensure proper alignment. Good contact is vital for effective braking.
· Reassemble the Caliper: Secure the Brake System Place the caliper back and tighten the bolts securely. Use the C-clamp to push the caliper piston back if needed. This step is crucial for proper brake function.
· Reattach the Wheel: Finalize the Setup Reinstall the wheel, making sure all fasteners are in place. Give the brakes a test push. Listen and feel for any odd sounds or delays.
· Test Your Brakes: Ensure Safe Functionality Take your bike for a slow ride in a safe area. Test the brakes at low speed. Check if they respond quickly and smoothly. #DIYMaintenance #BikeSafety
Following these steps ensures your brake pads are installed correctly. A small error can lead to poor performance. Take your time and work carefully. The process builds confidence and helps you know your bike better. Regular DIY work keeps you engaged and in tune with your ride.
Expert Tips and Tricks
Enhance Your Ride with Pro Advice
Learning the basics is great, but a few pro tips can elevate your maintenance routine. Here are some insights from experienced riders. #ProTips #BrakeCare
· Check the Rotors: Always inspect your rotors. They should be smooth with no deep grooves. If the rotor is damaged, it may need resurfacing or replacement.
· Bedding In New Pads: After replacing pads, spend time bedding them in. This means riding gently to let the pads form a proper bond with the rotors.
· Use Quality Parts: Invest in quality brake pads. Cheaper options may wear quickly and compromise safety.
· Regular Inspections: Don’t wait for a warning sound. Regularly inspect your brakes. A routine check every few rides can prevent major issues.
· Stay Informed: Keep up with the latest brake technologies. New materials and designs can offer improved safety and performance.
· Ask for Advice: Join rider forums and groups. Sharing experiences can reveal new insights and tips.
These expert tips can change your maintenance routine for the better. They ensure that every ride is safe and enjoyable. Remember, every rider’s journey is unique. Sharing your experiences can help others learn and grow. #RideTogether #SafetyFirst
Brake Pad Care and Maintenance
Keep Your Brakes in Top Shape
Good maintenance is more than a one-time task. It is a part of your riding routine. Keeping brake pads in top shape prolongs their life and keeps you safe. #MaintenanceRoutine #BikeCare
Regular cleaning is key. Brake dust and debris can build up over time. Use a soft cloth and a safe cleaner to wipe the pads and rotors. This habit prevents wear and tear. Also, check the brake fluid levels. Clean, properly filled fluid aids the braking system. A small investment in care pays off with better performance and fewer repairs.
Rotate your tires and balance your bike. While it might not seem directly related, a balanced ride means less strain on the brakes. Every component of your bike works in harmony. Ensure that each part is well-maintained. This careful attention to detail creates a smoother, safer ride. Regular maintenance builds a deeper connection between you and your machine. #BikeLove #RideSafe
The Future of Braking Technology
Innovations in Brake Systems
Brake technology is not static. It evolves with new ideas and materials. The future holds many exciting changes. New compounds for brake pads promise longer life and better performance. #TechTrends #FutureRide
Smart brake systems are on the horizon. These systems monitor wear and adjust performance automatically. They can alert you when a change is needed. Such innovations make riding even safer. Innovations in materials are making brakes lighter and more effective. A lighter brake pad can mean faster response and less wear on other parts. The blend of technology and design is pushing the boundaries of what we expect from brakes. This progress is something to admire and look forward to.
The integration of sensors in brake systems is another fascinating trend. These sensors can provide real-time data on your bike’s performance. They help you monitor conditions that might lead to early wear. This technology turns routine maintenance into a data-driven process. Riders can get instant alerts and adjust their habits. The future is bright with such smart solutions. #Innovation #SmartRide
The Joy of a Smooth Ride
How Well-Maintained Brakes Enhance Your Journey
There is joy in every safe ride. Smooth brakes add to that joy. They give you the freedom to push limits while knowing safety is in place. Every rider deserves that peace of mind. #SmoothRide #RideHappy
Imagine riding on an open road. Your bike responds exactly as you need it to. Brakes work seamlessly, giving you control at every turn. Confidence comes from knowing that your machine is in top shape. A well-maintained braking system is a mark of respect—for yourself, your bike, and the road. This practice is not just about safety; it is about pride in your craft. Every ride becomes a journey where you can focus on the thrill of the road. It becomes an experience that builds memories and lasting bonds with your machine. #FreedomOnWheels
A smooth ride inspires conversation among riders. Sharing maintenance tips and experiences can lead to deeper bonds within the community. Whether you are a beginner or a seasoned pro, every rider has a story to tell. The art of brake care is one such tale that brings us together. It is a reminder that small efforts can lead to big rewards. Embrace the joy of a safe and smooth ride. #CommunityRide #MotorcycleLove
Keep the Spirit Alive
Celebrate Safety and Mastery in Every Ride
In wrapping up, replacing worn brake pads is a blend of art and science. It is a simple yet vital task that keeps your rides safe and enjoyable. By knowing the signs, the timing, and the proper steps, you equip yourself with the tools to keep your bike at its best. The process is empowering and connects you to every part of your machine.
Your bike is more than metal and grease. It is a partner in every journey. Treat it well, and it will serve you reliably. Share your experiences and learn from others. Let every ride be a lesson and a celebration of life on two wheels.
I invite you to join the conversation. Share your tips, your stories, and your passion for riding. Every comment enriches our collective knowledge. Let us inspire one another to ride safely and ride proud. Together, we make the road a better place. #RideTogether #InspireSafety
Embrace every ride with the confidence that comes from knowing your brakes are in top shape. Share your experiences and join the conversation using the hashtags woven throughout this guide. Let’s continue to learn, inspire, and ride safely together. #SafetyFirst #MotorcycleMaintenance #DIYBrakes #RideSmart #BrakeCare
Troubleshooting Electrical Issues in a Motorcycle: A Friendly, Detailed, and Open-Ended Guide.
Good Old Bandit
Solve motorcycle electrical problems step by step! Explore simple tests, common fixes, and tips for DIY success. #MotorcycleChat #DIYRepairs #BatteryCheck #StarterRelay #ClickNoStart #NoSpark #IgnitionTroubles #BadGrounds #ElectricalMystery #FuseBox #ShortCircuit #ChargingSystem #StatorCheck #DIYTools #MotorcycleTips #PersistentIssues #MechanicHelp #CommunityLearning #ShareYourStory #ElectricalConfidence #RiderCommunity #LearningTogether
Why Electrical Issues Matter
Have you ever walked out to your motorcycle, turned the key, and found yourself met with silence? Or maybe you hit the starter, and all you heard was a weak click. If you’ve been riding for a while, you’ve likely faced at least one electrical issue. These problems can be confusing and frustrating, but they don’t have to be a mystery. Electrical components may seem like a puzzle, yet with some basic knowledge and a willingness to investigate, you can tackle many of these issues at home.
In this guide, we’ll talk about troubleshooting motorcycle electrical problems in a friendly, step-by-step way. We’ll go over common issues like dead batteries, blown fuses, or random flickering lights. We’ll also discuss tools you’ll need, safe ways to handle wires, and some “best practices” to keep your electrical system in good shape. I’ll share insights on how to locate hidden wiring faults, interpret voltage readings, and figure out if a part needs replacing.
This won’t be a rigid set of rules. Instead, think of it like sitting around with friends, sharing experiences and tips. Electrical troubleshooting is a process. Sometimes you find the culprit right away; other times you have to do some detective work. By staying calm and methodical, you’ll often pinpoint the source of the trouble and feel pretty good about solving it yourself.
Grab your favorite drink, find a comfortable spot, and let’s chat about how to keep your motorcycle’s electrical system in top shape. Feel free to ask questions or share stories in the comments. This post is meant to spark conversation, so don’t hold back. #MotorcycleChat #DIYRepairs
The Battery—Where the Power Begins
Battery Basics: The Core of Your Motorcycle’s Electrical World
Your motorcycle’s battery is often the first place to look when electrical problems arise. Without a healthy battery, your ignition system, starter motor, and accessories may not function properly. Let’s talk about what a battery does and how you can test it.
What Does the Battery Do?
The battery supplies the initial burst of energy to power your starter motor and ignition system. Once the engine is running, the charging system (stator and regulator/rectifier) takes over, but the battery remains an important buffer, helping smooth out voltage spikes and providing consistent power.
Common Battery Issues
· Dead or Weak Battery: This can be caused by leaving lights on, short rides that don’t recharge the battery fully, or simply an old battery that no longer holds a charge.
· Corroded Terminals: Corrosion creates a barrier that prevents the free flow of electricity.
· Loose Connections: Vibrations can cause battery cables to loosen, especially if they aren’t tightened properly.
How to Check Your Battery
· Visual Inspection: Look for cracks or bulges on the battery case. Check for green or white buildup around the terminals.
· Voltage Measurement: Use a multimeter to measure voltage across the terminals. A fully charged battery should read around 12.6 to 12.8 volts (engine off).
· Load Test: Even if the voltage appears fine, the battery may fail under load. Many auto parts stores can perform a load test for free.
Diagram: Basic Battery Check
______________________
| |
| Motorcycle |
| (Side View) |
| |
| [Battery]---(Terminals |
| |
| Check Voltage (Multimeter) |
| |
---------------------------------------
(In this diagram, imagine a rectangular battery located under your seat or side cover. A multimeter is connected to the battery terminals to read voltage. This is a simplified view, but it captures the idea of how you’d measure the voltage at the battery.)
Why Start with the Battery?
It’s the simplest component to test and often the root of many problems. If your battery fails basic checks, it’s time to recharge or replace it. A healthy battery is the first step toward a reliable electrical system. #BatteryCheck #DIYMaintenance
Starter Relay—When You Hear a Click
Understanding the Starter Relay: The Hidden Switch That Makes Starting Possible
So, you press the starter button, and you only hear a faint click. This can point to a faulty starter relay or a weak battery. If your battery checks out, the relay is a good next suspect.
What Is a Starter Relay?
The starter relay is an electrically operated switch. When you press the starter button, the relay allows a high current to flow from the battery to the starter motor. If the relay is bad, you’ll hear a click but get no cranking.
Common Relay Issues
1. Internal Corrosion: Moisture can seep into the relay housing, corroding the contacts.
2. Worn Contacts: Over time, repeated use can wear down the contact points inside the relay.
3. Wiring Problems: Loose or corroded connections at the relay terminals.
Quick Test
Jump the Relay: Use a screwdriver or jumper wire to bridge the two main terminals on the relay. If the starter motor spins, the relay is likely bad. If it doesn’t, the issue may lie in the starter motor or battery.
Diagram: Relay Jump Test
Starter Relay (Top View)
_________
| | <--- Relay coil
| T1 T2 | <--- Two main terminals
|_________|
Use a screwdriver to connect T1 and T2.
(In this diagram, the relay has two main terminals labeled T1 and T2. By using a screwdriver to bridge these terminals, you effectively bypass the relay’s internal switch. If the starter motor cranks, the relay is the culprit.)
Why the Relay Matters
It’s a small part that has a big job. Without it, your starter motor won’t receive the power it needs. Replacing a relay is often cheap and straightforward. #StarterRelay #ClickNoStart
Ignition System—Where the Spark Happens
Spark Plugs and Beyond: The Lifeline of Your Engine’s Combustion
If your engine cranks but doesn’t start, you might have a spark problem. The ignition system includes spark plugs, ignition coils, and related wiring. Let’s explore how to diagnose and address spark issues.
Spark Plug Basics
Spark plugs ignite the air-fuel mixture in each cylinder. Over time, they can foul from carbon buildup or oil deposits. A bad plug can lead to misfires, poor fuel economy, and even a no-start condition.
Testing for Spark
1. Remove Spark Plug: Take out one plug and reattach it to its wire.
2. Ground the Plug: Touch the plug threads to the engine block.
3. Crank the Engine: Watch for a blue spark. If there’s no spark, check the coil or plug wire.
Diagram: Checking for Spark
_______________________________
| |
| Spark Plug (side view) |
| |||| |
| (Ground against engine) |
|_______________________________|
(Crank engine)
(This diagram shows a single spark plug removed from the cylinder head, with the threaded side touching a metal part of the engine. When you crank the engine, you should see a visible spark at the electrode gap.)
Ignition Coil and Wires
If you don’t see a spark, your ignition coil or wires might be faulty. You can measure coil resistance with a multimeter. Compare your reading to the specifications in your service manual. If the coil is out of range, it may need replacement.
Why Spark Matters
Without a spark, your engine won’t run. Maintaining a healthy ignition system ensures better performance and fuel efficiency. #NoSpark #IgnitionTroubles
Grounds—The Often Overlooked Connections
Chasing Bad Grounds: Why Corrosion and Loose Bolts Cause So Many Headaches
Ground wires are crucial in completing electrical circuits. If the ground is loose or corroded, you can get weird problems like dim lights, flickering signals, or intermittent starting. Let’s see how to track them down.
What Is a Ground?
A ground connection is where an electrical circuit is tied to the motorcycle’s frame or chassis. This allows current to flow back to the battery through the frame instead of a separate wire for every circuit.
Symptoms of Bad Grounds
1. Dim or Flickering Lights
2. Weak Horn
3. Erratic Gauge Readings
4. Starter Issues
Checking Ground Connections
1. Locate Ground Points: Common ground points are often near the battery and on the frame near the engine.
2. Clean Corrosion: Remove bolts and clean the area with a wire brush.
3. Tighten Securely: Make sure connections are snug and free from grease or paint that can block conductivity.
Diagram: Ground Points
Motorcycle Frame (Top View)
_________________
| |
| [Engine] |
| | (Ground Wire) |
| [Battery]------------- |
|________________|
Ground wires often attach to the frame or engine block.
(In this top-down view, you can see a ground wire from the battery negative terminal to the frame or engine block. There might be additional ground wires depending on your bike’s design.)
Why Ground Matters
Good grounds ensure stable current flow. One loose ground can trigger multiple problems. It’s an easy fix once you find it, so don’t skip this step. #BadGrounds #ElectricalMystery
Fuses and Shorts—Your Bike’s Circuit Protectors
Fuses—Tiny Heroes of Electrical Safety: Protecting Your Wiring from Overload
Fuses protect circuits from excessive current. When a fuse blows, it means something caused a spike in current or a short circuit. Replacing a fuse is simple, but if it keeps blowing, you need to find out why.
Common Fuse Problems
1. Wrong Fuse Rating: Installing a fuse with a higher rating can allow excessive current, and damaging wiring.
2. Damaged Wires: Frayed insulation can cause a short to ground.
3. Faulty Components: A failing part can draw too much current.
How to Diagnose a Blown Fuse
1. Replace the Fuse: If it blows again immediately, you likely have a short.
2. Inspect the Circuit: Look for damaged or pinched wires.
3. Test Components: Disconnect components one by one to isolate the issue.
Diagram: Simple Fuse Circuit
Battery (+) ---- [Fuse] ---- Switch ---- Load (Light/Bulb) ---- (-) Battery
(This simplified circuit shows how a fuse is placed in series between the battery and the switch. If there’s a short after the fuse, the fuse will blow to protect the rest of the circuit.)
Shorts: The Silent Trouble
A short occurs when the current takes an unintended path, usually to the ground. This can blow fuses or drain the battery. Tracking a short involves visual inspection and sometimes a “wiggle test” to see if moving wires replicate the problem.
Why Fuses Matter
They prevent major damage by stopping high current flow. If your fuse blows repeatedly, don’t just keep replacing it. Find and fix the root cause. #FuseBox #ShortCircuit
The Charging System—Keeping the Juice Flowing
The Stator and Regulator/Rectifier: Partners in Power
Your battery doesn’t charge itself. The charging system—made up of the stator and the regulator/rectifier—provides ongoing power once the engine is running. If your battery keeps dying during rides, you may have a charging issue.
Stator Basics
The stator generates alternating current (AC) when the engine spins. This AC power must be converted to direct current (DC) for your battery and electrical components.
Regulator/Rectifier Basics
The regulator/rectifier converts AC to DC (rectification) and ensures the voltage stays within a safe range (regulation). Without it, your battery could overcharge or fail to charge at all.
Testing the Stator
1. Check AC Output: Disconnect the stator wires and measure the AC voltage between each pair of leads with the engine running. You should see an increasing voltage with a higher RPM.
2. Continuity to Ground: The stator coils shouldn’t show continuity to ground. If they do, the stator might be shorted.
Testing the Regulator/Rectifier
1. Measure DC Output: With the engine at around 3,000 to 5,000 RPM, check the battery voltage. It should be around 13.5 to 14.5 volts.
2. Diode Check (if possible): Some multimeters can test diodes. The regulator/rectifier often contains diode packs.
Diagram: Charging System Overview
(Engine)
|
[Stator]
|
AC Output
|
[Regulator/Rectifier]
|
DC Output
|
[Battery]
(In this simplified diagram, the stator produces AC power. The regulator/rectifier converts and regulates this power before sending it to the battery.)
Why the Charging System Matters
A faulty charging system means you’ll keep draining your battery until it can no longer start the bike. Regular checks can save you from unexpected roadside problems. #ChargingSystem #StatorCheck
Tools, Tips, and Techniques for Troubleshooting
Your Toolkit for Electrical Adventures: Multimeters, Wiring Diagrams, and a Calm Mind
When you’re trying to solve electrical mysteries, having the right tools and approach makes a big difference. Let’s explore some essentials.
Must-Have Tools
1. Multimeter: Measures voltage, resistance, and current.
2. Wire Strippers and Crimpers: For making solid connections.
3. Test Light: A quick way to check for power in a circuit.
4. Service Manual: Contains wiring diagrams and component specs.
Best Practices
1. Take Notes: Write down readings and observations.
2. Work Methodically: Check one system at a time.
3. Use Proper Connectors: Avoid twisting wires together without secure connections.
4. Disconnect the Battery: When working on sensitive parts, remove the battery’s negative cable.
Diagram: Basic Multimeter Use
[Multimeter]
| |
Red Probe Black Probe
You can set the dial to DC Voltage, AC Voltage, or Resistance depending on what you need to measure.
(This simple diagram shows a generic multimeter with two probes. The red probe usually goes to the positive side of a circuit, and the black probe goes to the negative side or ground.)
Why Tools and Techniques Matter
Guesswork often leads to frustration. Having reliable data from your measurements helps you pinpoint the real problem faster. #DIYTools #MotorcycleTips
Persistent Problems and When to Seek Help
Final Checks and Community Support: When to Call a Pro and When to Ask Friends
Sometimes, despite all your efforts, an electrical issue won’t go away. That’s okay. Let’s talk about what to do next.
Double-Check the Basics
1. Battery Health: Even a new battery can be defective.
2. Fuse Box: Make sure the correct fuses are installed.
3. Grounds and Connections: Revisit each ground and connector.
The Wiggle Test
Lightly wiggle wiring harnesses while the bike is running. If you see lights flicker or the engine stutter, you’ve found a loose or damaged wire. That’s your target for deeper inspection.
Online Forums and Local Experts
Motorcycle communities are full of experienced riders who love to help. Post detailed symptoms, photos, and voltage readings. Someone out there has likely faced a similar issue.
When to Consult a Professional
If you’ve tried everything and the problem persists, or if it involves complex electronic modules, consider taking it to a qualified mechanic. Sometimes specialized tools or experience can solve issues faster.
Why Persistence Pays Off
Electrical troubleshooting is about patience and careful observation. Every step you take brings you closer to a solution. And remember, each problem you solve makes you a more confident and informed rider. #PersistentIssues #MechanicHelp
Going Deeper into Electrical Mysteries
(In this section, we’ll expand on some lesser-known tips, share stories, and encourage conversation. Feel free to jump in with questions or personal anecdotes.)
Talking About the “Invisible” Problems
Sometimes, you’ll face an issue that defies logic. For example, your bike might start fine when cold but refuse to start after a short ride. This could point to a heat-related component failure, like an ignition coil that works at cooler temperatures but fails when hot. Another possibility is a poor connection that expands with heat, causing an intermittent open circuit.
Stories from the Road
· A friend once spent weeks chasing a random stall on his bike. It turned out to be a corroded connector hidden behind the headlight assembly. A few minutes of cleaning fixed an issue that had been plaguing him for ages.
· Another rider had a fuse blowing every time she hit a bump. A wire had rubbed against the frame under the seat, creating a momentary short. A piece of electrical tape and a zip tie solved the problem.
Preventive Measures
· Use dielectric grease on connectors to repel moisture.
· Inspect wiring harnesses at least once a season.
· Keep an eye on battery terminals and clean them regularly.
Share Your Tips: Have you found a unique trick or tool that makes electrical work easier? Did you learn something the hard way? Let’s talk about it. The best part of these discussions is hearing how others have tackled similar challenges. #CommunityLearning #ShareYourStory
Recap and Key Takeaways
We’ve covered the major components of your motorcycle’s electrical system:
1. Battery – The primary source of power.
2. Starter Relay – The switch that engages the starter motor.
3. Ignition System – Spark plugs, coils, and wires that ignite the fuel-air mixture.
4. Grounds – The vital return path for current.
5. Fuses and Shorts – Circuit protection and tracking down wiring faults.
6. Charging System – The stator and regulator/rectifier that keep your battery charged.
7. Tools and Techniques – Multimeters, wiring diagrams, and step-by-step methods.
8. When to Seek Help – Knowing your limits and when to consult pros or the community.
Every section offers a starting point for deeper exploration. Electrical work can be intimidating, but each success story builds your confidence. And remember, you’re not alone. Many riders love sharing their troubleshooting triumphs (and disasters!). #ElectricalConfidence
Stay Curious and Keep the Conversation Going
Electrical systems might seem complicated, but they follow the laws of physics just like anything else. A systematic approach, some basic tools, and a willingness to learn can unravel most problems. Don’t be afraid to experiment and ask questions. Sometimes, you’ll solve a problem by trying a simple fix that others overlook.
If you’re reading this and have questions, drop a comment. If you’ve fixed a puzzling electrical glitch, share your story. The beauty of a community is that each person’s experience can help someone else down the road. Together, we can make motorcycle maintenance less mysterious and more empowering. #RiderCommunity #LearningTogether
Motorcycle electrical systems might feel overwhelming at first. But once you grasp the fundamentals, it’s a rewarding puzzle to solve. If you’ve never tried working on your wiring, consider starting small. Even simple tasks like cleaning battery terminals or checking fuses can build your skills and save you a trip to the shop.
Whether you’re a new rider or a seasoned mechanic, sharing knowledge helps everyone. If you have a unique tip or a crazy story about electrical problems, jump into the comments. Someone else might benefit from your experience. And if you’re stuck, don’t be shy—there’s a good chance someone in the community has faced the same issue.
Electrical troubleshooting isn’t just about fixing a single problem. It’s about understanding how your motorcycle communicates and operates. Once you get comfortable with that, you’ll see the process in a whole new light.
Thanks for reading, and keep that curious spirit alive. Ride safe, and may your bike’s electrical system stay bright and reliable. #RideSafe #MotorcycleLife