
Unleashing the Thrills of Motorcycles
Mastering Motorcycle Wheels: A Complete Guide to Choosing, Maintaining, and Maximizing Performance
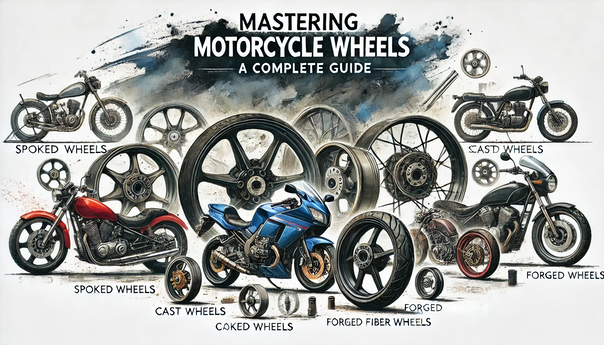
Wheels are the foundation of your motorcycle’s handling, performance, and style. Each type serves a unique purpose, from rugged #SpokedWheels to sleek #CarbonFiberWheels. This guide explores four major wheel types—spoked, cast, forged, and carbon fiber—and helps you understand which is best for your ride. We’ll also cover #TubeVsTubeless wheels and provide essential maintenance tips to maximize efficiency. #MotorcycleWheels #SpokedWheels #CastWheels #ForgedWheels #CarbonFiberWheels #TubeVsTubeless #MotorcyclePerformance #MotorcycleMaintenance #RiderEfficiency #WheelCare #AdventureMotorcycles #Sportbikes #MotorcycleHandling #HandlingMastery #TwoWheels #RiderCommunity #AdventureRiding #PerformanceBikes #MotorcycleCulture #TwoWheeledAdventures #RideSafe #BikerLife
Explore the differences between #Spoked, #Cast, #Forged, and #CarbonFiberWheels. Learn which wheel suits your riding style and find out maintenance tips!
Spoked Wheels: Classic Durability Meets Off-Road Adventure
#SpokedWheels are the original motorcycle wheel design, known for their strength, flexibility, and retro aesthetic. These wheels consist of a hub connected to the rim via tensioned steel spokes, offering excellent impact absorption.
Best Suited For:
#SpokedWheels are ideal for off-road bikes, #AdventureMotorcycles, and classic motorcycles. Their ability to flex and absorb impacts makes them perfect for uneven terrains and rough conditions.
Advantages:
Durability: Excellent for rough terrain and #OffRoadRiding.
Flexibility: Can handle high-impact forces without cracking.
Classic Aesthetic: Adds a timeless, retro look to your bike.
Disadvantages:
Weight: Heavier than #CastWheels or carbon fiber.
Maintenance: Spokes need regular adjustment and are more prone to damage.
Maximizing Efficiency:
Regularly inspect and adjust the tension of the spokes to maintain performance. Cleaning the spokes with a wire brush ensures they stay rust-free and strong.
Maintenance Tip:
Check the spoke tension every few rides if you're frequently #OffRoading. Any loose or damaged spokes should be replaced immediately.
Cast Wheels: Modern Convenience and Strength
#CastWheels are made by pouring molten metal (usually aluminum) into a mold. This results in a solid, one-piece wheel that is commonly found on modern motorcycles.
Best Suited For:
#CastWheels are best for street bikes, cruisers, and #Sportbikes that spend most of their time on paved roads. Their rigidity and low cost make them perfect for daily riders.
Advantages:
Low Cost: More affordable to produce compared to other types.
Low Maintenance: No spokes to adjust or tighten.
Weight: Lighter than spoked wheels, improving acceleration and handling.
Disadvantages:
Brittleness: Less flexible, more prone to cracking under heavy impacts.
Not Suitable for Off-Road: Vulnerable to damage on rough terrain.
Maximizing Efficiency:
Ensure your #CastWheels are balanced properly to prevent vibrations. Avoid potholes and rough surfaces to extend their lifespan.
Maintenance Tip:
Clean cast wheels regularly with a soft cloth and soapy water to remove road grime and brake dust. Inspect for cracks periodically.
Forged Wheels: Premium Performance for Speed Enthusiasts
#ForgedWheels are created through a process of compressing aluminum (or other alloys) under high pressure, creating a wheel that is incredibly strong and lightweight.
Best Suited For:
#ForgedWheels are ideal for #PerformanceMotorcycles, track bikes, and high-end #Sportbikes. Their light weight and strength make them perfect for riders looking for top-tier handling and acceleration.
Advantages:
Strength: Forged wheels are significantly stronger than cast wheels.
Lightweight: Reduces unsprung weight, improving handling and acceleration.
Durability: Resilient under stress and less prone to cracking.
Disadvantages:
Cost: More expensive than cast or spoked wheels due to the manufacturing process.
Maintenance: Though tough, they still require periodic inspections for cracks or wear.
Maximizing Efficiency:
Regular wheel balancing ensures your #ForgedWheels perform optimally. Pair them with high-performance tires to maximize your bike’s handling and acceleration capabilities.
Maintenance Tip:
Keep forged wheels clean and polished to prevent corrosion, especially if exposed to salt or moisture. Routine checks for cracks will ensure they stay road-worthy.
Carbon Fiber Wheels: The Pinnacle of Lightweight Precision
#CarbonFiberWheels represent the cutting edge of motorcycle wheel technology. Known for being ultra-lightweight and incredibly stiff, they’re a favorite among racers and high-performance enthusiasts.
Best Suited For:
#CarbonFiberWheels are best for #Sportbikes, track bikes, and riders seeking maximum performance. Their low weight dramatically improves handling, acceleration, and braking performance.
Advantages:
Ultra-Lightweight: The lightest wheel material, reducing rotational mass and improving every aspect of bike performance.
Precision Handling: Increases agility and control, especially at high speeds.
Aesthetics: Carbon fiber has a sleek, high-tech appearance.
Disadvantages:
Cost: The most expensive wheel option.
Fragility: Vulnerable to damage from impacts or heavy loads.
Special Care: Requires more cautious handling and maintenance to avoid damage.
Maximizing Efficiency:
Keep your #CarbonFiberWheels for smooth road or track use. Invest in high-performance tires that match their capabilities and ensure proper tire pressure to avoid damage.
Maintenance Tip:
Never use harsh chemicals to clean carbon fiber wheels; instead, use a soft cloth and mild soap. Inspect them after every ride for any cracks or chips.
Tube vs. Tubeless Wheels: Understanding the Basics
Finally, let’s talk about #TubeVsTubeless wheels. Most spoked wheels require inner tubes, while cast, forged, and carbon fiber wheels can be tubeless.
Tube Wheels:
Pros: Easier to repair in off-road environments (you can replace just the tube).
Cons: Heavier and punctures result in faster air loss.
Tubeless Wheels:
Pros: Less prone to sudden deflation, easier to seal punctures, and generally lighter.
Cons: Difficult to repair if the rim is damaged.
Maximizing Efficiency:
Use tire sealant with tubeless wheels for added protection against punctures. With tube wheels, carry an extra tube on long rides for quick repairs.
Maintenance Tip:
Regularly check tire pressure for both tube and tubeless setups, as improper inflation can cause unnecessary stress on the wheel and affect handling.
By understanding the unique benefits and drawbacks of each wheel type, you can select the perfect wheels to match your motorcycle and riding style. Whether you're hitting the trails with #SpokedWheels, cruising the streets with #CastWheels, racing with #ForgedWheels, or going full throttle on track with #CarbonFiberWheels, maintaining them well will ensure they deliver top performance for years to come.
Maximizing Your Motorcycle's Performance with the Right Wheels
Now that you have a detailed understanding of the different types of motorcycle wheels and their specific use cases, it's time to focus on optimizing performance and longevity. Here's how to get the most out of your #MotorcycleWheels, no matter which type you choose.
Regular Maintenance is Key
Regardless of your wheel type—#SpokedWheels, #CastWheels, #ForgedWheels, or #CarbonFiberWheels—routine maintenance is essential for peak performance. Cleaning your wheels regularly prevents a build-up of dirt, brake dust, and other contaminants that can affect performance. Regularly inspecting for cracks, loose spokes, or any signs of wear ensures safety and longevity.
Keep Your Tires Properly Inflated
Both #Tube and #Tubeless wheels benefit from correct tire pressure. Low or high tire pressure can negatively impact handling, wear out your tires faster, and even damage your wheels over time. Check your tire pressure regularly, especially before long rides, to ensure that your bike handles and performs as it should.
Balance Your Wheels
Balanced wheels are crucial for smooth riding and longer tire life. Unbalanced wheels cause vibrations, reduced traction, and uneven wear. Whether you’re using #CastWheels for your daily ride or #CarbonFiberWheels for a track day, make sure to balance them after every tire change or regularly if you notice unusual vibrations.
Match Your Wheels with the Right Tires
Choosing the correct tires for your wheels can greatly affect your motorcycle’s performance. For example, #SpokedWheels may require tube-type tires, while #ForgedWheels and #CarbonFiberWheels work best with performance-oriented tubeless tires. Always select tires that complement the capabilities of your wheels and riding style.
Avoid Overloading Your Wheels
Each type of wheel has its weight limit. While #SpokedWheels are more forgiving on rough terrain, overloading any wheel type—especially #CarbonFiberWheels—can lead to cracks or even failure. Ensure your wheels are suitable for the load you're carrying, whether it's a heavy touring load or the lighter needs of a performance ride.
The Bottom Line: Ride with Confidence!
By selecting the right wheels for your motorcycle and maintaining them properly, you'll enhance not only your bike’s performance but also your overall riding experience. Whether you’re venturing into the wild on #AdventureMotorcycles with rugged #SpokedWheels or chasing lap times with lightweight #CarbonFiberWheels, keeping your wheels in top shape is the key to a smooth, safe, and exhilarating ride.
Embrace Your Riding Journey with the Right Wheels
Choosing the right wheels for your motorcycle is not just a matter of aesthetics; it's about enhancing your riding experience and ensuring safety on the road or track. With the right knowledge and maintenance, you can unlock the full potential of your motorcycle. Here’s a quick recap of everything we've covered to keep you informed and ready to ride.
Recap of Wheel Types and Their Benefits:
#SpokedWheels: Durable and flexible, perfect for off-road adventures.
#CastWheels: Affordable and low-maintenance, ideal for everyday street riding.
#ForgedWheels: Strong and lightweight, designed for performance enthusiasts.
#CarbonFiberWheels: The pinnacle of technology, offering precision and reduced weight for serious riders.
Your Motorcycle, Your Choice
As you embark on your riding adventures, remember that the wheels you choose significantly impact how your motorcycle performs. Whether you're cruising down the highway, navigating winding roads, or tearing up a dirt trail, understanding your wheels is crucial. Choose wisely, maintain diligently, and enjoy every moment on your bike!
Further Tips for Wheel Longevity:
Stay Aware of Road Conditions: Adapt your riding style to the conditions. Avoid potholes and debris to protect your wheels.
Invest in Quality Tires: Match your wheels with high-quality tires designed for your riding style and environment.
Monitor Your Ride: Pay attention to how your motorcycle feels. If you notice vibrations, noises, or handling issues, investigate promptly.
Join the Community
Engaging with fellow riders can provide additional insights into wheel performance and maintenance. Consider joining motorcycle forums or local riding groups to share experiences and tips!
With this comprehensive guide on motorcycle wheels, you're well-equipped to make informed decisions about your ride. Get out there, explore, and enjoy the freedom that comes with every twist of the throttle!
The Heart of Your Motorcycle Experience
In the world of motorcycling, wheels are more than just components; they are the very essence of your ride. The choice between #SpokedWheels, #CastWheels, #ForgedWheels, and #CarbonFiberWheels can significantly influence not just performance but also your overall enjoyment and safety on the road. Each wheel type brings its unique strengths and considerations, perfectly tailored for different riding styles and conditions.
By understanding the nuances of each wheel type and committing to regular maintenance, you empower yourself to optimize your motorcycle's capabilities. Whether you're tackling rugged trails or blazing through city streets, your wheels will play a pivotal role in defining your journey.
So, take the time to select the right wheels for your motorcycle, prioritize their upkeep, and immerse yourself in the exhilarating experience of riding. With the knowledge and tips provided in this guide, you can ride confidently, knowing that your wheels are set up for success. Embrace the road ahead, and let every twist and turn bring you closer to the adventure you seek!
Mastering Motorcycle Braking Systems: Axial vs. Radial Master Cylinders & More
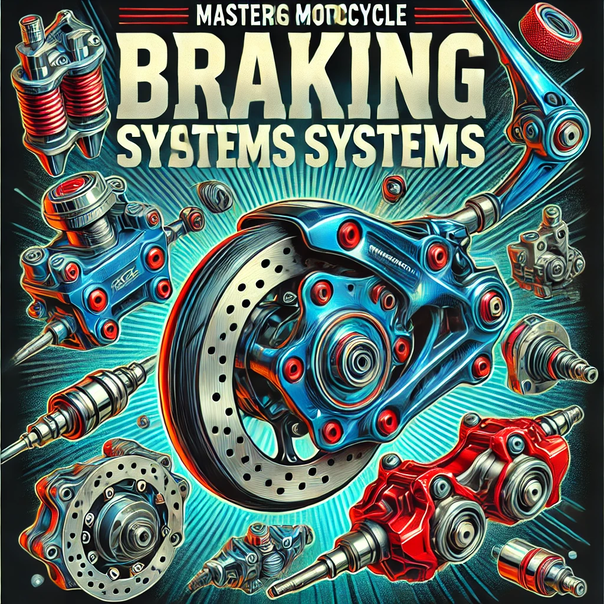
Curious about what drives the braking power of your motorcycle? At the heart of every effective braking system is the master cylinder. This essential component transforms the force you apply on the brake lever into hydraulic pressure, enabling precise, responsive braking. Let’s break down the types of master cylinders, from open and closed systems to axial and radial options, and understand how each setup fits different motorcycle needs.
Explore the different types of motorcycle master cylinders, including axial vs. radial and open vs. closed systems, and how they impact braking performance.
Axial vs. Radial Master Cylinders
Axial Master Cylinder An axial master cylinder is the traditional choice for many motorcycles and is often mounted parallel to the handlebar. It operates by pressing down on the brake lever, which transfers force to the brake fluid in a linear motion. Axial master cylinders are compact, making them great for motorcycles with limited space around the handlebars. They also provide a relatively smooth braking feel, though they can sometimes lack the power and responsiveness of radial designs.
Radial Master Cylinder Radial master cylinders, on the other hand, have been growing in popularity, especially on high-performance motorcycles. Instead of a linear motion, radial cylinders apply force in a perpendicular direction relative to the handlebar. This design enhances brake modulation and feedback, which is why it’s preferred by sports and track riders. Radial master cylinders allow for a larger piston and a greater degree of hydraulic force, delivering more precise control and power than axial models. #AxialMasterCylinder #RadialMasterCylinder #MotorcycleBrakes
Open System vs. Closed System Master Cylinder
Open System Master Cylinder An open system master cylinder contains a bladder in the reservoir tank, which helps adjust the brake fluid level automatically. This design is particularly beneficial as it accommodates changes in fluid levels due to temperature fluctuations or normal wear. Open systems are often found in street and touring motorcycles where easy maintenance is a priority. The bladder helps ensure consistent pressure, making braking smooth and reliable over time.
Closed System Master Cylinder Unlike the open system, a closed system master cylinder does not feature a bladder in the reservoir. Instead, it requires manual adjustments to maintain the proper brake fluid level. While closed systems can provide a stable braking feel, they demand more frequent checks, making them better suited for specialized applications or performance motorcycles where precision is paramount. #OpenSystemMasterCylinder #ClosedSystemMasterCylinder #MotorcycleMaintenance
Single Cylinder Master Cylinder: Straightforward Simplicity
A single-cylinder master cylinder, with just one hydraulic circuit, is a relatively simple design and is mostly found in older motorcycles or entry-level models. While straightforward and easy to maintain, it lacks the redundancy and control of more advanced systems, such as those offering independent front and rear braking. Single-cylinder designs have become less common as braking technology has evolved. #SingleCylinderMasterCylinder #MotorcycleBasics #BrakeSystem
Ported Tandem Cylinder: Dual Circuit Design for Better Control
The ported tandem master cylinder features separate hydraulic circuits for front and rear brakes, giving riders independent control over each wheel’s braking force. This system is commonly seen in touring and adventure bikes where controlled braking is essential. Ported tandem designs help ensure consistent braking even if one circuit experiences a pressure drop, making them safer and more reliable for long rides. #PortedTandemCylinder #AdventureMotorcycles #BrakingSafety
Port-less Master Cylinder: Specialized for Unique Applications
A port-less master cylinder is designed without fluid ports, making it highly specialized and typically found in custom or high-performance builds. This unique setup allows for very tight control over hydraulic pressure but is best suited to specific use cases rather than everyday riding. While not as common, it’s an intriguing option for specialized motorcycle braking needs. #PortlessMasterCylinder #CustomMotorcycles #HighPerformance
In essence, the type of master cylinder you choose can significantly impact your ride. From smooth, consistent braking in open systems to the powerful modulation offered by radial designs, each has its strengths. Understanding these different setups can help you select a braking system that matches your riding style, offering you confidence and control every time you hit the road. #MotorcycleMasterCylinder #BrakingSystem #AxialVsRadial #MotorcycleSafety
Optimizing Your Motorcycle’s Braking Performance
Every motorcycle setup is unique, and selecting the right master cylinder can elevate your riding experience. From commuting through city streets to conquering winding mountain roads, the right master cylinder setup not only braking efficiency but also the responsiveness and feel of your controls.
For example, an open system master cylinder could be ideal for long-distance touring bikes where consistent pressure is crucial. In contrast, a radial master cylinder may suit track or sport riders who prioritize agility and responsiveness. Understanding these variations lets you pick the best setup for your riding style and environment, ensuring you get both performance and safety tailored to your needs.
Why the Right Master Cylinder Matters
Master cylinders are more than just a component—they are the heart of the braking system, allowing you to feel connected to the bike while ensuring smooth, controlled stops. As motorcycles become increasingly powerful, choosing the right master cylinder becomes even more essential. From enhancing your braking power to providing precise control in varying conditions, the right master cylinder optimizes both performance and safety.
So, whether you’re upgrading your current system or curious about options for your next motorcycle, consider how each master cylinder type aligns with your needs. After all, achieving the perfect ride often comes down to fine-tuning the small details. #MotorcycleBrakes #BrakingPower #RiderControl #MasterCylinderUpgrade
Feel free to ask questions or share your setup for insights from the community. Remember, mastering your braking system is all part of becoming a better, more confident rider!
Fine-Tuning Your Master Cylinder for the Perfect Braking Feel
Upgrading or selecting a master cylinder isn’t just about stopping power; it’s about personalizing your bike’s feel. With the right setup, you can achieve a more responsive brake lever feel, increase braking confidence, and better adapt your bike to specific conditions—be it the smooth deceleration needed for commuting or the aggressive bite preferred on the track.
Considering Lever Ratio and Piston Size
When choosing a master cylinder, it’s essential to understand how lever ratio and piston size affect braking feel:
Lever Ratio: This defines the length from the pivot to the point where you apply pressure. A higher lever ratio can increase brake sensitivity, offering more precision, while a lower ratio might feel stiffer but provide quicker brake response.
Piston Size: Smaller pistons tend to deliver more pressure and are preferred for fine control, while larger pistons can offer a more linear feel with greater braking power. Sports bikes often favor smaller pistons for maximum modulation, while touring bikes may use larger pistons for stable, controlled stops.
Regular Maintenance: Keeping Your Master Cylinder in Top Shape
To ensure the longevity of your braking system, don’t overlook regular maintenance of the master cylinder:
Check for Fluid Levels: In open systems, the bladder in the reservoir helps regulate this automatically. For closed systems, make it a habit to inspect and top up the fluid.
Bleed the Brakes Regularly: This removes any trapped air that can reduce braking efficiency.
Inspect for Leaks: Regularly check the reservoir and surrounding areas for leaks or cracks that might compromise the system.
Proper maintenance not only keeps your master cylinder performing at its best but also enhances the overall safety of your motorcycle.
Final Thoughts: Elevate Your Riding Experience
The master cylinder you choose can make all the difference between average and exceptional braking performance. Whether you opt for an axial or radial master cylinder or an open or closed system, remember that it’s about creating a braking setup that complements your riding style and boosts your confidence on the road.
By understanding the various master cylinder options and how they affect braking dynamics, you’ll be more prepared to find that perfect balance of power, control, and responsiveness. So go ahead—fine-tune your setup, maintain your system, and ride with confidence! #BrakingMastery #MotorcycleUpgrades #RideWithConfidence #MotorcycleMaintenance #PrecisionBraking
Upgrading Your Master Cylinder: When & Why to Consider It
If you’re aiming for that next level of performance or simply want more confidence in your braking, upgrading your master cylinder could be the game-changer you’re looking for. Here are a few scenarios where a master cylinder upgrade makes a difference:
Enhanced Braking for High-Speed Riders: Track and sport riders often prefer radial master cylinders due to their superior feel and control at high speeds. The radial design’s perpendicular orientation allows for a greater degree of force modulation, giving riders the confidence to brake harder and later into turns.
Customizing Brake Feel for Touring and Adventure Riders: Long-distance riders can benefit from a system that prioritizes smooth, consistent pressure. Open-system master cylinders with automatic fluid adjustment are great for endurance rides, where braking comfort over extended distances is key.
Upgrading Older Models: Many older motorcycles use single-cylinder master systems, which don’t offer the same degree of control as modern ported tandem or radial systems. Upgrading to a radial or tandem master cylinder can give your classic bike a fresh feel, optimizing it for today’s roads and riding demands.
Common Master Cylinder Upgrades & Customization Options
When upgrading, here are some popular choices to consider:
Adjustable Levers: Many aftermarket master cylinders come with adjustable brake levers that allow riders to customize the reach and resistance of the brake lever, making it easier to tailor the feel to personal preference.
Brake Lines and Fluid Upgrades: Upgrading to high-quality braided brake lines or high-performance brake fluids can also enhance braking consistency and response, especially in performance applications.
Aftermarket Kits: For those seeking the best of both worlds, some kits offer a mix of axial and radial design elements, allowing for a unique blend of control and modulation suited to individual preferences.
Mastering Your Motorcycle: One Braking System at a Time
At the end of the day, the master cylinder isn’t just a component—it’s a crucial link in the rider’s connection to the motorcycle. Each type of master cylinder, from axial to radial and open to closed systems, offers different benefits suited to various riding styles and environments. Whether you’re racing on the track, cruising long distances, or simply commuting daily, understanding and investing in your braking system can elevate your entire riding experience.
So, take the time to explore your options, fine-tune your setup, and make every ride not only safer but also smoother, more responsive, and enjoyable. The right braking system transforms the ride—and you’re in control of choosing the best setup for yours! #MasterCylinderUpgrade #MotorcyclePerformance #BrakingPrecision #RideElevated #MotorcycleConfidence
Expert Tips for Choosing and Maintaining Your Master Cylinder
If you’re ready to choose or upgrade a master cylinder, a few additional pointers can help you get the most out of your new setup and keep it performing at its peak. Here are some expert tips:
Match the Piston Size to Your Calipers: Ensuring compatibility between the master cylinder piston size and the brake calipers on your motorcycle is critical. For example, pairing a large-piston master cylinder with small calipers may create an overly sensitive brake lever, while pairing a small piston with large calipers could reduce braking power.
Consider Your Riding Style and Environment: If you ride in stop-and-go city traffic, an axial setup with a smoother, progressive feel may work best. Track or performance riders might prefer the precise feedback of a radial master cylinder. Touring or adventure riders can benefit from an open system’s consistent feel and self-adjusting fluid levels.
Invest in Regular System Bleeding: Over time, air bubbles can form in the hydraulic brake lines, which compromises braking performance. Regularly bleeding the brake system (especially after heavy usage or high-temperature rides) will keep your system responsive and safe.
Keep an Eye on Brake Pads and Rotors: A high-performance master cylinder places increased demand on brake pads and rotors. Choose pads that match your riding style—organic pads for everyday riding or sintered for high-performance braking—and regularly check rotor wear to maintain optimal stopping power.
Store Your Motorcycle Carefully: For open systems especially, temperature fluctuations can cause brake fluid to expand and contract, potentially affecting the fluid level. Storing your motorcycle in a dry, temperate environment helps maintain the fluid’s stability and prolongs the system’s lifespan.
Discover the Difference: The Master Cylinder as Part of Your Riding Experience
Upgrading or fine-tuning your master cylinder isn’t just about performance; it’s about enhancing your connection to your motorcycle. The feeling of control, the smoothness of each stop, and the ability to navigate confidently—these are the subtle qualities that make every ride memorable.
From casual riders to pros, a tailored braking setup can redefine your experience on two wheels. So go ahead, make an informed choice, take care of your system, and hit the road with a newfound sense of control and confidence! #MotorcycleBraking #BrakingUpgrades #PerformanceRiding #BrakeMaintenance #MasterYourRide
Advanced Brake System Setups: For the Enthusiast Rider
For those looking to push the boundaries even further, here are some advanced setups and modifications you might consider to fully customize your braking experience:
Dual Master Cylinder Setup: Some custom setups utilize separate master cylinders for each caliper, typically found in high-performance racing applications. This configuration can enhance control and modulation by allowing independent pressure adjustment for each wheel. However, it’s a specialized setup requiring precise calibration and is best suited for experienced riders and track environments.
ABS and Master Cylinder Compatibility: If your motorcycle has ABS (Anti-lock Braking System), it’s essential to select a master cylinder that’s compatible with your ABS module. ABS can significantly enhance safety by preventing wheel lock-up during sudden braking, and with the right master cylinder, you’ll get smooth, precise braking without compromising the benefits of ABS.
Upgraded Brake Calipers: Pairing your master cylinder with high-performance brake calipers can maximize braking power and responsiveness. Radial calipers, often found on high-end or race motorcycles, provide more even pressure distribution across the brake pads and can complement a radial master cylinder for top-tier control.
Adjustable Ratio Master Cylinders: Some master cylinders come with adjustable lever ratios, allowing you to fine-tune the pressure response to your personal preference. This feature enables you to choose between a stiffer feel for aggressive braking or a softer touch for smoother modulation. It’s an excellent option for riders who switch between street and track environments.
Aftermarket Brake Fluid Reservoirs: While not as performance-oriented, aftermarket reservoirs can offer practical benefits like increased capacity, improved heat resistance, and custom styling options. They can be a useful addition for riders who do long-distance touring or have custom bike builds.
Your Personalized Brake System Awaits
Creating the perfect braking system is about finding what feels right for you and your riding style. From straightforward upgrades like switching to a radial master cylinder to full-scale customization with high-performance calipers and ABS integration, there are countless ways to enhance your braking experience.
A finely tuned brake system can elevate your confidence, control, and enjoyment on every ride. Whether you’re hitting the racetrack, carving mountain roads, or simply enjoying your daily commute, the right master cylinder setup transforms your motorcycle into a finely honed machine responsive to every movement you make.
So, take the next step, experiment with upgrades, and embrace the confidence that comes with mastering your braking system. #AdvancedBraking #MotorcyclePerformance #BrakeUpgrades #RiderConfidence #MasterCylinderModifications
Tailoring Your Braking System: Make It Uniquely Yours
A motorcycle’s braking system is one of the most customizable and impactful upgrades you can make. The combination of your master cylinder, brake lines, calipers, and brake pads allows for nearly infinite possibilities to craft a system that aligns perfectly with your riding goals. Whether you’re looking for smooth city stops, controlled off-road descents, or precise track braking, a well-tuned system makes all the difference.
Final Steps for an Optimal Setup
Test and Adjust: Once you’ve upgraded or modified your braking system, take the time to test it under different conditions. This will help you get familiar with the new feel and identify if any tweaks are needed.
Consult with Experts: For complex upgrades like dual master cylinders or ABS-compatible systems, consider working with a professional mechanic. They can ensure everything is calibrated correctly, which is especially important for custom setups or high-performance builds.
Practice Makes Perfect: Get comfortable with your new system by practicing braking at varying speeds and conditions. The confidence gained from knowing exactly how your brakes will respond is invaluable for every ride, helping you become not only a better rider but also a safer one.
Embrace the Journey to Perfect Braking
Upgrading your braking system is as much about the journey as it is about the destination. Experimenting with different components and configurations allows you to deepen your understanding of your motorcycle and make it truly your own. The result? A bike that feels like an extension of you, where every lever pull, and every stop becomes part of an exceptional riding experience.
Whether you’re in it for the performance, the style, or the pure thrill of customization, mastering your braking system is a step toward ultimate riding freedom. So, dive in, make those upgrades, and transform each ride into a journey of precision, power, and joy. #PerfectBraking #MotorcycleCustomization #BrakingJourney #RideWithConfidence #UltimateBrakeSetup
Elevate Your Ride with the Right Braking System
Mastering your motorcycle’s braking system is more than an upgrade—it’s an investment in safety, control, and the joy of riding. By understanding the unique characteristics of axial and radial master cylinders, open and closed systems, and customizing your setup, you can create a braking system that aligns perfectly with your riding style. Whether you’re navigating city streets, hitting the track, or exploring rugged trails, the right braking system transforms your bike into a responsive, confident machine.
Each ride becomes smoother, every stop more precise, and your confidence on two wheels reaches new heights. So, take the time to explore, experiment, and fine-tune your braking system because a perfect braking setup isn’t just about stopping—it’s about riding with freedom and control. #RideWithConfidence #MotorcycleBrakes #MasterYourBraking #OnwardAndUpward
Here’s to mastering the road ahead, one brake lever pulls at a time!
How to Set Up Your Motorcycle Suspension
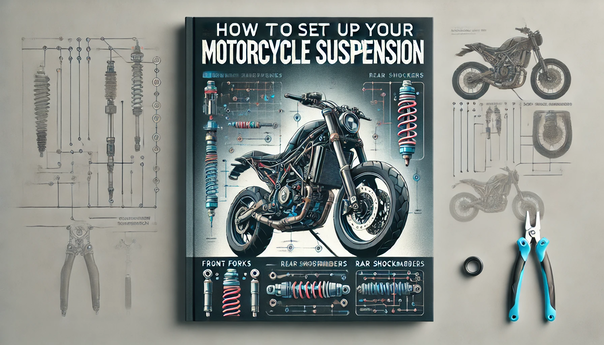
Suspension is the backbone of your motorcycle's performance, impacting handling, comfort, and safety. Setting it up correctly is crucial for an optimized riding experience. In this guide, we'll walk you through different suspension setups for various types of motorcycles and show you how to fine-tune your ride to perfection.
If you're planning on going on a long motorcycle tour, having a proper suspension setup can make a big difference in your comfort and safety. In this article, we'll go over the basics of setting up your motorcycle suspension for touring.
Step 1: Adjust your preload
The preload on your suspension determines how much weight your bike can handle before it starts to sag. For touring, you'll likely be carrying more weight than usual, so you'll need to adjust your preload accordingly. Check your owner's manual or consult a mechanic to find out how to adjust your preload. Once you've adjusted, sit on your bike and make sure it doesn't sag too much.
Step 2: Adjust your damping
Damping refers to how quickly your suspension compresses and rebounds. For touring, you'll want a slower damping rate to help absorb bumps in the road and prevent your bike from bouncing around too much. Check your owner's manual or consult a mechanic to find out how to adjust your damping. You may need to experiment a bit to find the right setting for your weight and riding style.
Step 3: Check your tire pressure
Proper tire pressure is important for both comfort and safety on a long motorcycle tour. Underinflated tires can cause your bike to handle poorly and increase the risk of a blowout. Overinflated tires can make your ride harsh and uncomfortable. Check your owner's manual for the recommended tire pressure, and make sure your tires are properly inflated before you hit the road.
Step 4: Adjust your riding position
Your riding position can also affect your suspension setup. Make sure you're sitting in a comfortable position and that your weight is distributed evenly across your bike. This will help prevent excess weight on one side of the bike, which can throw off your suspension.
Step 5: Test your suspension
Once you've made your adjustments, take your bike for a test ride to make sure everything feels right. Pay attention to how your bike handles bumps in the road and how it feels in corners. If you notice any issues, make further adjustments until you're satisfied with your suspension setup.
Setting up your motorcycle suspension for touring requires a bit of time and effort, but it can make a big difference in your comfort and safety on the road. By adjusting your preload, damping, tire pressure, and riding position and testing your setup, you can ensure that your bike is ready for the long haul.
Master motorcycle suspension setup with this comprehensive guide. Tailor your ride for comfort, safety, and peak performance across different bike types.
Understand Your Motorcycle’s Suspension: Know the Basics Before You Begin
Suspension setup differs between bike types, but the foundation is the same. Whether you're riding a sports bike, cruiser, or adventure motorcycle, the suspension controls how your bike reacts to the road surface. It absorbs bumps, improves cornering, and maintains tire contact.
Key Components:
Forks (Front Suspension): Absorbs impacts from the front wheel.
Shock Absorber (Rear Suspension): Works on the rear wheel to handle impacts.
Preload: Adjust the initial tension of the spring.
Compression Damping: Controls the speed at which the suspension compresses.
Rebound Damping: Controls the speed at which the suspension returns after being compressed.
By understanding these basics, you're ready to dive into the fine-tuning process. #Hashtags: #MotorcycleBasics #Suspension101 #BikeHandling
Setting Up Suspension for Sports Bikes: Achieve Precision Handling for High-Performance Riding.
Sports bikes are built for agility, speed, and precision. Setting up your suspension here is all about improving cornering and high-speed stability.
Adjustments to Make:
Preload: Stiffen the preload to reduce fork dive under hard braking.
Compression Damping: A stiffer compression setting gives better high-speed stability.
Rebound Damping: Set it to ensure the bike recovers quickly enough after corners without bouncing.
Experiment with settings based on your weight and riding style. For track riders, a stiffer setup enhances responsiveness. For street use, balance comfort with handling. #Hashtags: #SportbikeSetup #PerformanceTuning #TrackReady
Adventure & Dual-Sport Motorcycles: Versatility is Key for Off-Road and On-Road Performance
Adventure and dual-sport motorcycles need suspension that can handle a variety of terrains—from smooth highways to rugged trails. Flexibility is critical here.
Adjustments to Make:
Preload: Softer preload for off-road; stiffer for carrying luggage or a passenger.
Compression Damping: Softer for absorbing rough terrain, stiffer for smooth surfaces.
Rebound Damping: A faster rebound is better for off-road, while a slower rebound improves stability on-road.
These adjustments allow you to tackle challenging trails while keeping the bike stable on highways. #Hashtags: #AdventureRiding #DualSportSetup #TrailBlazers
Cruisers & Touring Bikes: Comfort and Stability for Long-Distance Journeys
For cruisers and touring bikes, the suspension is all about comfort. These bikes are built for long-distance riding, and you want your suspension to soak up the road without making the ride harsh.
Adjustments to Make:
Preload: Set it softer for comfort but adjust it higher when carrying passengers or luggage.
Compression Damping: Soft for maximum comfort on bumpy roads.
Rebound Damping: Slower rebound for a smoother ride, preventing bounciness on long journeys.
For touring bikes, especially, always take luggage weight into account when adjusting your preload. #Hashtags: #CruiserComfort #TouringLife #SmoothRides
Suspension Setup for Dirt Bikes: Master Off-Road Terrain with Confidence
Dirt bikes are engineered to tackle rough and unpredictable off-road conditions. Setting up the suspension for these bikes is all about maximizing control and shock absorption on harsh terrain. With the right setup, you'll glide over rocks, roots, and bumps while maintaining stability.
Adjustments to Make:
Preload: Keep it softer to enhance grip and traction on uneven surfaces.
Compression Damping: Softer settings allow the suspension to absorb harsh impacts, preventing the bike from feeling too rigid.
Rebound Damping: A quicker rebound is necessary to prevent the suspension from packing down when navigating whoops or jumping.
Make sure to test your settings on both slow technical sections and faster open trails. Your bike’s suspension should feel responsive without being harsh on your body during long rides. #Hashtags: #DirtBikeSetup #OffRoadAdventure #TrailRidingTips
Suspension Setup for Two-Up Riding: Achieve Balance and Comfort with a Passenger Onboard
Riding two-up (with a passenger) adds weight and changes your motorcycle's dynamics, making proper suspension adjustment even more crucial. Without the right setup, your bike can feel sluggish, uncomfortable, or even unsafe.
Adjustments to Make:
Increase Preload: With the added weight of a passenger, the suspension will naturally sag more. To compensate, increase the preload to maintain proper ride height and prevent bottoming out.
Stiffen Compression Damping: A stiffer compression setting will help control the extra weight during acceleration, braking, and cornering.
Adjust Rebound Damping: Increase the rebound damping slightly to prevent the suspension from rebounding too quickly after absorbing bumps or during acceleration.
These adjustments will keep the ride smooth for both the rider and passenger, ensuring stability and comfort. Don’t forget to reassess your tire pressure, as additional weight may require a small increase. #Hashtags: #TwoUpRiding #PassengerSetup #SuspensionBalance
Testing and Fine-Tuning: Find the Sweet Spot for Your Ride
Once you’ve adjusted your suspension based on your motorcycle type, it’s time to test and fine-tune. Take your bike for a spin, ride over different terrains, and pay attention to how it feels. Is it too stiff? Too soft? Adjust the settings accordingly until you hit the sweet spot.
Remember, suspension tuning is a personal process. What works for one rider may not work for another. Keep tweaking until your bike handles just the way you like. #Hashtags: #FineTune #SuspensionTuning #PerfectRide
Mastering your motorcycle suspension setup is more than just a technical task—it’s a journey toward making your bike feel like an extension of yourself. Let the road inspire you to perfect your ride!
Suspension Maintenance: Keep It in Top Shape: Regular Care for Long-Lasting Performance
No matter how perfect your suspension setup is, regular maintenance is crucial for keeping it in peak condition. Properly functioning suspension ensures consistent performance and prolongs the life of your components.
Maintenance Tips:
Inspect Fork Seals: Check for oil leaks regularly. Leaky seals can affect damping performance.
Clean and Lubricate: Keep the suspension clean and free of dirt, mud, or grime to prevent wear.
Change Suspension Fluids: Replace fork oil and shock fluid according to your manufacturer’s recommendations to ensure optimal performance.
Check Bushings and Bearings: Worn-out bushings or bearings can lead to poor handling.
Staying on top of these simple maintenance steps ensures your suspension delivers a smooth, responsive ride for years to come. #Hashtags: #BikeMaintenance #SuspensionCare #RideSmooth
Suspension Tools & Resources: Gear Up for DIY Suspension Adjustments
You don’t need to be a professional mechanic to adjust your motorcycle suspension, but having the right tools makes all the difference. Invest in high-quality tools and consider these resources for fine-tuning your setup.
Tools to Have:
Spanner Wrench: Essential for adjusting preload.
Suspension Pump: For air forks, this is crucial to maintain the right pressure.
Measuring Tape: To measure sag and ensure correct settings.
Torque Wrench: Ensures you tighten bolts and settings to the right specification.
For those new to suspension setup, online tutorials, motorcycle forums, and even manufacturer guidelines can be invaluable for learning how to fine-tune like a pro. #Hashtags: #DIYSuspension #BikeTools #SuspensionAdjustment
Dialing in your motorcycle suspension might take a bit of trial and error, but it’s worth it. Whether you’re chasing lap times, conquering rough trails, or cruising the open road, a perfectly tuned suspension transforms your riding experience. Embrace the process, keep tweaking, and soon, you’ll feel the difference every time you hit the road. Ride with confidence, and let your bike handle like a dream!
Common Suspension Mistakes to Avoid: Get the Most Out of Your Setup by Dodging These Errors
While adjusting your motorcycle suspension, it’s easy to make mistakes that could lead to discomfort or poor handling. Avoid these common pitfalls to ensure your bike performs its best.
Mistakes to Watch Out For:
Ignoring Sag: Sag is critical for setting the balance of your bike. Too little or too much sag can throw off handling.
Over-tightening Rebound: Too much rebound damping can make your suspension feel sluggish and prevent it from recovering between bumps.
Skipping Test Rides: Never set and forget. Test your settings in real-world conditions. What works in theory might not work on the road or trail.
Neglecting Weight Considerations: Your suspension should be tailored to your weight and riding gear. Don’t forget to factor in luggage or passenger weight.
Unbalanced Front and Rear Suspension: Adjusting only one end of your bike can lead to an unstable ride. Always balance front and rear suspension settings for harmony.
By steering clear of these mistakes, you’ll get the most out of your motorcycle’s suspension and enjoy a smoother, safer, and more responsive ride. #Hashtags: #SuspensionMistakes #BikeTuningTips #PerfectRide
Custom Suspension Upgrades: Take Your Ride to the Next Level
If you've optimized your suspension settings but still feel there's room for improvement, it might be time to consider upgrading your suspension components. Many riders choose custom upgrades to achieve more tailored performance.
Upgrades to Consider:
Upgraded Forks: High-performance forks offer better damping control and smoother ride quality.
Aftermarket Shocks: Consider upgrading to adjustable shocks that allow more precise tuning.
Cartridge Kits: These kits for forks can greatly improve damping and compression control.
Steering Dampers: For high-speed stability, especially in sports bikes, adding a steering damper can reduce the wobble and increase control.
Upgrading your suspension can be a game-changer, especially if you're serious about track days or aggressive off-road riding. Consult with a professional if needed, but with a solid understanding of your bike’s suspension, you can make informed decisions that suit your riding style. #Hashtags: #CustomSuspension #BikeUpgrades #NextLevelRiding
Troubleshooting Suspension Issues: Diagnose and Fix Common Problems with Ease
Even with the best setup, you might encounter issues with your suspension over time. Knowing how to troubleshoot these problems can help you quickly identify the root cause and fix it, ensuring a smooth ride.
Common Issues & Fixes:
Excessive Fork Dive: If your front suspension compresses too much during braking, increase the preload or stiffen compression damping.
Harsh Ride-Over Bumps: If your bike feels too stiff over uneven surfaces, soften the compression damping and check for over-tightened preload.
Bouncing After Bumps: If your suspension continues to bounce after hitting a bump, increase the rebound damping to slow down the recovery rate.
Bottoming Out: If your suspension bottoms out frequently, especially on rough terrain, increase preload and consider stiffer springs.
Regular testing and small adjustments are key to resolving suspension problems. Address issues early to avoid long-term damage to your components. #Hashtags: #SuspensionTroubleshooting #FixYourRide #BikeTuningTips
Mastering your motorcycle's suspension setup isn't just about technical adjustments—it's about enhancing your entire riding experience. With patience, knowledge, and the right tools, you can transform your bike into a finely-tuned machine that reacts to every twist and turn with precision and comfort.
Whether you ride a sports bike, cruiser, adventure bike, or dirt bike, the principles of suspension tuning remain universal: balance, comfort, and performance. Dive into the process, enjoy the improvements, and remember—riding is as much about the journey as the destination.
The Future of Motorcycle Suspension: Embrace Cutting-Edge Technology for a Smoother Ride
Motorcycle suspension technology continues to evolve, offering new possibilities for performance and comfort. Many modern bikes are now equipped with electronic suspension systems, allowing real-time adjustments on the go.
Key Innovations:
Semi-Active Suspension: These systems automatically adjust damping based on riding conditions and rider input, providing a smoother, more responsive ride.
Adaptive Suspension: This technology senses road conditions and adapts the suspension settings in real-time, improving comfort and control.
Customizable Modes: Many motorcycles now offer preset suspension modes for different riding scenarios, such as "Sport," "Comfort," or "Off-Road," which can be changed at the push of a button.
As suspension technology advances, riders can expect more personalized and efficient setups without needing manual adjustments. Keep an eye out for these advancements when upgrading your bike. #Hashtags: #FutureOfSuspension #ElectronicSuspension #TechInRiding
Your motorcycle's suspension is its lifeline to the road. By understanding, adjusting, and maintaining it, you’re setting yourself up for a more enjoyable and safer ride. Whether you're navigating twisty roads, commuting, or hitting rugged trails, the right suspension setup makes all the difference. Continue learning, experimenting, and perfecting your ride—because the journey is always better when your bike feels just right.
Mastering Compression and Rebound: How to Set Your Motorcycle Suspension for the Perfect Ride
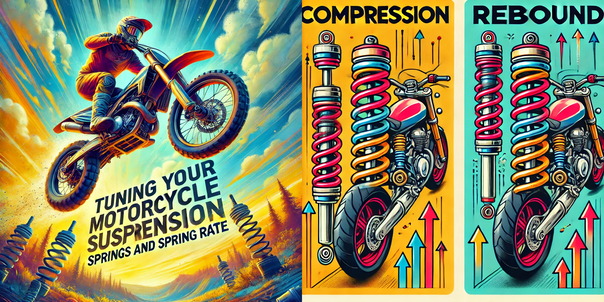
Achieving the perfect ride on your motorcycle depends heavily on your suspension setup. Compression and rebound are two essential aspects that directly affect how your bike handles bumps, corners, and overall road performance. Whether you're riding on smooth asphalt, rough off-road trails, or winding mountain roads, dialing in your suspension settings can significantly improve your control, comfort, and safety. In this guide, we’ll walk you through how to properly set your compression and rebound to optimize your motorcycle’s suspension for any riding condition.
Explanation of Compression and Rebound in Motorcycle Suspension
Compression and rebound are two critical components of a motorcycle’s suspension system. They directly affect how your bike handles road imperfections, corners, and overall ride comfort. Understanding these concepts will allow you to adjust your suspension to suit different riding styles, conditions, and preferences.
Learn in detail about compression and rebound in motorcycle suspension. Understand how these adjustments affect ride quality, handling, and comfort for better performance.
What is Compression Damping?
Compression damping controls how quickly or slowly the suspension compresses when you hit a bump or dip in the road. In other words, it manages how fast the springs compress and absorb the energy from road impacts.
Key Function:
Compression damping prevents your suspension from compressing too quickly when you encounter bumps, potholes, or dips. Without it, the suspension could collapse too easily, causing you to lose control or experience a harsh ride.
Types of Compression:
Low-Speed Compression: This refers to the suspension’s response to slower, smaller movements like cornering or braking. It's not about bike speed but rather the speed of suspension compression. Example: During hard braking, the bike’s front suspension compresses as weight shifts forward. Low-speed compression damping will control how much and how quickly the front end dives under braking.
High-Speed Compression: This manages the suspension’s response to sudden, sharp impacts like hitting a pothole, a speed bump, or off-road obstacles at higher speeds. Example: When you hit a big bump at high speed, high-speed compression damping controls how the suspension absorbs the impact. Without proper damping, the suspension could bottom out, causing a jarring impact.
Compression Damping Adjustments:
Too Much Compression Damping (Stiff Suspension): If your compression damping is set too high (too stiff), the suspension won’t compress enough to absorb bumps. This results in a harsh ride where every imperfection on the road is felt. In extreme cases, the tires may lose contact with the road on rough surfaces.
Too Little Compression Damping (Soft Suspension): If it’s set too low (too soft), the suspension will compress too easily, causing the bike to feel mushy or unstable. The suspension may bottom out on larger bumps, leading to a loss of control.
What is Rebound Damping?
Rebound damping controls how quickly the suspension returns to its original position after being compressed. In other words, it regulates how the suspension extends back after absorbing a bump.
Key Function:
Rebound damping ensures that the bike’s suspension doesn't bounce back too fast after compression, which can cause instability. Without proper rebound damping, the suspension may recover too quickly or too slowly, both of which can negatively affect handling and comfort.
Rebound Scenarios:
Too Fast Rebound: If the rebound is too fast (not enough damping), the suspension will extend quickly after compressing, causing the bike to "bounce" excessively. This can make the ride feel unstable, especially on rough roads or during high-speed cornering. Example: After hitting a bump, if the bike rebounds too fast, the suspension may overshoot and bounce back, leading to reduced traction and making it difficult to control the bike.
Too Slow Rebound: If the rebound is too slow (too much damping), the suspension won’t extend fast enough after a bump. This can cause the suspension to stay compressed longer than necessary, making the bike feel sluggish and unresponsive. Example: After hitting multiple bumps in quick succession, if the rebound is too slow, the suspension won't return to its full travel before encountering the next bump. This can lead to a loss of suspension travel (packing), making the bike harder to control.
Rebound Damping Adjustments:
Excessive Rebound (Too Slow): This can make the bike feel heavy and unresponsive. If the suspension takes too long to return to its original position, it will "pack down" over successive bumps. This means that the suspension doesn’t recover fully between impacts, reducing its ability to absorb the next bump.
Insufficient Rebound (Too Fast): If the rebound is too fast, the bike will feel bouncy and unstable. The suspension will recover too quickly after a bump, making the bike feel like it's floating or hopping over the road rather than staying firmly planted.
How Compression and Rebound Work Together
Compression and rebound damping are two halves of a balanced suspension system. They must work together to provide smooth, controlled responses to road conditions. Improper settings on either side can drastically impact ride quality, handling, and safety.
Compression-Rebound Relationship:
Under-Damped Compression + Fast Rebound: If compression is too soft and rebound is too fast, the bike may dive too quickly into its suspension on a bump and then snap back too fast, creating an uncontrolled bouncing effect.
Over-Damped Compression + Slow Rebound: Conversely, if compression is too stiff and rebound is too slow, the bike will feel harsh and unresponsive, compressing too little on bumps and then taking too long to return to its normal position.
Tuning Both Together:
When tuning your suspension, it’s crucial to adjust both compression and rebound in tandem. For example, if you stiffen the compression damping, you may also need to increase rebound damping to balance the suspension's return after compression.
Testing Compression and Rebound Settings
After making adjustments, it’s important to test the settings by riding your motorcycle in different conditions to feel how the suspension responds.
How to Test Compression:
Find a Bumpy Road or Rough Terrain: Ride over rough patches or speed bumps and note how the suspension reacts.
Look for Harshness or Bottoming Out: If you feel every bump harshly or bottom out too often, adjust compression settings accordingly.
How to Test Rebound:
Ride Through a Series of Bumps: Find a road with multiple bumps or a winding road to see how the suspension recovers between impacts.
Look for Bouncing or Sluggishness: If the bike feels bouncy or unstable after hitting bumps, reduce rebound damping. If it feels sluggish or unresponsive, increase rebound damping.
Signs of Imbalanced Damping:
Bouncing after bumps: This indicates too fast rebound or too soft compression.
Harshness and poor comfort: This suggests too stiff compression or too slow rebound.
Consider Your Riding Style and Terrain
The ideal compression and rebound settings depend heavily on your riding style, terrain, and preferences.
Sport Riding or Racing: Stiffer compression and faster rebound settings will provide sharper, more responsive handling for aggressive cornering and high speeds.
Touring or Commuting: Softer compression and slower rebound settings prioritize comfort, allowing the suspension to absorb more of the road’s imperfections for a smoother ride.
Off-Road Riding: Softer compression and slower rebound settings work best for off-road terrain, as they allow the suspension to absorb large bumps and rocks while preventing excessive bouncing.
Compression and rebound damping are fundamental aspects of suspension tuning that greatly affect how your motorcycle handles, reacts to road imperfections, and performs overall. Mastering these settings allows you to tailor your bike’s suspension to suit your weight, riding style, and terrain, leading to a safer, more enjoyable ride. Start with small adjustments, test thoroughly, and fine-tune until you find the perfect balance for your riding needs.
How to Set Compression and Rebound for Good Motorcycle Suspension
Dialing in your motorcycle's suspension can greatly improve both your ride quality and performance. Compression and rebound adjustments allow you to fine-tune how your bike responds to bumps and how quickly it returns to its normal position after a compression. Here’s a step-by-step guide to help you set these suspension settings properly.
Learn how to set compression and rebound adjustments on your motorcycle suspension for optimal ride quality and handling. Master these key settings for a smoother and more controlled ride.
Understand the Basics of Suspension
Your motorcycle's suspension system primarily serves two key functions: to absorb the impact of road imperfections and to maintain tire contact with the road for better control. Adjusting compression and rebound settings is all about customizing how your bike behaves in different conditions.
Compression: Controls how fast your suspension compresses when you hit a bump.
Rebound: Manages how quickly the suspension returns to its normal position after being compressed.
Prepare for Suspension Adjustments
Before you start making adjustments, ensure the bike’s sag (how much the suspension compresses under the rider's weight) is set correctly. Sag directly affects how your bike handles and should be set first.
Tools Needed: Screwdrivers, spanners, and a tape measure (for measuring sag).
Get the Right Environment: Adjust your suspension in a safe, controlled environment, preferably on smooth, level ground.
Setting Compression
Compression damping affects how your suspension reacts to bumps or dips in the road. If it's too stiff, you'll feel every bump harshly; it’s too soft, and your bike will bottom out on rough roads.
Step 1: Identify the compression adjuster. Typically, it's located on the fork or rear shock.
Step 2: Start by turning the adjuster fully clockwise (the stiffest setting).
Step 3: From this position, turn the adjuster counterclockwise, one click at a time, until the suspension feels responsive yet not overly stiff. A good starting point is usually 10-15 clicks out from the stiffest setting.
Test ride after every adjustment to feel how the bike handles small and large bumps.
Setting Rebound
Rebound controls how quickly the suspension returns to its neutral position. Too fast, and the bike feels bouncy; too slow, and it might feel sluggish or unresponsive.
Step 1: Locate the rebound adjuster. Like compression, it's usually found on your fork or shock.
Step 2: Turn it fully clockwise (slowest rebound).
Step 3: Turn the adjuster counterclockwise a few clicks at a time (a good starting point is 10-15 clicks) to find a balance between responsiveness and stability.
When testing, ensure the bike doesn't "bounce" excessively after hitting bumps and that it returns smoothly to its position.
Testing and Fine-Tuning
After adjusting both compression and rebound, take your bike for a test ride. Here’s what to look for:
Under-Damping Symptoms:
Too much bouncing or oscillation after hitting a bump.
Rear-end "kicks" or "pogo" effect.
Over-Damping Symptoms:
Harsh ride, feeling every road imperfection.
Suspension feels slow to react or too rigid.
Make small adjustments, typically one or two clicks at a time, and re-test until you achieve the balance between comfort and control.
Consider Riding Conditions
Your ideal suspension setup may vary depending on where and how you ride. Off-road trails, city streets, and racetracks all demand different suspension behavior.
Off-Road Riding: Softer compression for absorbing bigger bumps, slower rebound to avoid bouncing.
Street or Racing: Stiffer compression for sharp handling, faster rebound for quicker cornering response.
Setting your motorcycle’s suspension isn’t a one-size-fits-all process. It takes time, testing, and small tweaks to find the perfect balance between compression and rebound. Once dialed in, your ride will be smoother, safer, and more enjoyable.
How to Set Compression and Rebound for Different Types of Motorcycles
Adjusting your motorcycle's suspension is key to enhancing ride quality, safety, and handling. While the basic principles of compression and rebound settings apply universally, different types of motorcycles have unique suspension needs. Here’s a breakdown of how to set suspension for various bikes—whether you ride a sportbike, cruiser, dirt bike, or touring bike.
Learn how to set compression and rebound for different types of motorcycles, including sportbikes, cruisers, dirt bikes, and touring bikes. Get tailored suspension settings for better performance and comfort.
Sportbikes: Precision Handling and Performance
Sportbikes are built for high speeds and tight cornering. Their suspension systems are designed for aggressive riding, requiring precise adjustments to handle the demands of the track or twisty roads.
Compression: Sportbikes often have stiffer suspensions to maintain stability and reduce fork dives under hard braking. Start by setting your compression towards the stiffer end of the spectrum—around 10 clicks out from the firmest setting. Adjust softer if the ride feels too harsh on regular roads.
Rebound: Quick recovery from bumps is crucial for maintaining control at high speeds. Set rebound so that the bike returns to its normal position quickly but without "bouncing." Typically, 8-12 clicks out from full slow is a good starting point.
Consider Track vs. Street: If you're on track, stiffer settings for both compression and rebound will offer the responsiveness you need for hard cornering and quick maneuvers. For street riding, soften both settings slightly for better comfort over rougher surfaces.
Cruisers: Comfort and Stability
Cruisers prioritize a smooth, comfortable ride over sharp handling. The suspension settings here should absorb bumps and provide long-distance comfort rather than track-like responsiveness.
Compression: Softer settings are key for a smooth ride. Start by turning your compression clicker 15-20 clicks out from the firmest setting. This allows the suspension to absorb more road imperfections, providing a plush ride.
Rebound: A slower rebound setting ensures the bike doesn’t feel bouncy, but you don’t want it too slow, or the suspension won’t recover quickly enough, causing a “dead” feeling. Start around 15-18 clicks out from full slow and adjust based on how smooth the bike feels over bumps.
Comfort Tuning: Since cruisers are heavier and often ride on city streets or highways, the goal is to minimize the jarring effect of bumps. If the ride is too stiff, soften both compression and rebound further.
Dirt Bikes: Off-Road Absorption and Control
Dirt bikes are built to handle rough, uneven terrain, so their suspension needs to absorb larger impacts while keeping the rider in control on loose surfaces.
Compression: Dirt bikes need softer compression settings to soak up large bumps, rocks, and jumps. Start by turning your compression adjuster about 18-20 clicks out from full stiff. This will provide the travel you need for rough terrain without bottoming out.
Rebound: A slower rebound is often best to prevent the bike from bouncing or kicking after a jump. However, it shouldn’t be so slow that the suspension can’t reset before the next obstacle. Start around 12-16 clicks out from full slow and fine-tune depending on how the bike reacts over multiple bumps or jumps.
Adjust for Terrain: If you're riding in sand or loose dirt, slightly softer compression and rebound can help the bike float over obstacles. For rocky or harder surfaces, slightly firmer settings may be needed for better control.
Touring Bikes: Smooth, Long-Distance Comfort
Touring bikes are designed for long-distance travel, and their suspension needs to balance comfort with stability, especially when carrying luggage or a passenger.
Compression: Touring bikes often have a heavier load, so you’ll want a softer compression setting to absorb road imperfections and keep the ride comfortable. Start at 15-20 clicks out from full stiff. If you’re carrying a passenger or extra gear, you may need to firm up the compression slightly.
Rebound: Rebound should be slower than on sport bikes but quicker than on dirt bikes. A smooth recovery after bumps is key to maintaining comfort over long distances. Start around 15 clicks out from full slow and adjust to make sure the suspension recovers gently without feeling sluggish.
Load Considerations: When riding fully loaded, increase both compression and rebound to handle the added weight. Make sure the bike remains stable, especially when cornering or riding on highways.
Adventure Bikes: Versatility and Adaptability
Adventure bikes are hybrid machines that often switch between on-road and off-road riding. Their suspension needs to be versatile to handle everything from highways to dirt trails.
Compression: Because you’ll face varied terrain, compression settings should be balanced. For on-road riding, stiffer settings around 12-15 clicks out from full stiff will offer better control. For off-road, soften the compression (18-20 clicks out) to absorb bumps and maintain comfort.
Rebound: You’ll want a moderate rebound setting that allows quick recovery on paved roads while preventing bouncing on rough trails. Start with 10-14 clicks out from full slow and adjust based on terrain. On-road riding may require quicker rebound, while off-road may need slightly slower recovery.
Terrain Flexibility: For adventure riders, adjust suspension depending on the type of riding you do most. A softer setup is best for off-road, while stiffer settings will offer more control on highways and twisty roads.
Adjusting compression and rebound for different types of motorcycles requires a tailored approach. Understanding the unique needs of your bike—whether it’s a sportbike, cruiser, dirt bike, or touring machine—ensures you get the most out of your suspension. Start with the recommended settings, test, and fine-tune to your riding style and environment for the best performance and comfort.
The Role of Springs and Spring Rate in Tuning Your Motorcycle Suspension
When tuning your motorcycle’s suspension, one of the most fundamental aspects is the role of springs and the spring rate. These elements are crucial for maintaining proper suspension balance, absorbing road impacts, and ensuring optimal handling. Understanding how springs and spring rates affect your bike’s performance will allow you to fine-tune your setup for your riding style and conditions.
Learn about the role of springs and spring rate in motorcycle suspension tuning. Understand how adjusting these components improves handling, comfort, and ride stability.
What Are Suspension Springs?
Springs are the core component of your motorcycle's suspension system, supporting the weight of the bike and rider. The springs compress and expand to absorb bumps, keeping the tires in contact with the road for better control and comfort.
Key Functions of Suspension Springs:
• Support the weight of the rider and the bike.
• Absorb energy from road impacts.
• Maintain tire contact for better traction and control.
Springs work in conjunction with dampers (which control the rate of compression and rebound), but without the right spring rate, even the best damper settings won’t deliver optimal performance.
What is Spring Rate?
Spring rate refers to the stiffness of the spring—how much force is required to compress the spring by a certain amount. It’s typically measured in kilograms per millimeter (kg/mm) or pounds per inch (lb/in). A higher spring rate means the spring is stiffer and resists compression more, while a lower spring rate means the spring is softer and compresses more easily.
Why Spring Rate Matters:
Too Soft of a Spring Rate: The bike will sag too much under the rider’s weight, bottom out on bumps, and feel unstable during aggressive maneuvers.
Too Stiff of a Spring Rate: The bike will feel harsh over bumps, and the suspension won’t absorb road imperfections effectively, leading to a rough and uncomfortable ride.
Finding the correct spring rate ensures that your suspension responds properly to the road surface and rider input, keeping the bike balanced and performing well in various conditions.
How to Choose the Right Spring Rate
Choosing the right spring rate depends on factors like the rider's weight, riding style, and the type of terrain or conditions you’ll encounter.
Factors to Consider:
Rider Weight: Heavier riders will require a stiffer spring rate to prevent excessive sag, while lighter riders need softer springs to ensure the suspension isn't too rigid.
Riding Style: Aggressive riders, such as those on sportbikes or dirt bikes, may prefer stiffer springs for sharper handling, while touring or cruiser riders might prioritize comfort with softer springs.
Terrain and Conditions: Off-road riders benefit from softer springs that absorb bigger impacts, while on-road riders typically prefer stiffer springs for better cornering and stability.
How to Check if Your Spring Rate is Correct:
Sag Measurement: Setting the sag (how much the suspension compresses under the bike and rider’s weight) is key to determining if your spring rate is appropriate. Ideally, the sag should be about 25-30% of your total suspension travel.
Bottoming Out: If your suspension bottoms out (compresses fully and hits its limit) frequently during normal riding, your springs are too soft. If it never bottoms out, even in hard riding, they may be too stiff.
Handling Feel: If your bike feels sluggish and unresponsive during cornering, a stiffer spring rate may help. On the other hand, if it feels too harsh and unsettled over bumps, a softer spring rate could improve comfort and control.
How Springs Affect Compression and Rebound Settings
Your spring rate directly influences how you should set your compression and rebound damping. A stiffer spring will require more damping to control the energy stored in the spring, while a softer spring needs less damping.
Compression Damping: With stiffer springs, you’ll need more compression damping to prevent the suspension from compressing too quickly on bumps. Softer springs require less compression damping because the spring itself absorbs more of the impact.
Rebound Damping: Stiffer springs also need more rebound damping to control how quickly the suspension returns to its normal position after a bump. Softer springs will need less rebound damping as they store less energy.
Progressive vs. Linear Springs
When choosing or upgrading your springs, you may come across two types: progressive and linear springs.
Linear Springs: These have a consistent spring rate throughout their compression. This means the force required to compress the spring is the same throughout its travel. Linear springs provide predictable handling, making them ideal for racing and performance-oriented riding.
Progressive Springs: These have a variable spring rate, meaning they become stiffer as they compress. Progressive springs are softer initially, providing a more comfortable ride over small bumps, but stiffen up to handle bigger impacts. They’re ideal for riders who need versatility—such as adventure or touring riders.
Tuning Your Suspension with Springs
Once you’ve determined the correct spring rate, fine-tuning your suspension involves adjusting sag, compression, and rebound to match your riding style and terrain.
Steps for Tuning:
Set Your Sag: Ensure that your bike’s sag is within the proper range for your weight. This is typically about 25-30% of your suspension’s total travel.
Adjust Compression and Rebound: After setting sag, adjust your compression and rebound damping based on your spring rate. Stiffer springs will need more damping, while softer springs need less.
Test Ride and Fine-Tune: Take your bike for a test ride. Evaluate how it handles bumps, corners, and overall comfort. Make small adjustments as needed.
Springs and spring rates play a crucial role in determining how your motorcycle handles, absorbs bumps, and responds to your input. Tuning your suspension with the right spring rate tailored to your weight, riding style, and terrain can make all the difference in your bike’s performance and comfort. With proper tuning, you’ll enjoy better control, smoother rides, and enhanced stability.
Fine-tuning your motorcycle’s compression and rebound settings can make all the difference between a rough, bouncy ride and a smooth, responsive one. By understanding how these adjustments affect your bike's handling and performance, you'll be able to customize your suspension for any road or trail. Take the time to experiment, test different settings, and listen to how your bike reacts to different terrains. With the right setup, you’ll enjoy improved stability, better traction, and a more enjoyable ride overall. Now, it’s time to hit the road and experience the benefits of a well-tuned suspension!